Welcome to Trydo WordPress Theme! We would like to thank you for choosing our theme - Trydo.
It’s built with Elementor page builder. It’s fully responsive and looks well. It is a modern design and high-speed performance WordPress Theme. To use Trydo for Creative Agency, Creative Agency Landing, Personal Portfolio, Personal Portfolio Landing, Minimal Portfolio, Home Particles, Digital Agency, Business, Home Parallax, Startup, Studio Agency, Freelancer, Minimal Portfolio, Parallax, and other needed inner or details pages availability.
Requirements
There are system requirements in order to install and setup Trydo theme and its components properly. Make sure that you are running the latest version of WordPress,PHP version 5.6 or higher and MySQL version 5.6 or higher. We also recommend the following PHP configuration limits. https://wordpress.org/about/requirements/
After purchasing Trydo theme on themeforest.net with your Envato account, go to your Download page. You can choose to download Trydo theme only (Installable WordPress Theme) or the entire Trydo theme package which contains the following files:
The contents of the theme package downloaded from ThemeForest:
trydo.zip - An Installable WordPress Theme zip file. this file you need to upload to WordPress.
trydo-child.zip - This file contains the basic child theme that you can use with our theme. Just installing it won’t hurt and in case you decide to make some changes/extend the source code of the theme, it will be very helpful because it helps not to lose your custom changes after updating the parent theme. More on child themes
Plugins - This folder contains plugins required to work with our theme.
Demo Data - This folder contains the demo content file which will help you to import the demo manually.
Licensing - This folder contains the terms and conditions of the license.
Documentation - This folder contains what you are reading now :)
WordPress Installation
Please follow the instructions in the video to see how you can install WordPress on your hosting:
Important! if you download the All Files archive from ThemeForest and try to upload it to your WordPress, you will receive this error: Theme is missing the style.css stylesheet. Please make sure you unzipped the main archive and are uploading the correct file to your WordPress.
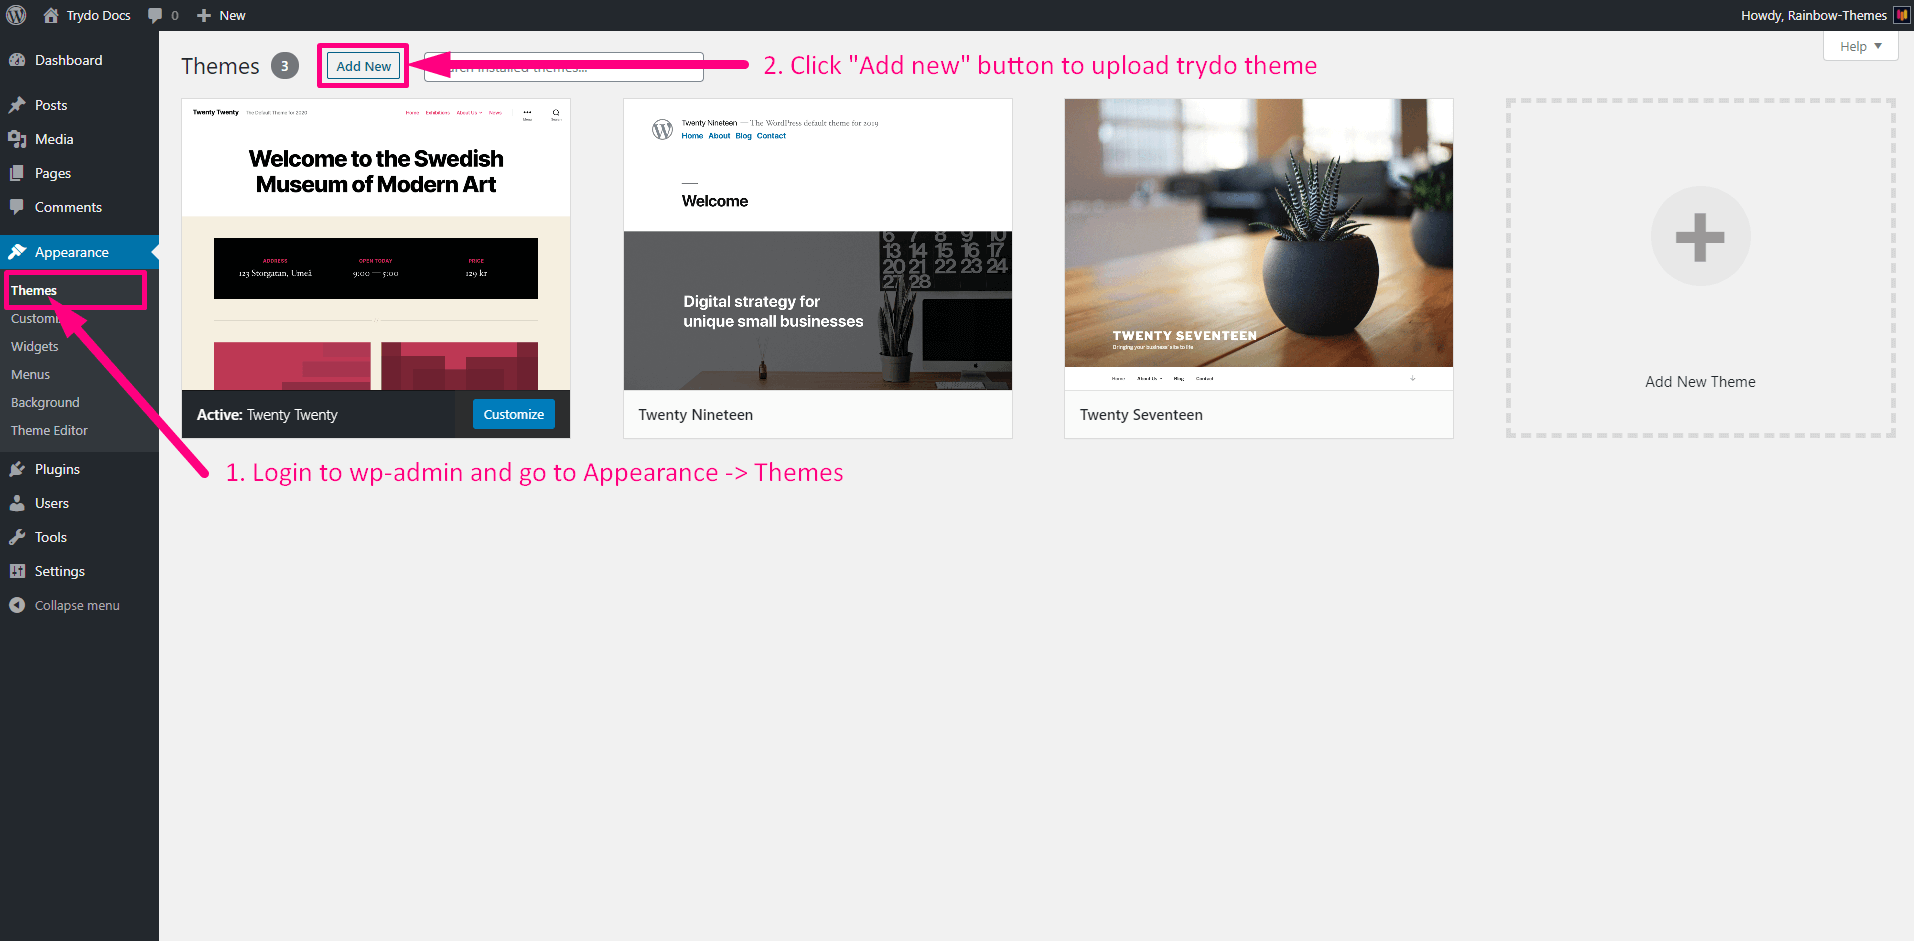
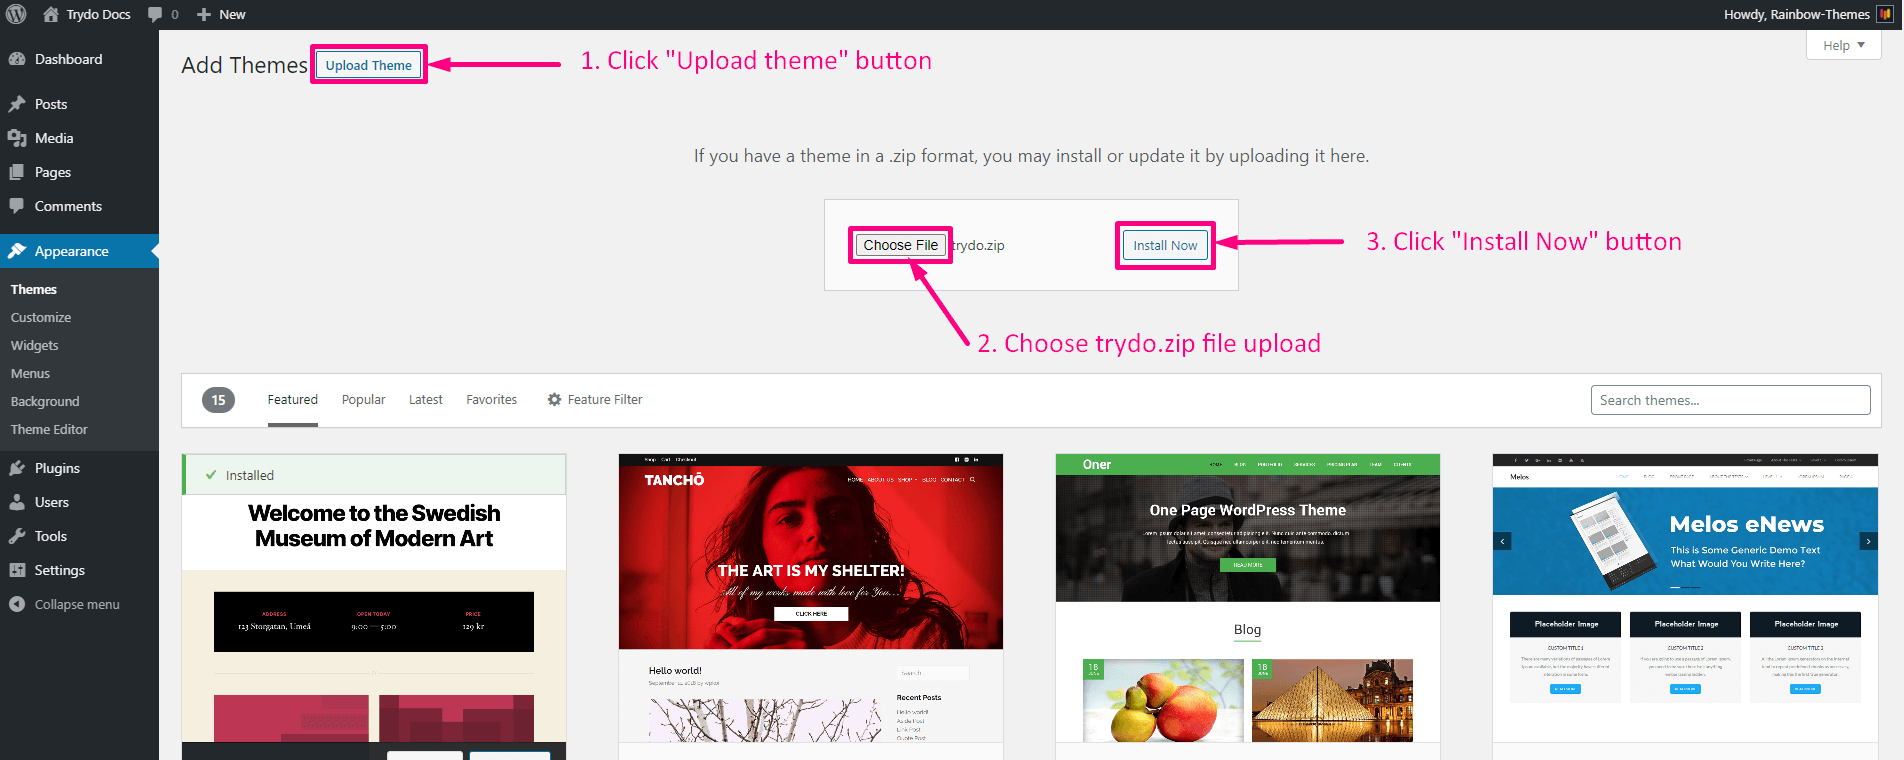
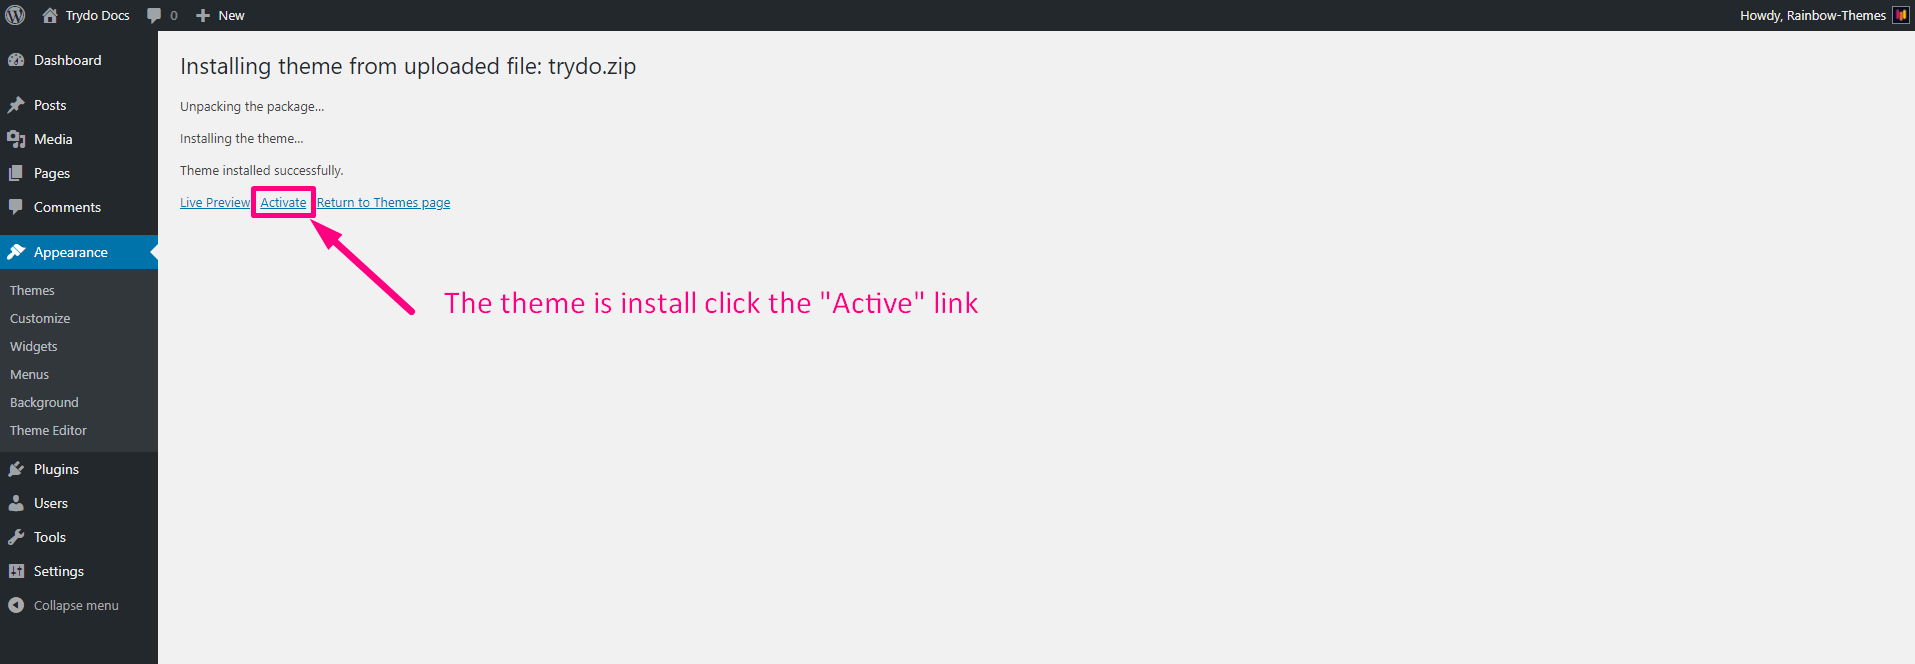
When you are ready to install a theme, you must first upload the theme files and then activate the theme itself. The theme files can be uploaded in two ways:
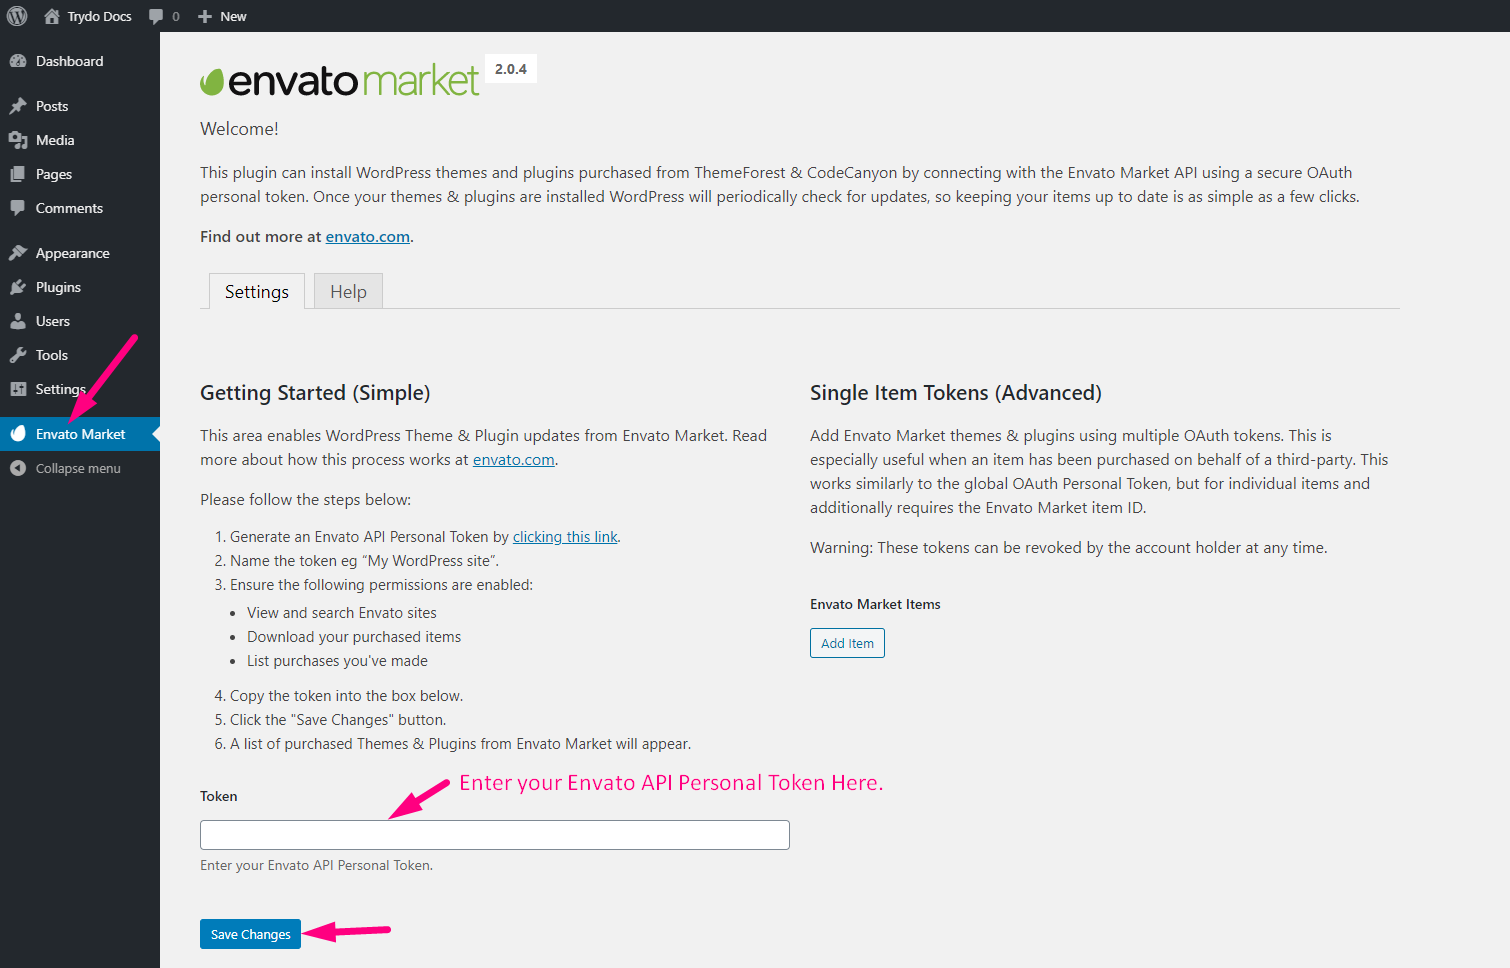
Once installed, you should see an Envato Market menu on the admin sidebar. Click on it.
Enter your Envato API Personal Token in the Token field. If you don’t have an API token you can create one here or click on the generate a personal token link on that page.
Once you have pasted your token in the Token field, click on Save Changes.
Should your token be correct, two extra tabs are now available on your Envato Market page. Click on the Plugins tab.
Enter your Envato API Personal Token.
If an update is available for the Trydo Theme, click on the Update Available link, which should start installing your update.
Trydo theme requires a set of core and additional plugins to function correctly. A plugin is an additional component that offers functionality and features beyond a typical WordPress installation. Without them, most of its functionality is not available. After installing the theme you will be prompted to install the required plugins at the top of your dashboard.
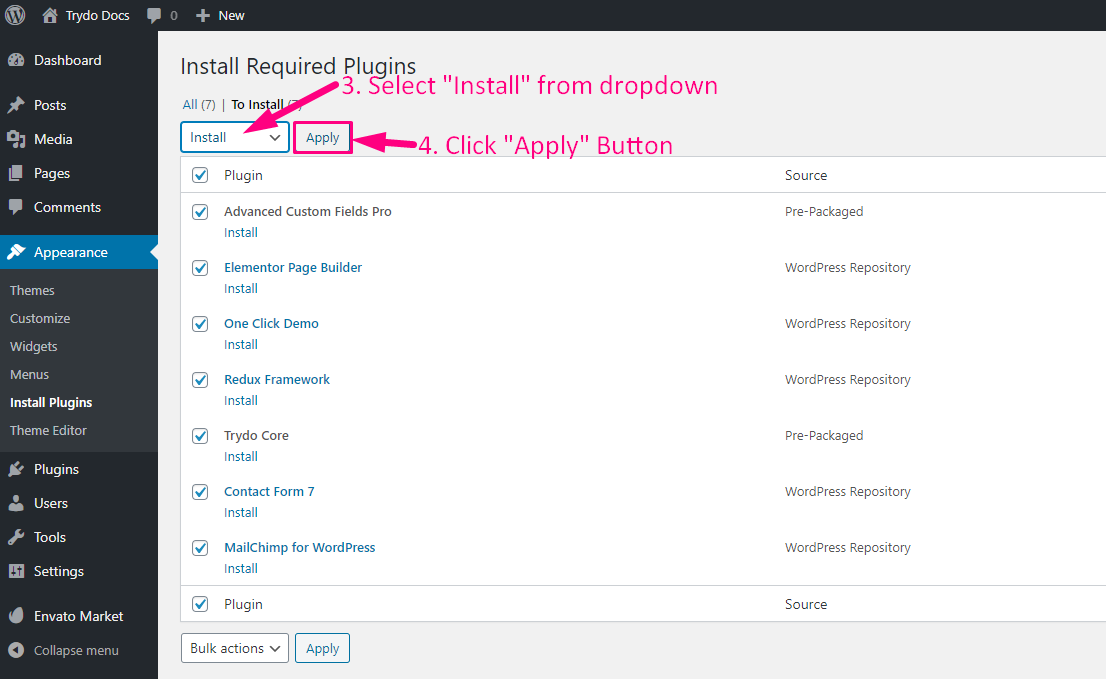
From the dashboard go to Appearance Install Plugins
Toggle all the required plugins and hint “Install”;
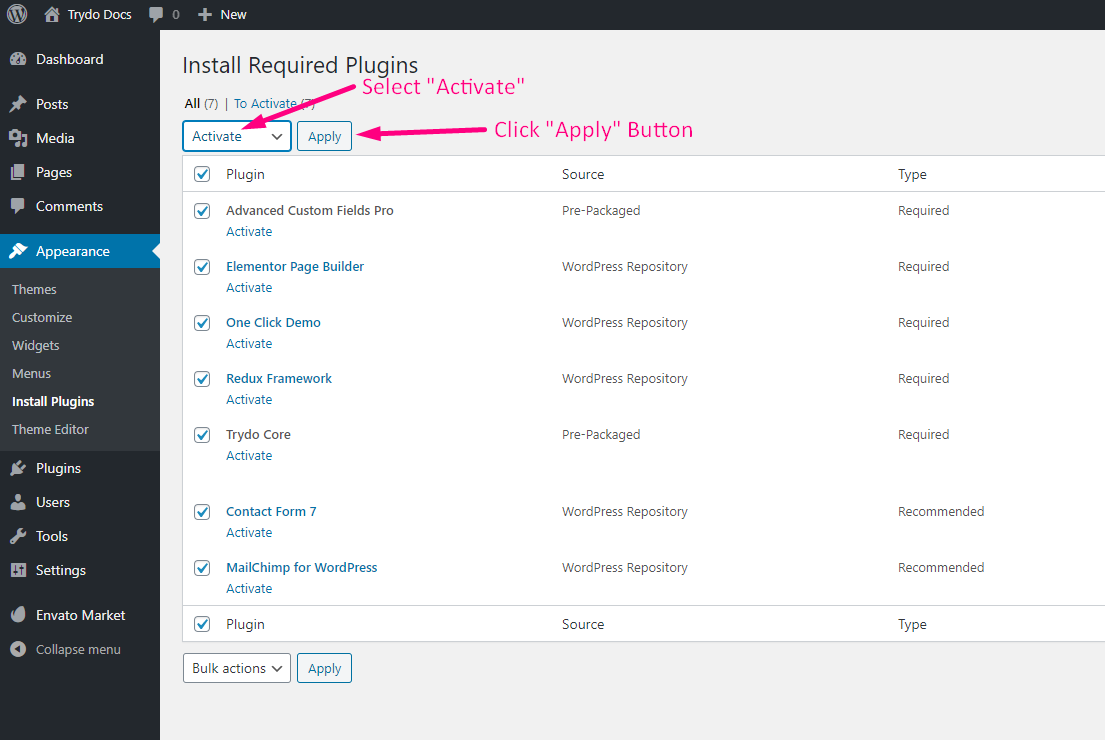
The last step will be activating the plugins.
Click on the begin installing plugins link to install all the required plugins.Select all and installSelect all and Activate
Want to build your site like the demo? You can do it by only one click! Trydo an easy solution for the demo content you saw on our preview website. Please follow the instructions below:
Note: Please remember that when you are done with the demo import, your some existing settings will be replaced by the demo contents Like: Your menu, Customizer. So it is recommended that you should only do this in fresh site.
Ensure, that the One-Click Import plugin is installed and activated;
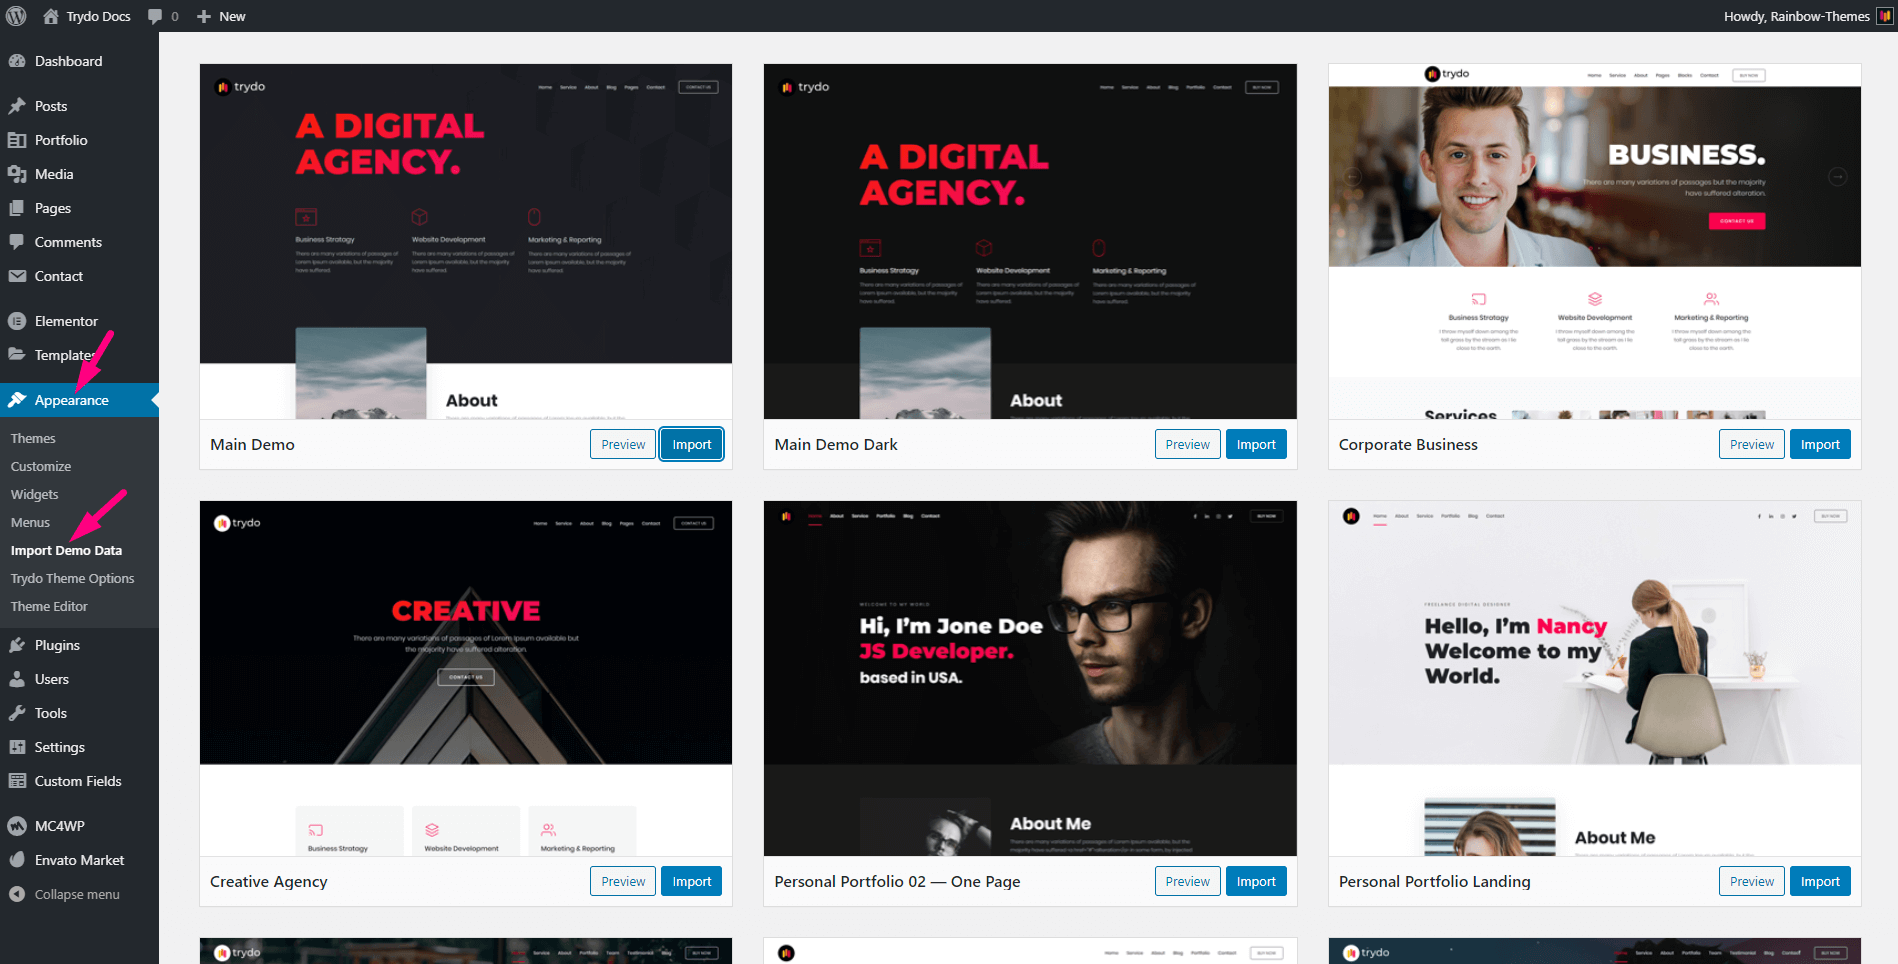
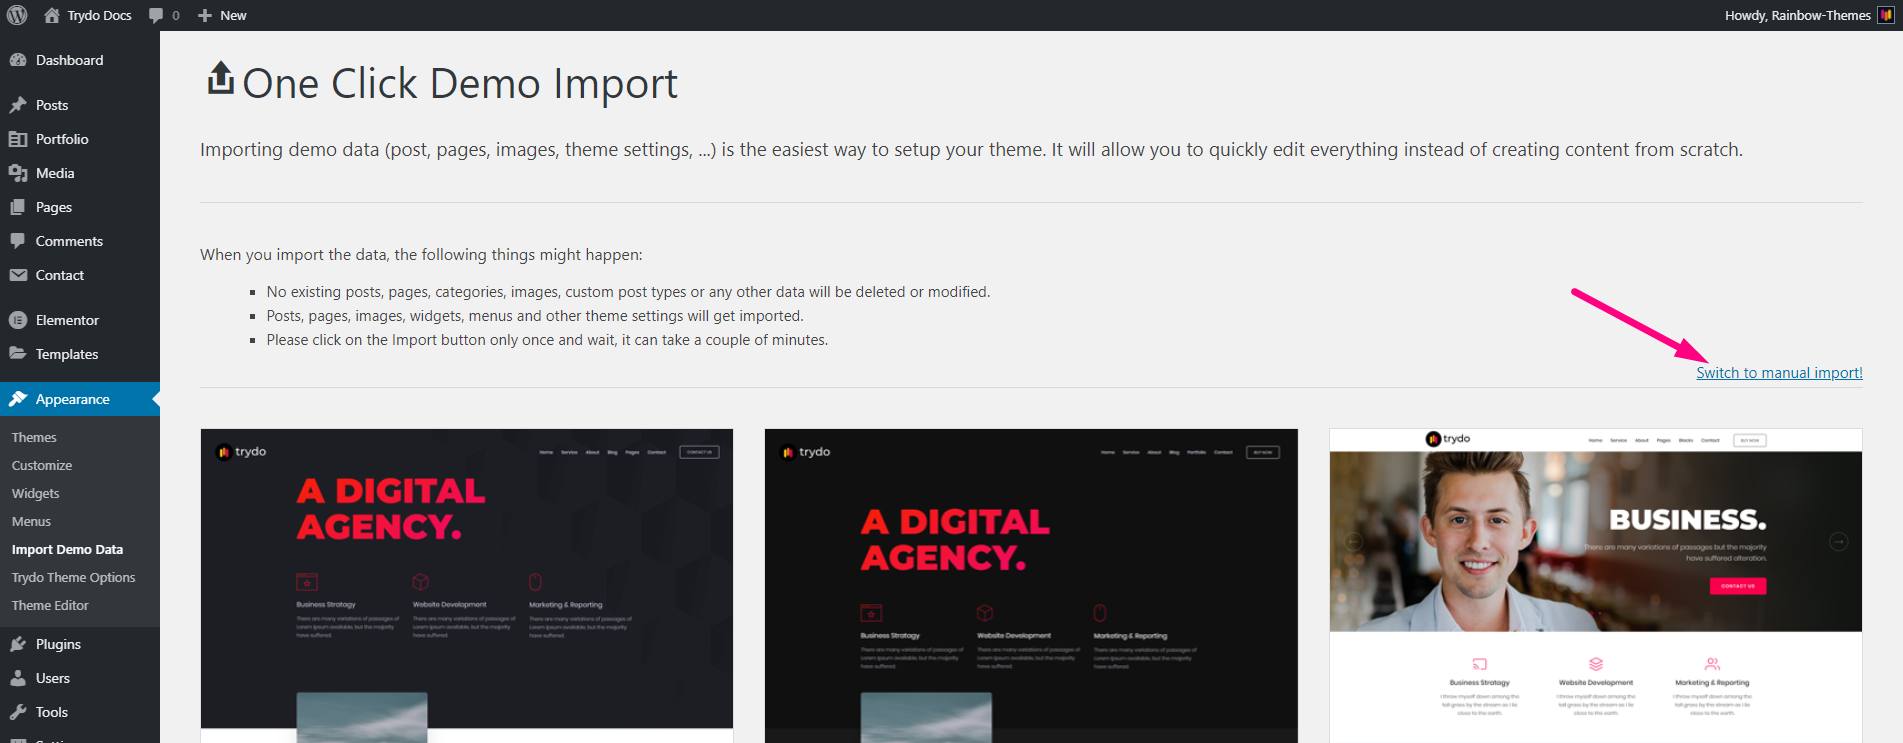
From the dashboard go to Appearance Import Demo Data
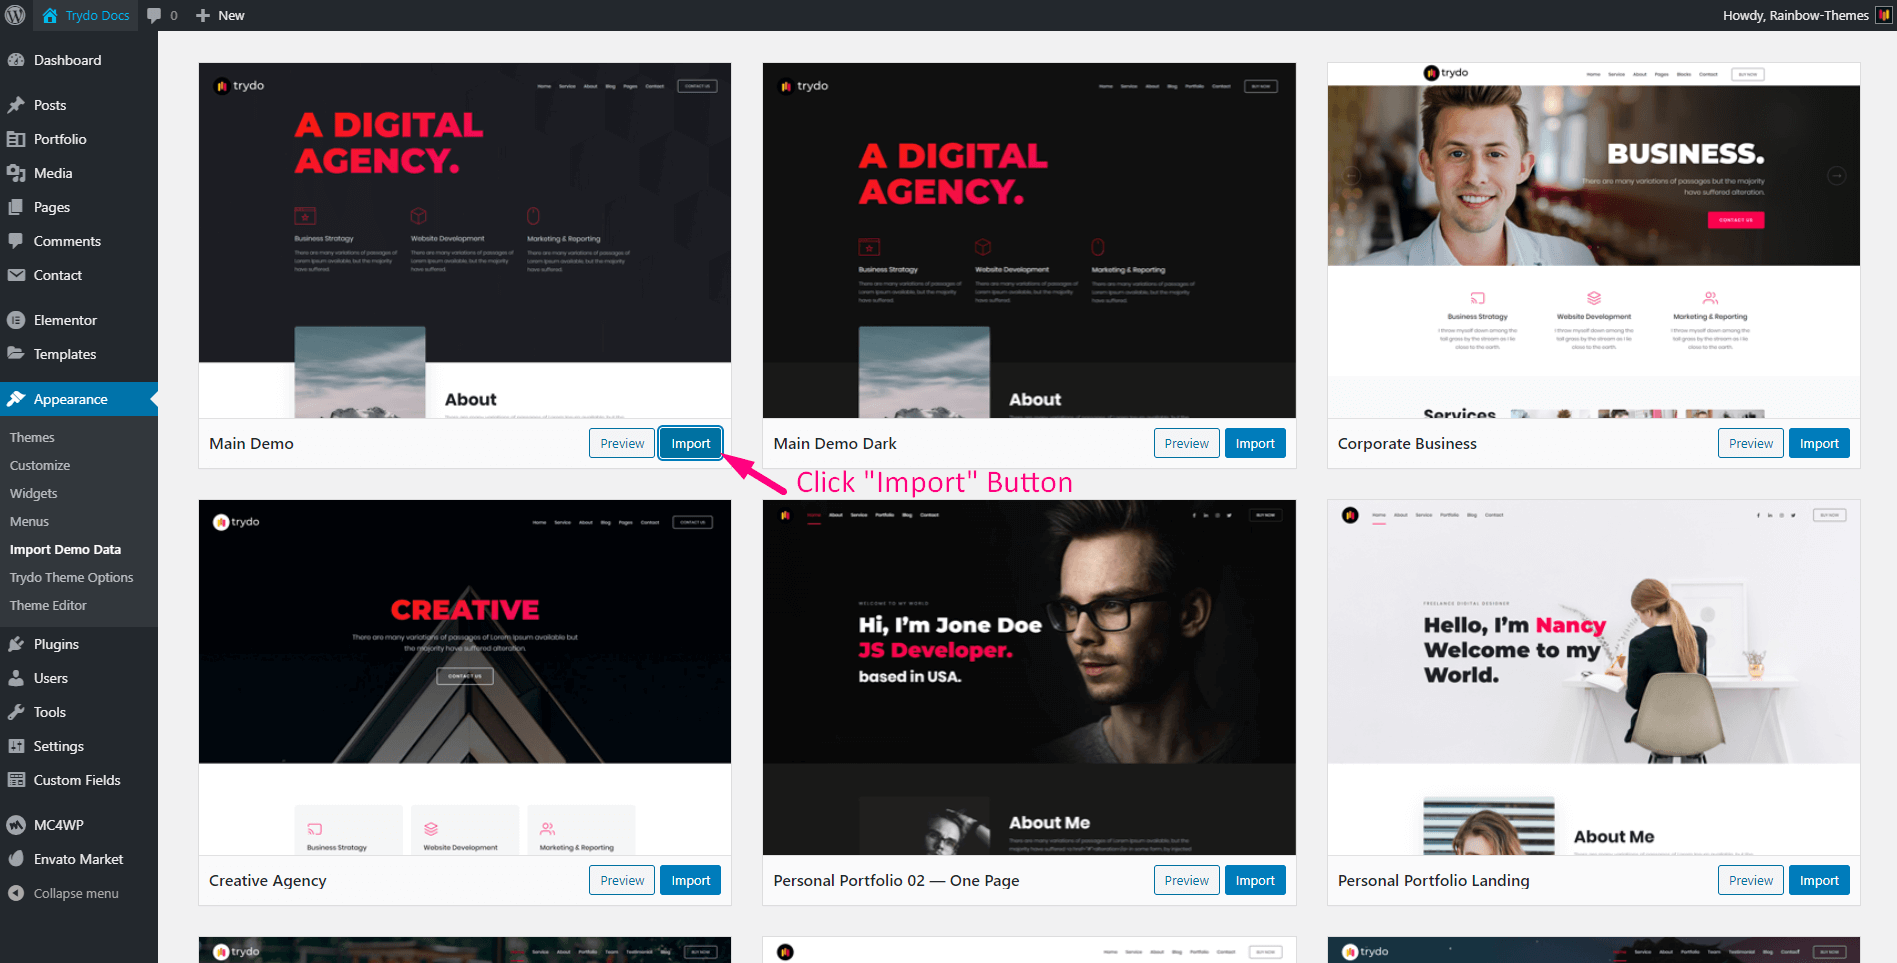
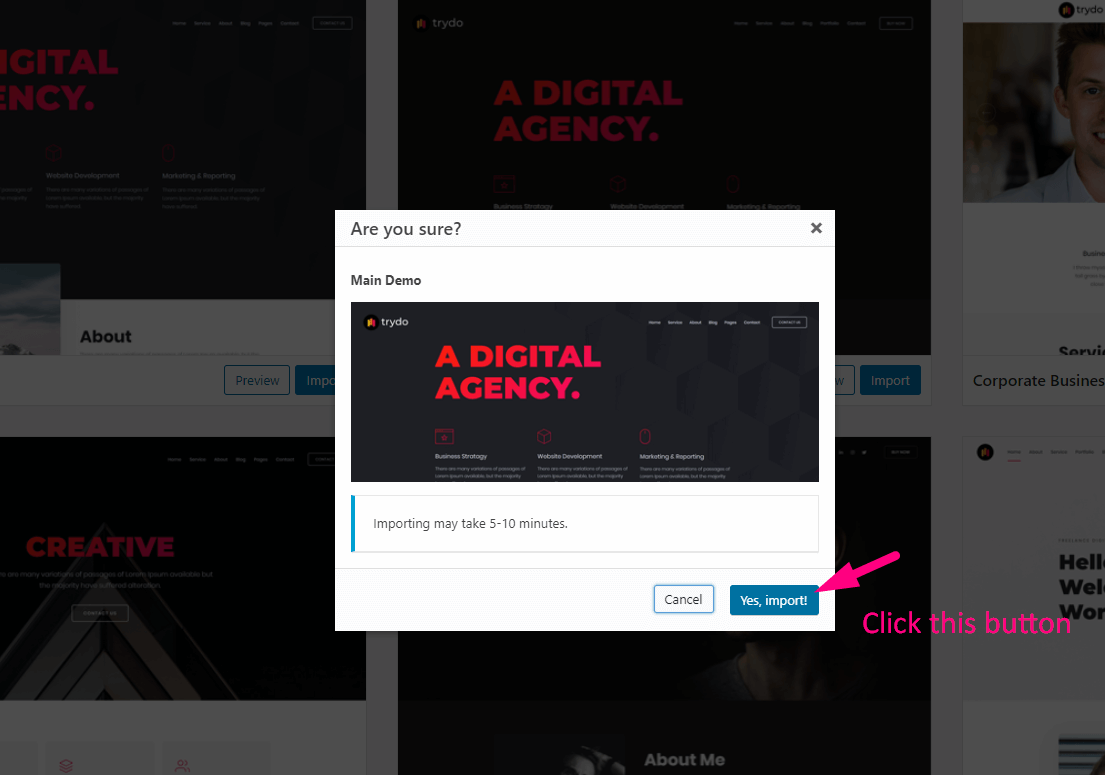
Choose the demo you want to install and click on the “Import” button below;
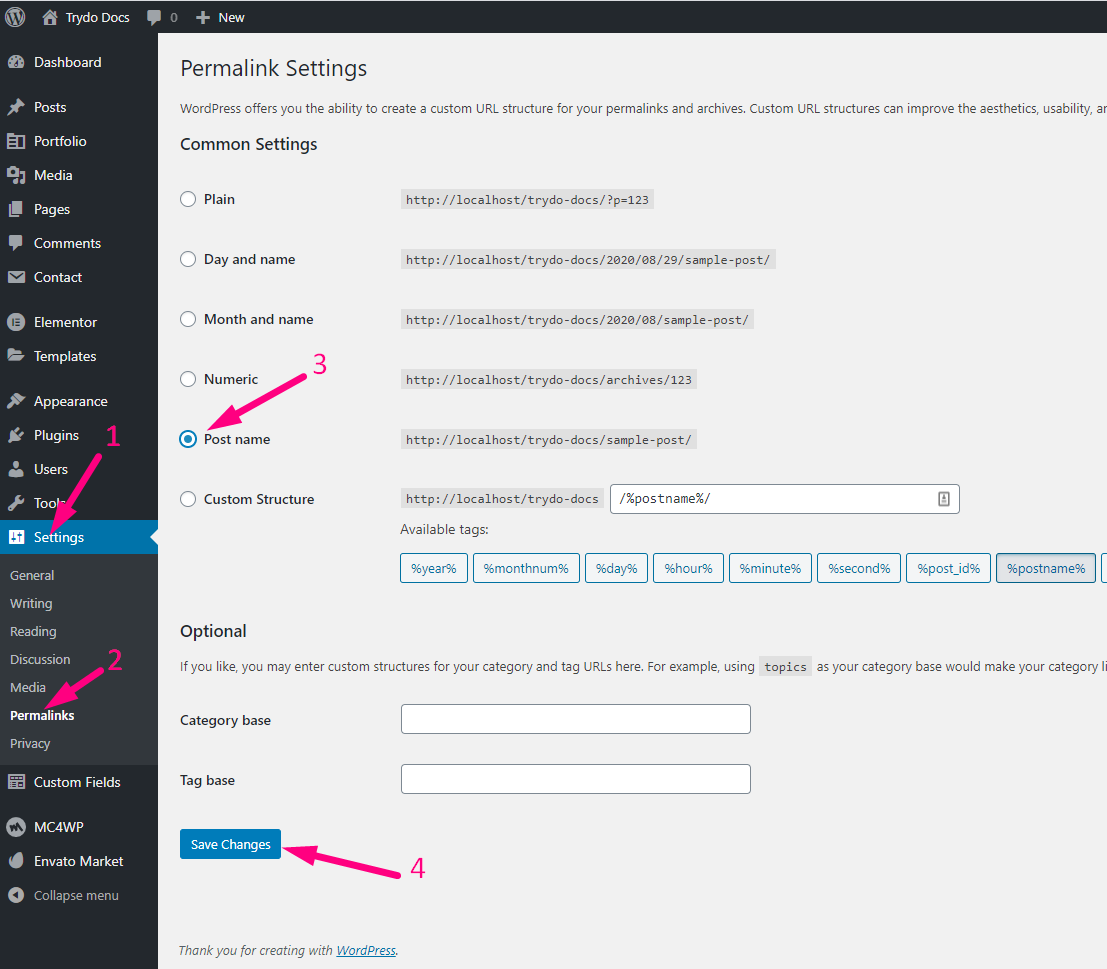
And change the permalink: From the dashboard go to Settings Permalink
go to Appearance -> Import Demo DataClick on the "Import" buttonClick "Yes, Import" ButtonChange permalink
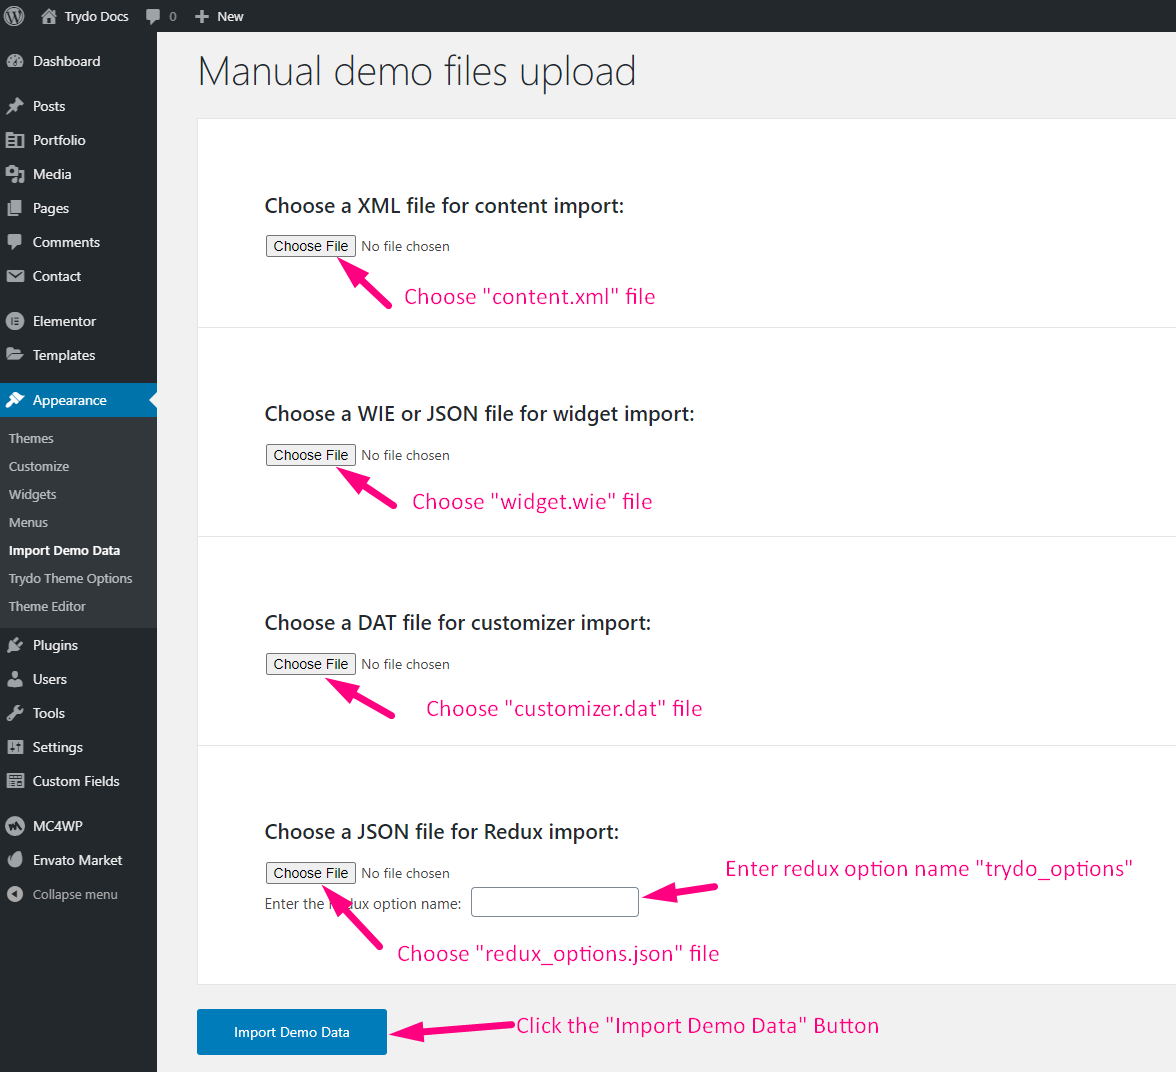
Note: We have added all the above files to the Theme package -> Demo Data folder.
Click "switch to manual import" linkChoose all file and click the "import demo data" button
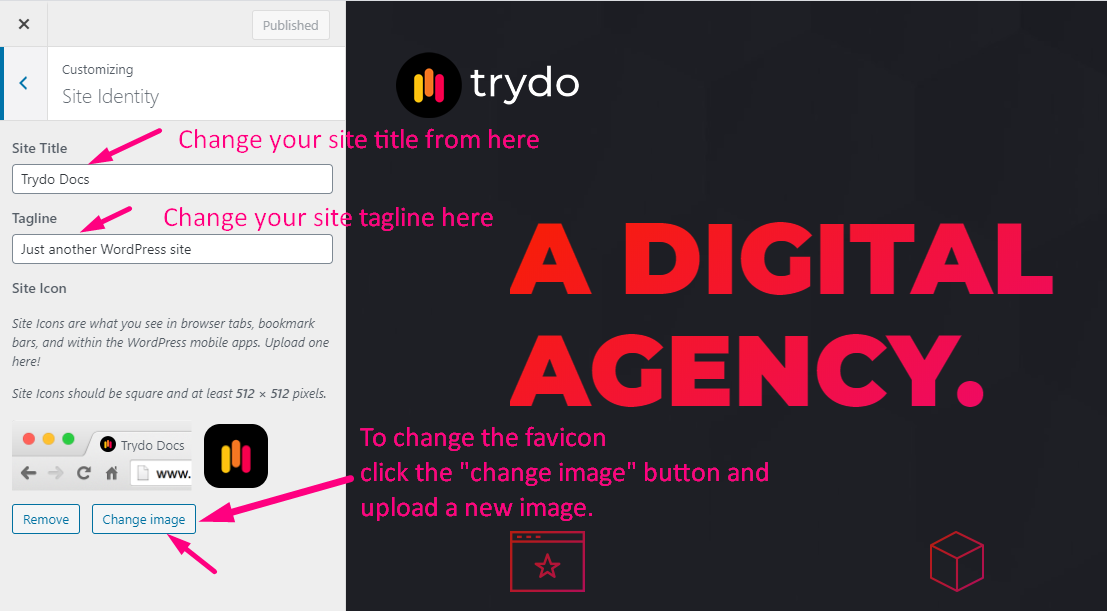
Change Site Title and Favicon
To change your Site title and Favicon login to wp-admin and navigate to Dashboard AppearanceCustomizeSite Identity and follow the following steps:
go to Dashboard > Appearance > Customize > Site Identity and change it.
Change Logo
To change your Site logo, login to wp-admin and go to Dashboard Trydo Theme OptionsGeneral and follow the following steps:
Go to Dashboard > Trydo Theme Options > General > upload your logo from here.
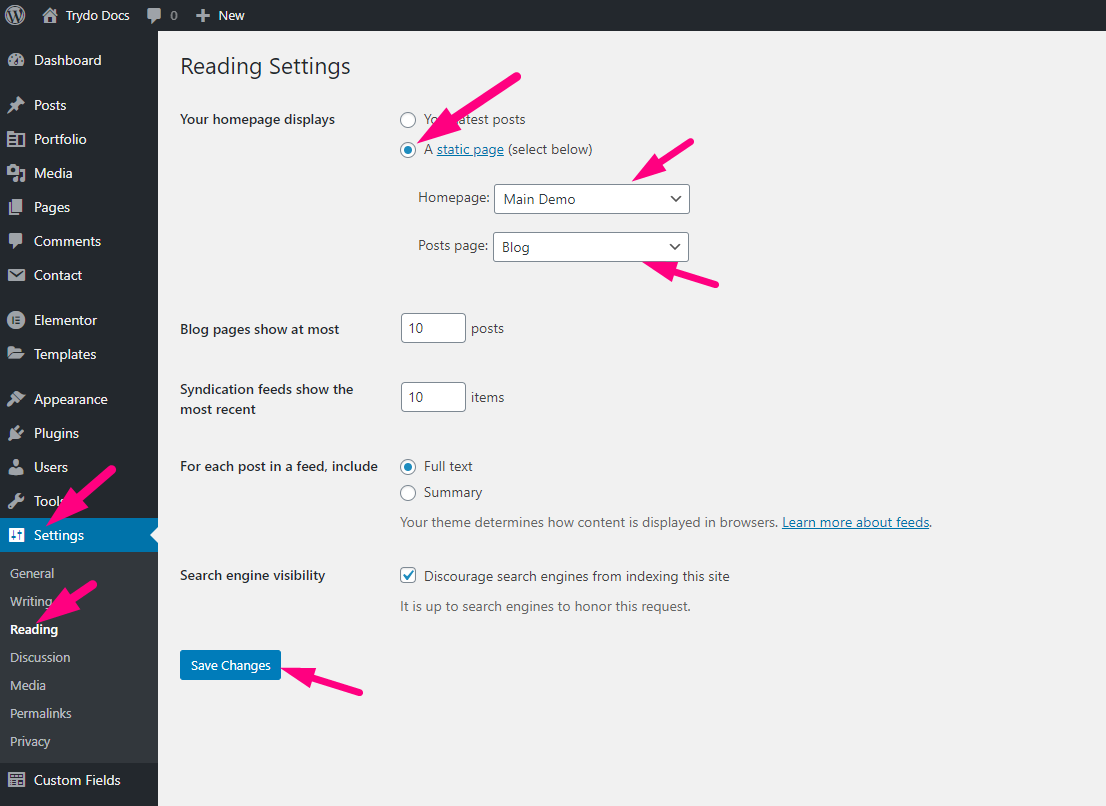
Setting a Home Page and Blog Page
To set the home and blog page, login to wp-admin and go to Dashboard Settings Reading and follow the following steps:
Select your Home and Blog Page.
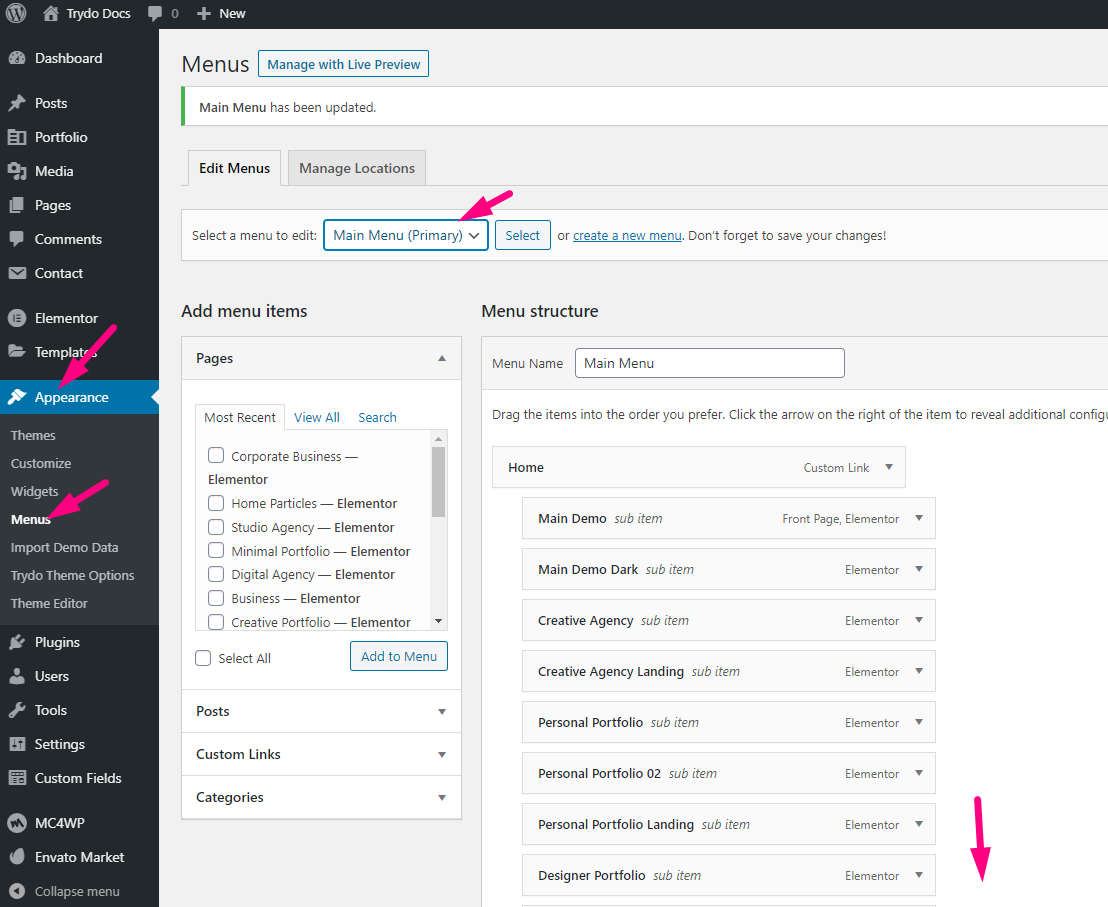
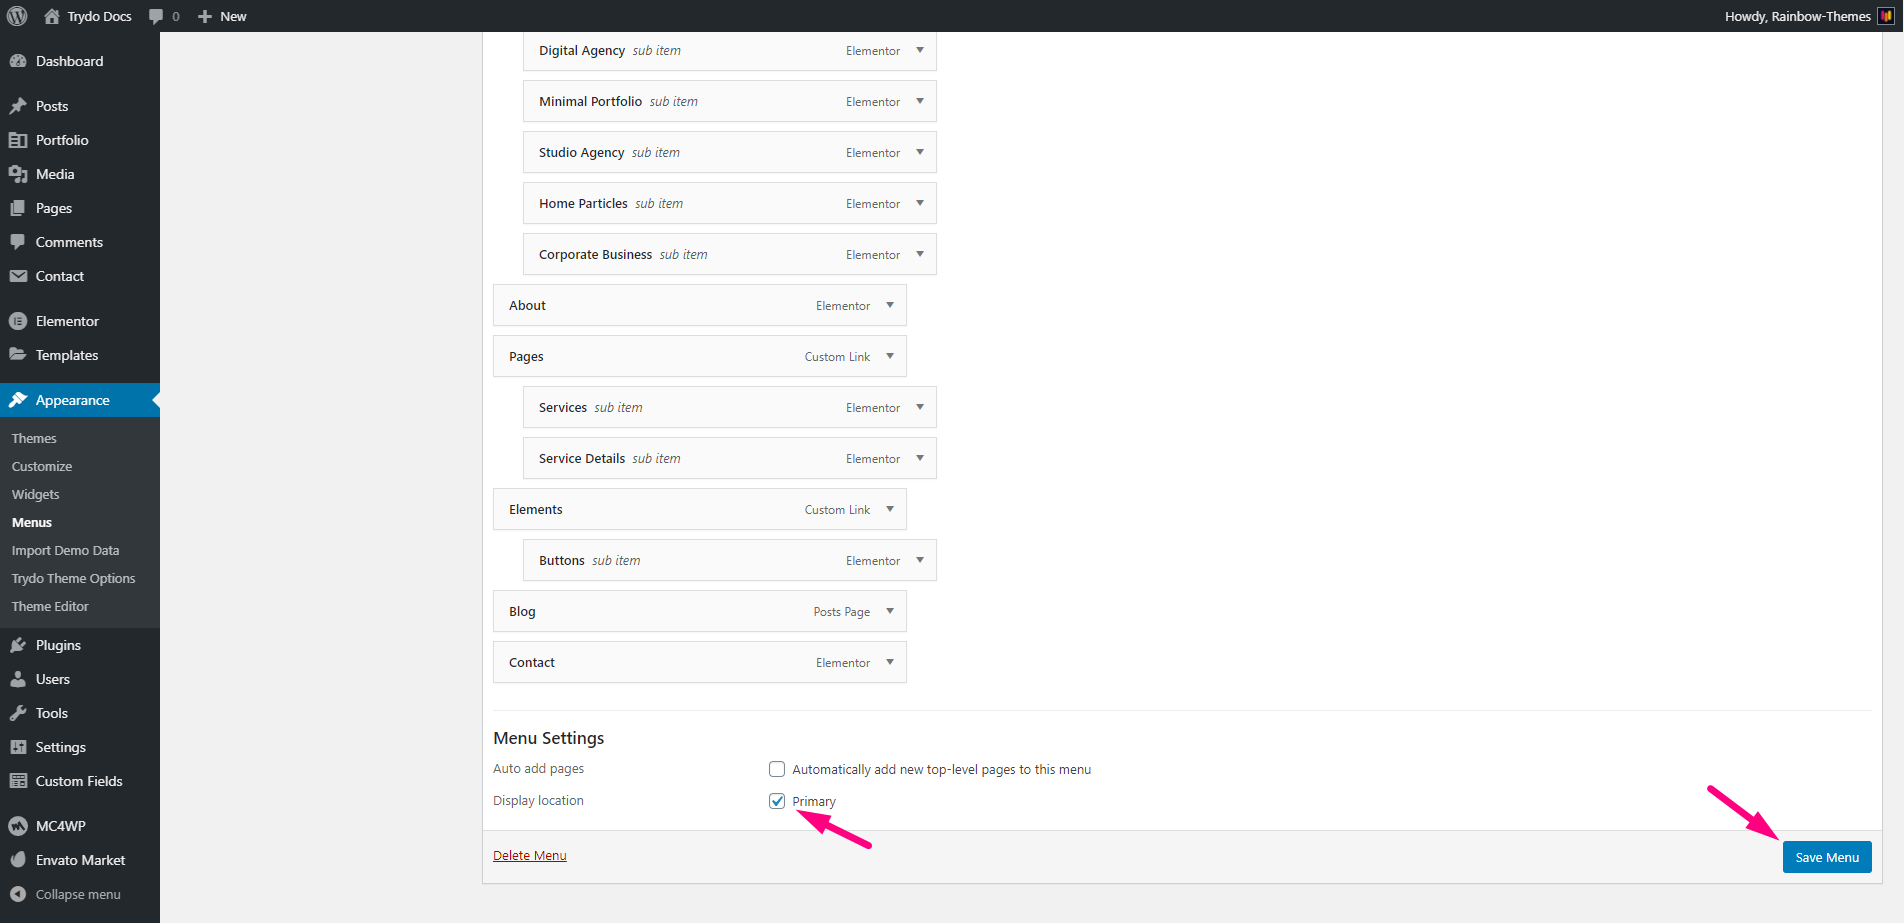
Customize Menu
To set the menus, login to wp-admin and go to Dashboard Appearance Menus and follow the following steps:
Customize the menu 1Customize the menu 2
One page Navigation
Prepare the page
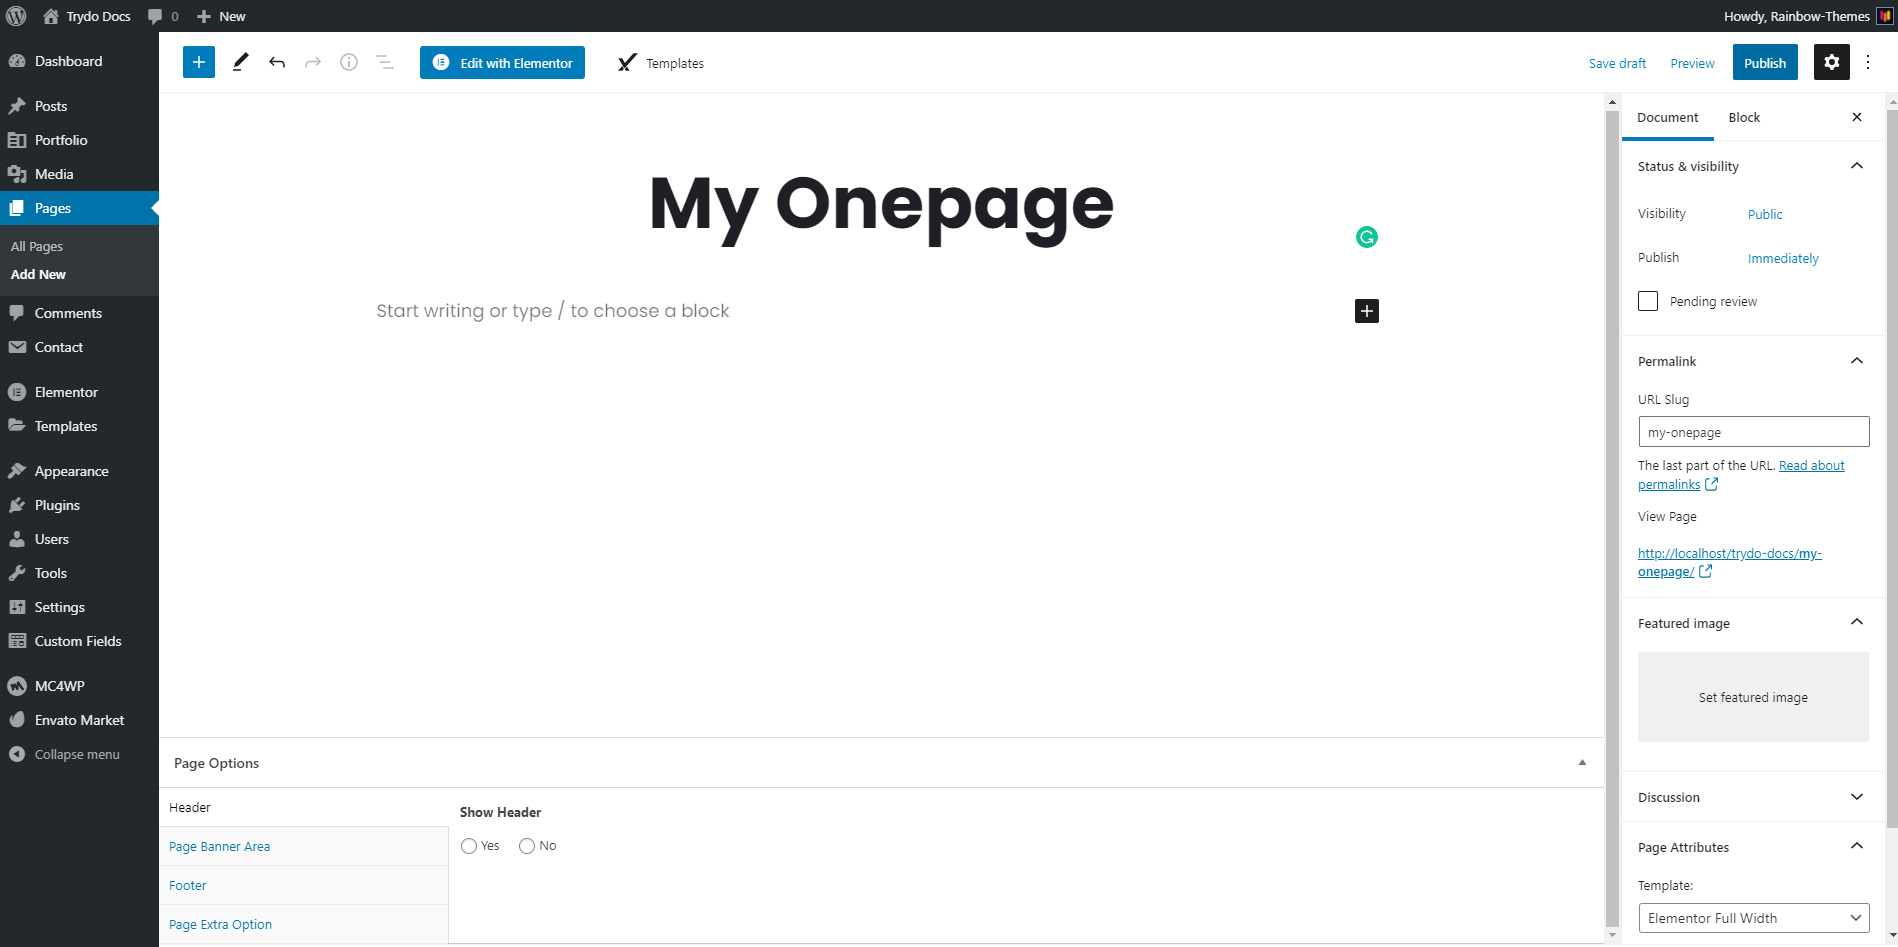
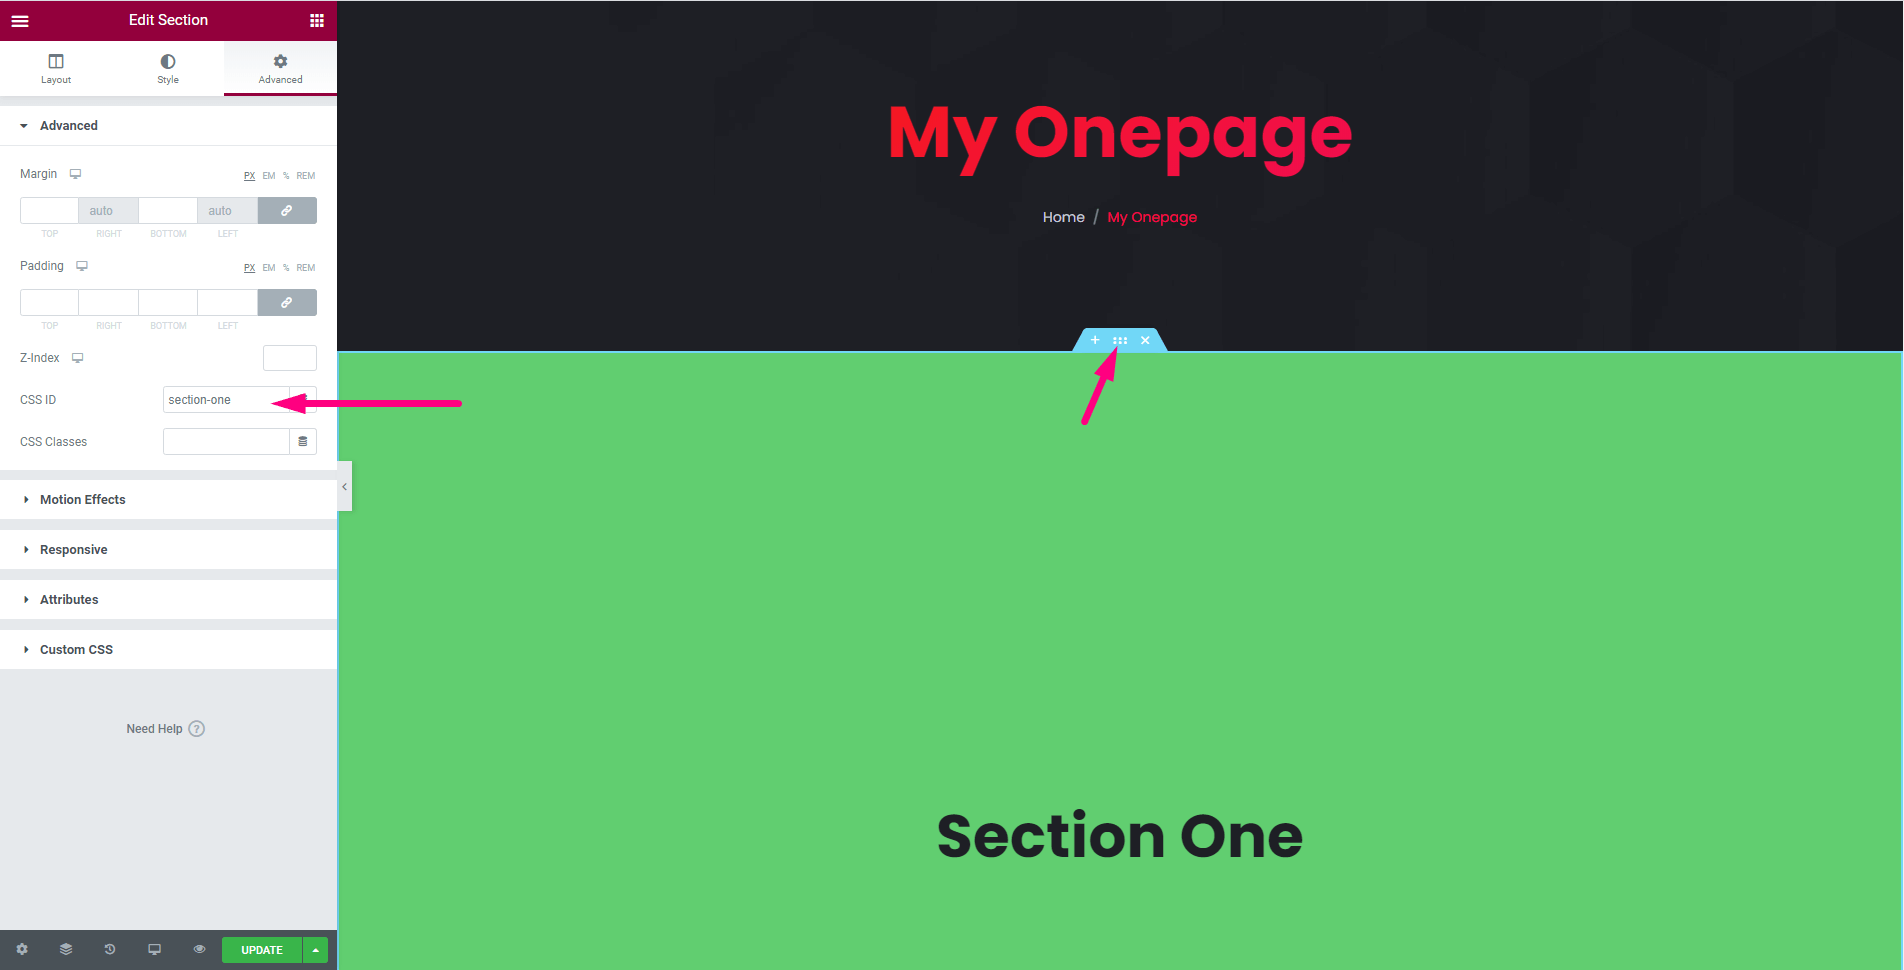
Create a new page. To do that go to Pages Add New and give the page a title and then add a Block element to the content. Add section unique "ID" into Per Block.
Prepare the menu
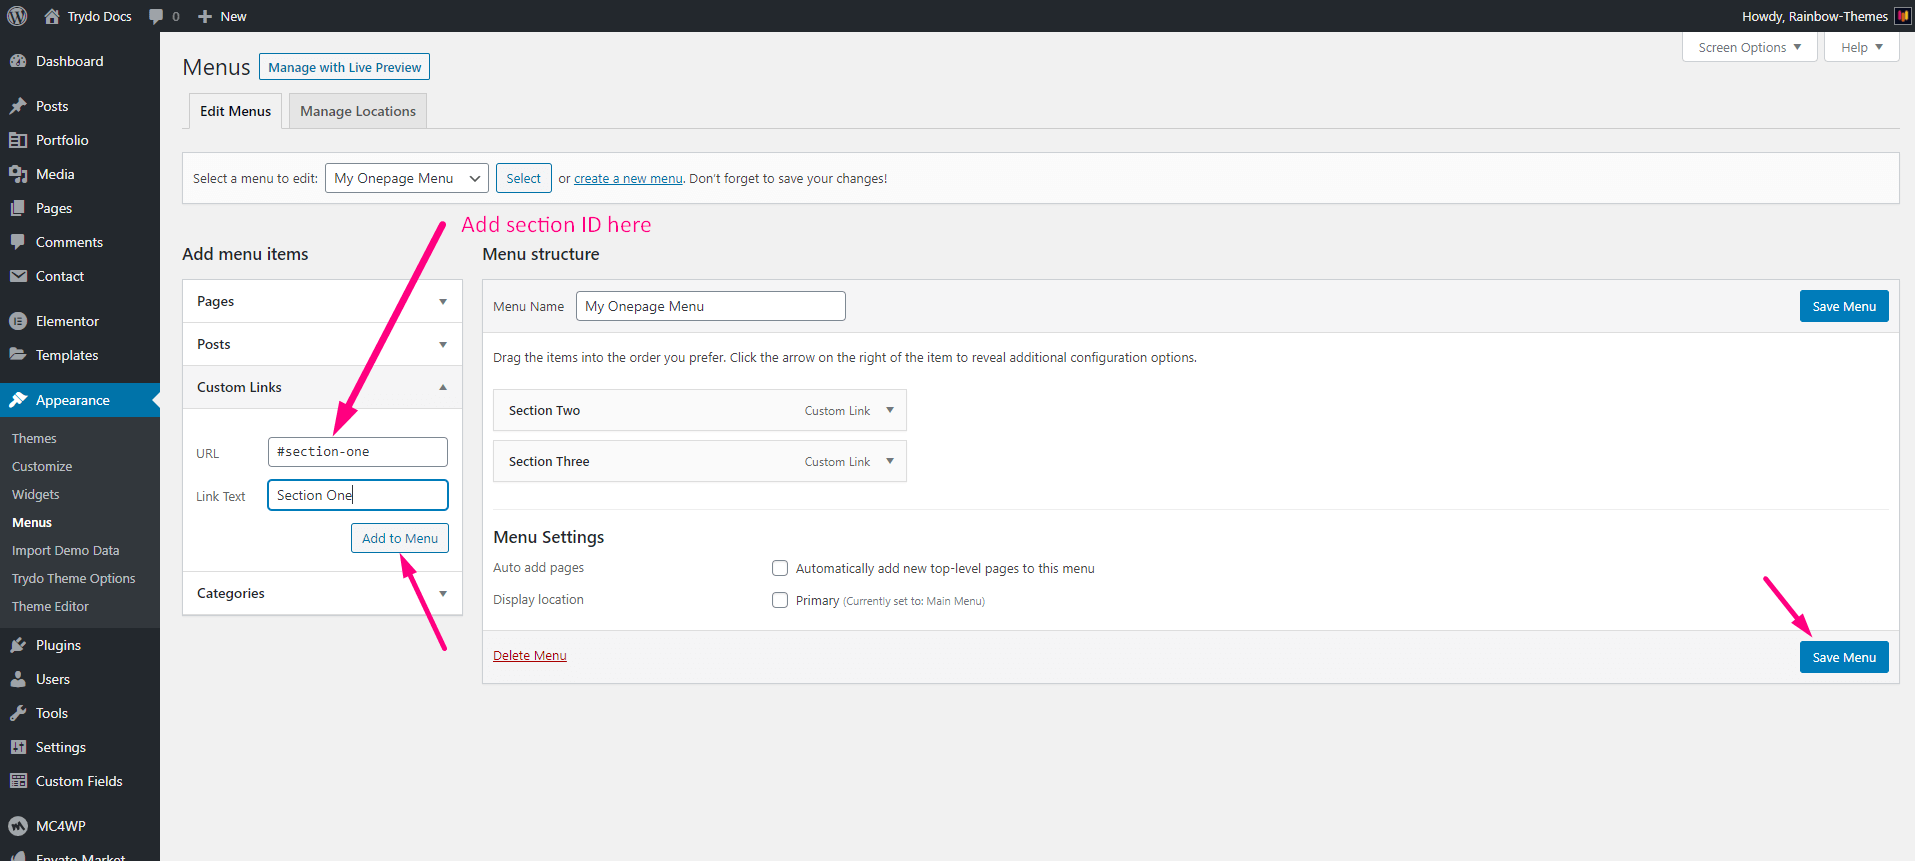
Go to Appearance Menu click the create a new menu link Give the new menu a unique name and then click the Create Menu button.
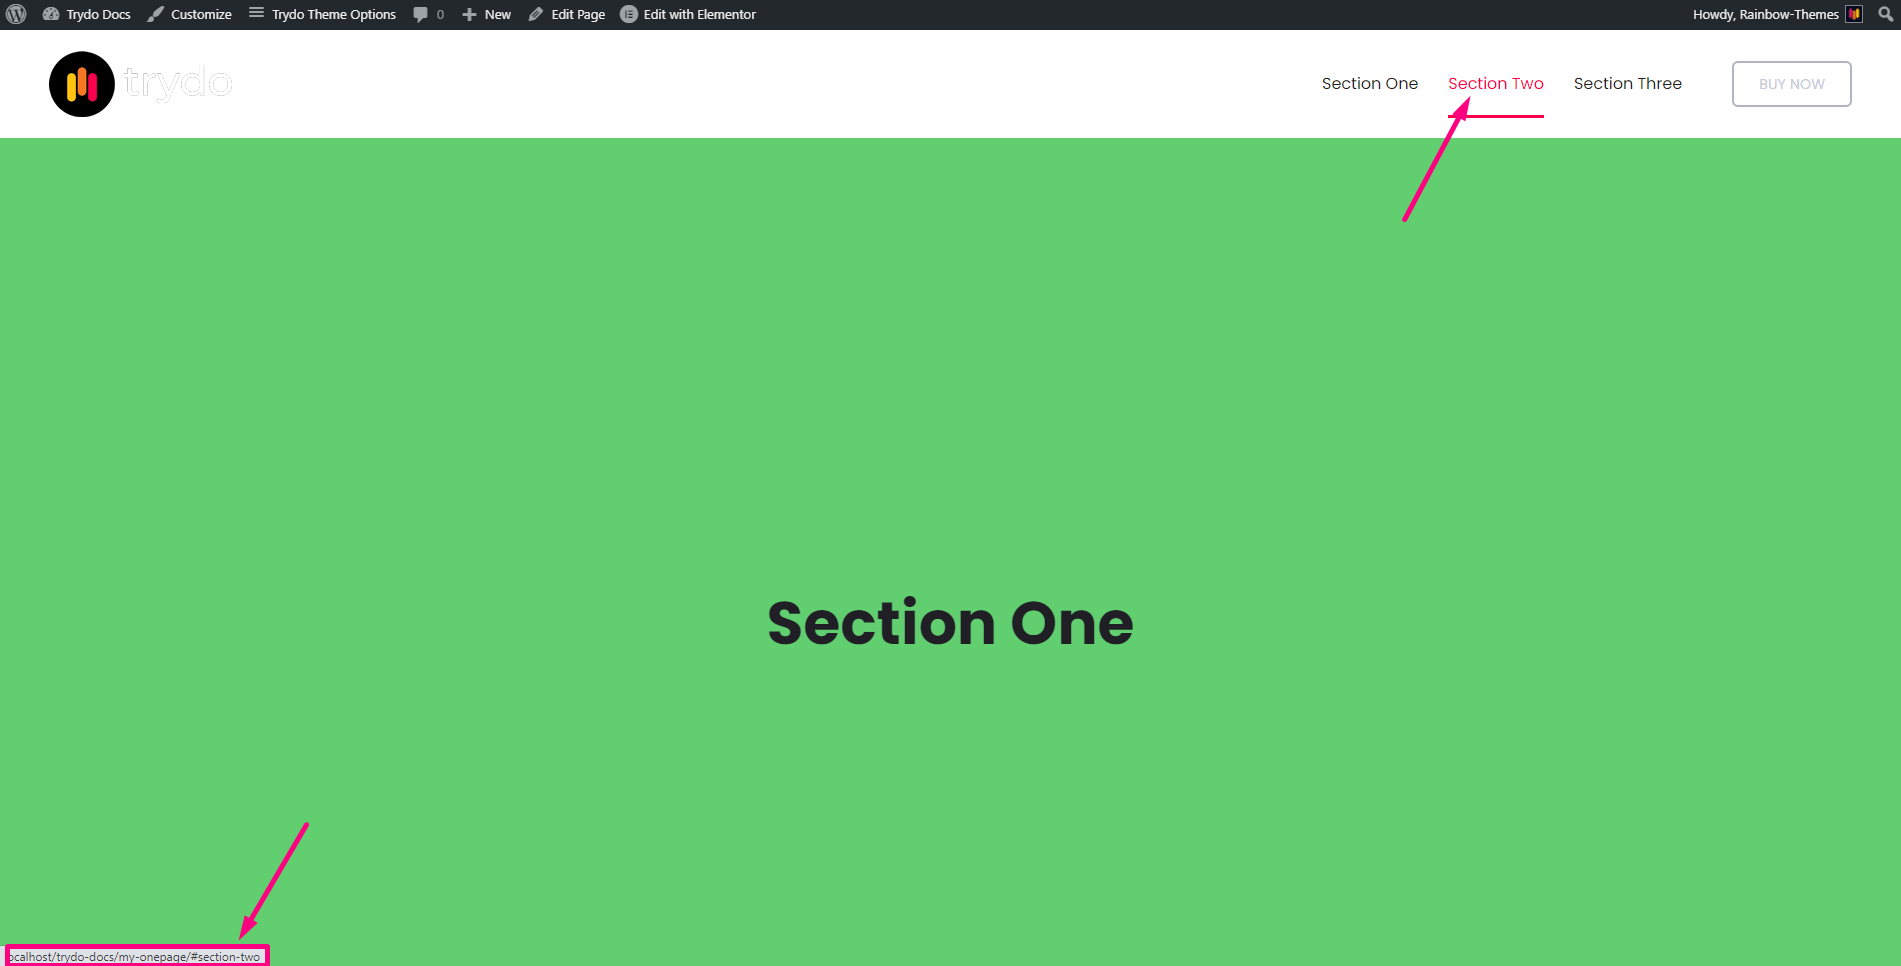
Add menu item with section ID
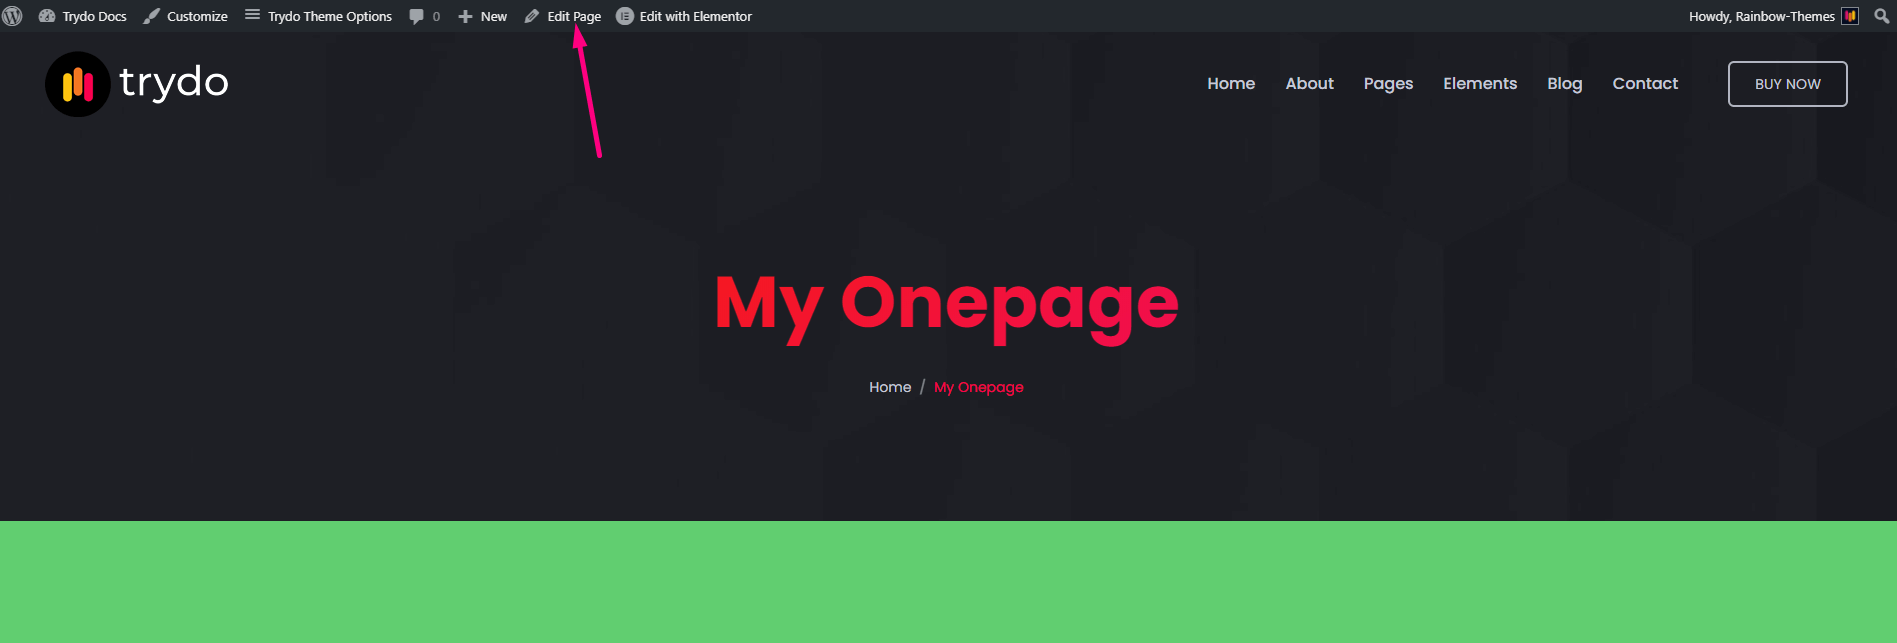
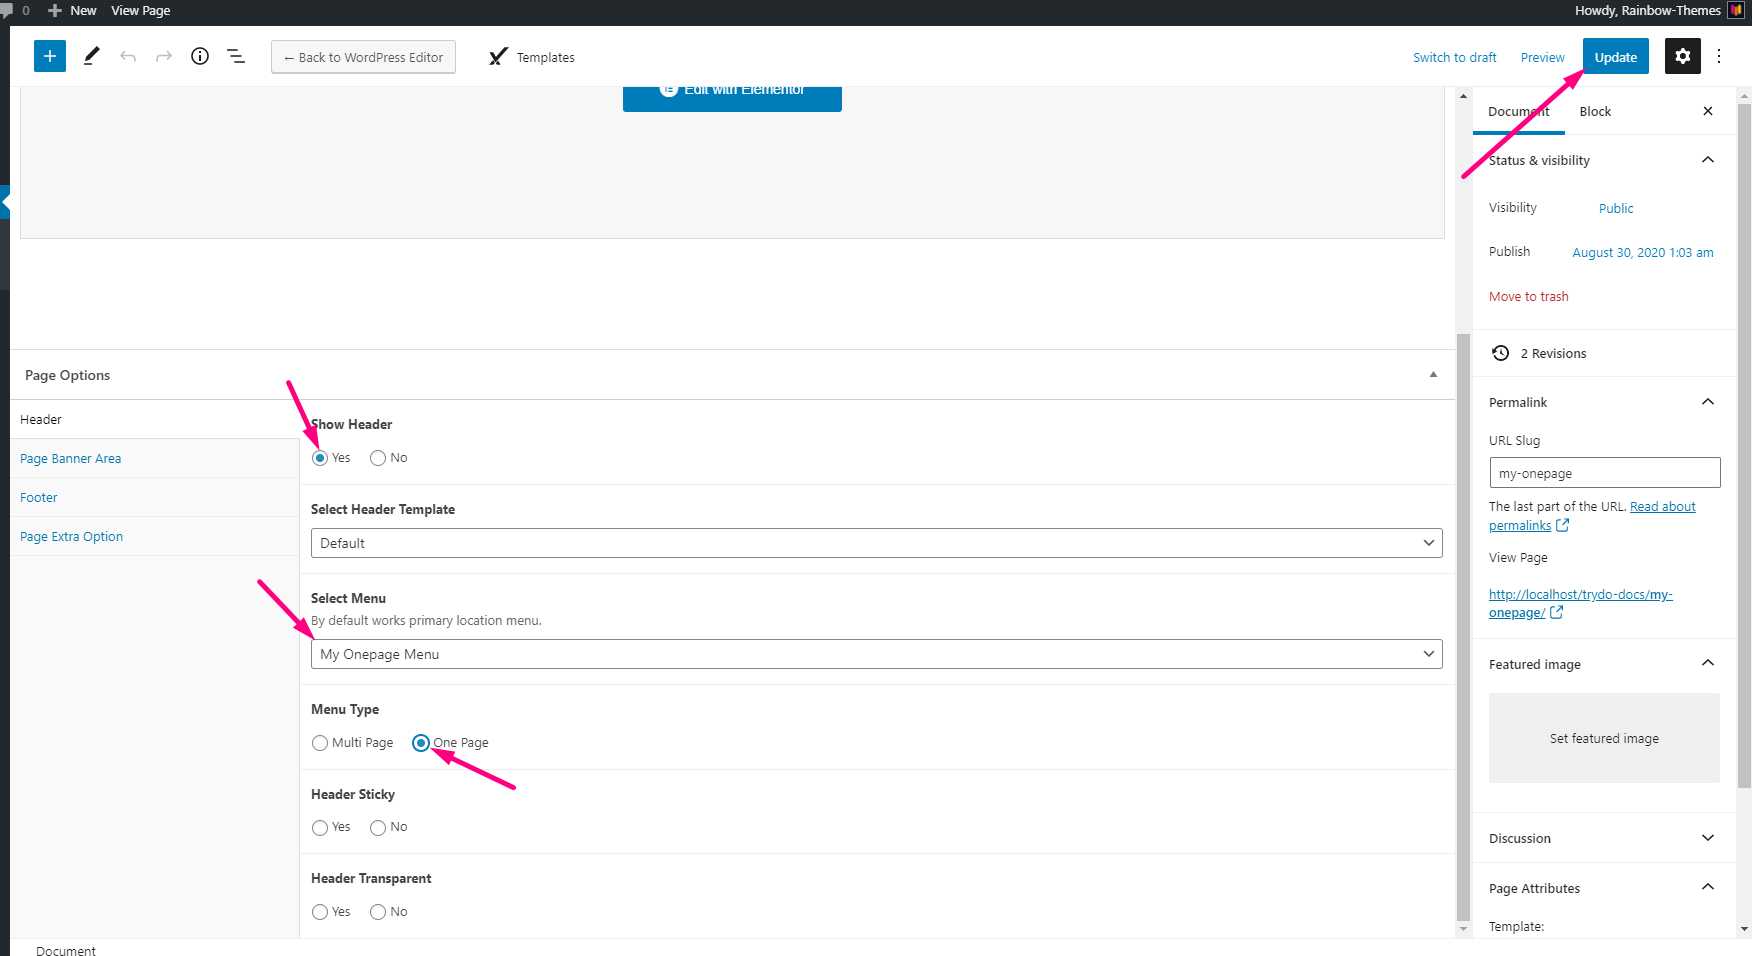
Select Onepage menu for this page from page attributes options
Create a pageAdd content block with "unique ID"Create a new menu for one pageAdd custom link item with section idSet One page menuFrom page attributes sectionOne Page Preview
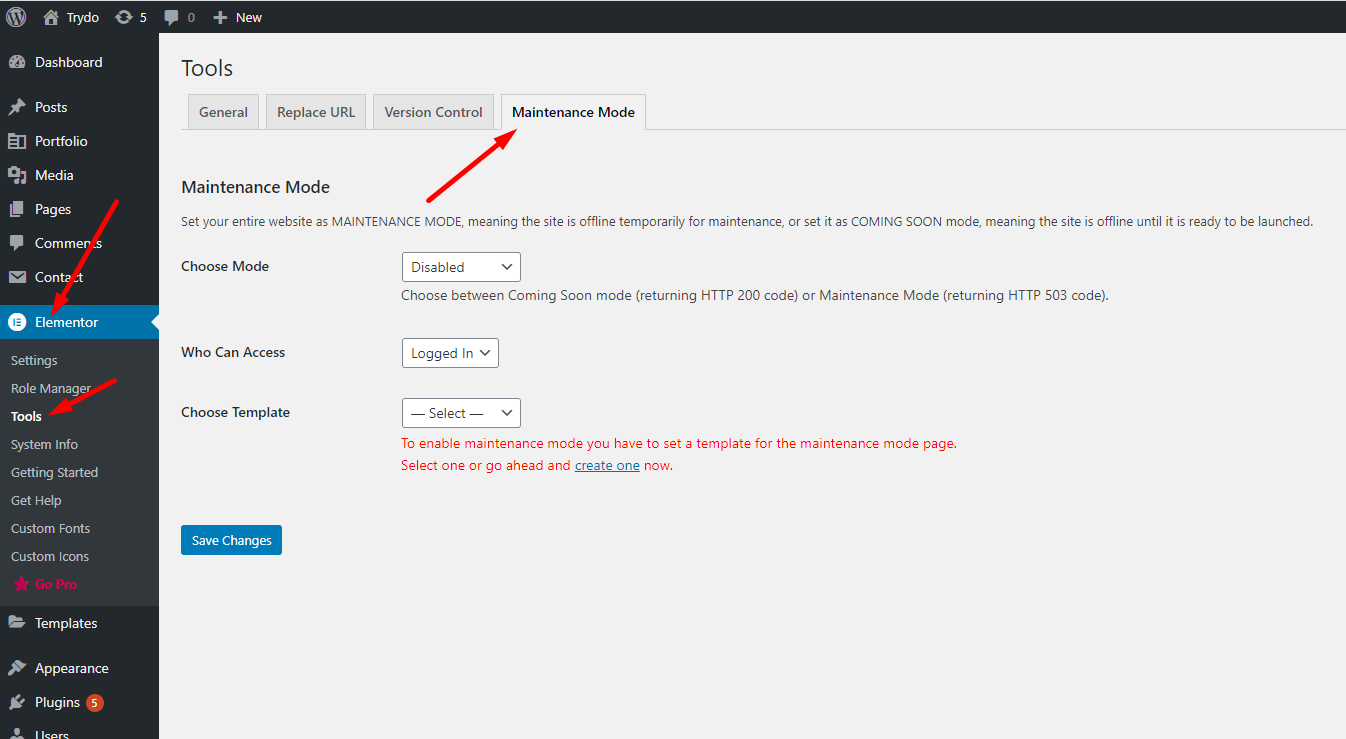
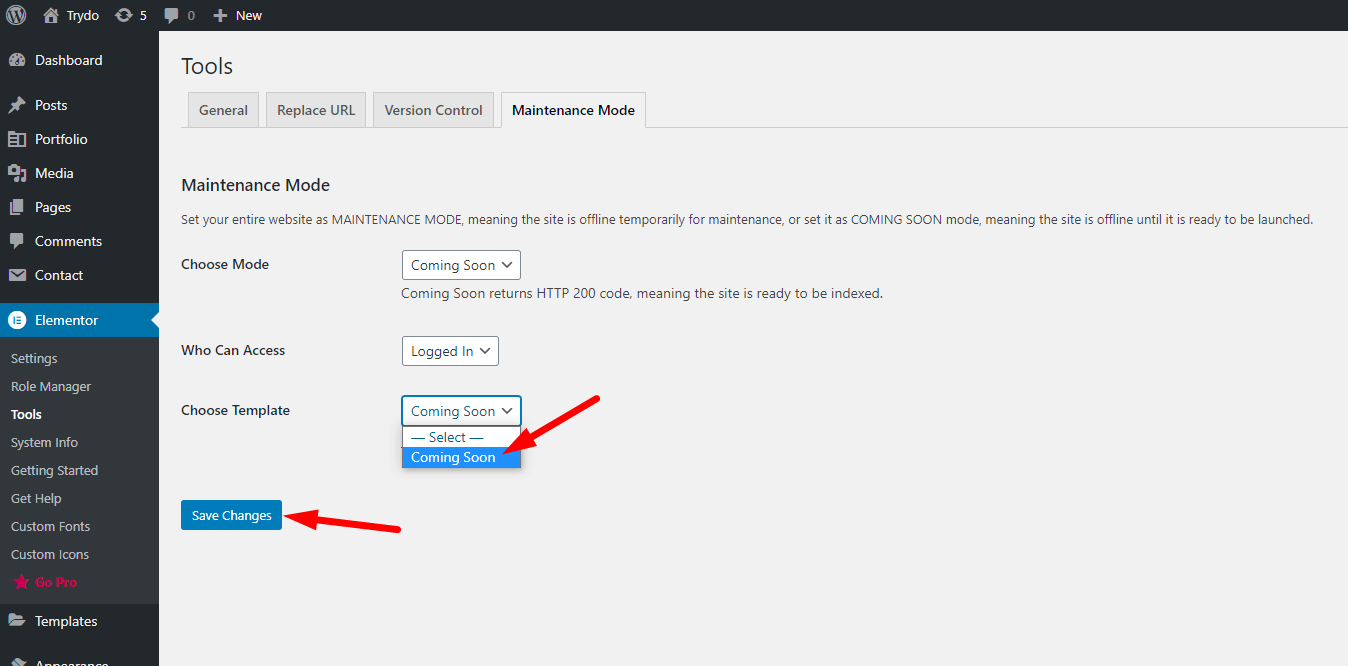
Get back to the WordPress Dashboard and navigate to Elementor Tools Maintenance Mode
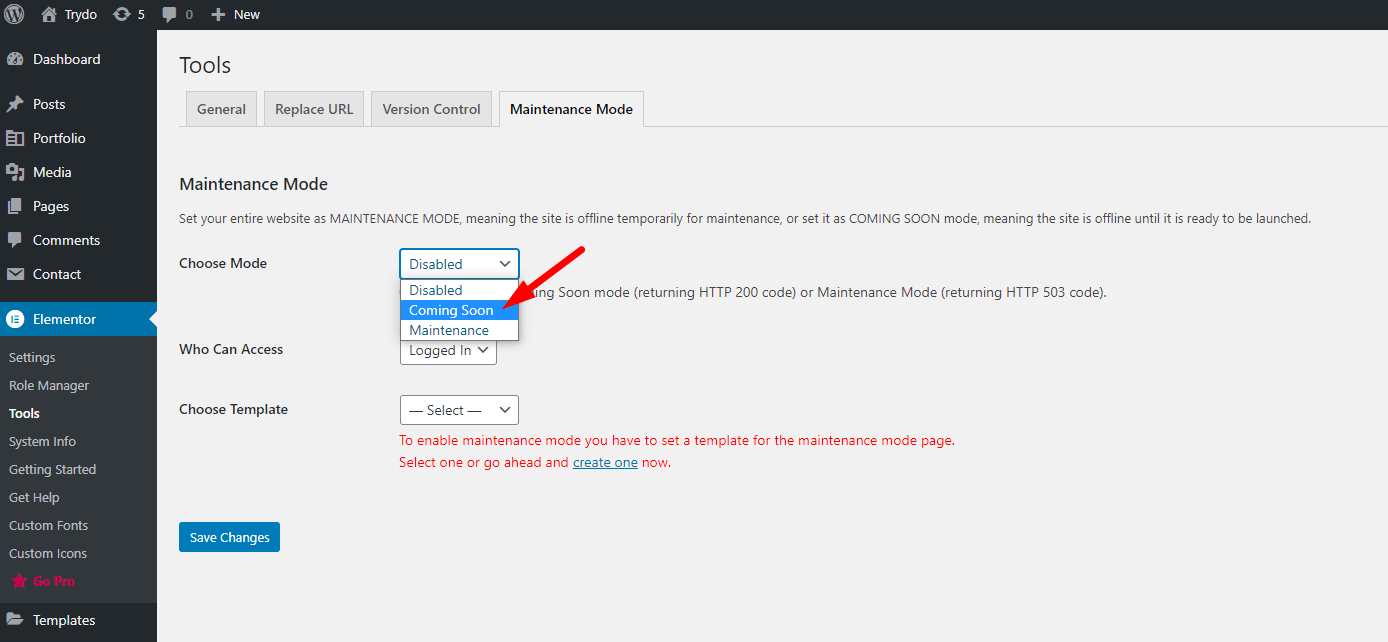
Choose between Coming Soon and Maintenance Mode
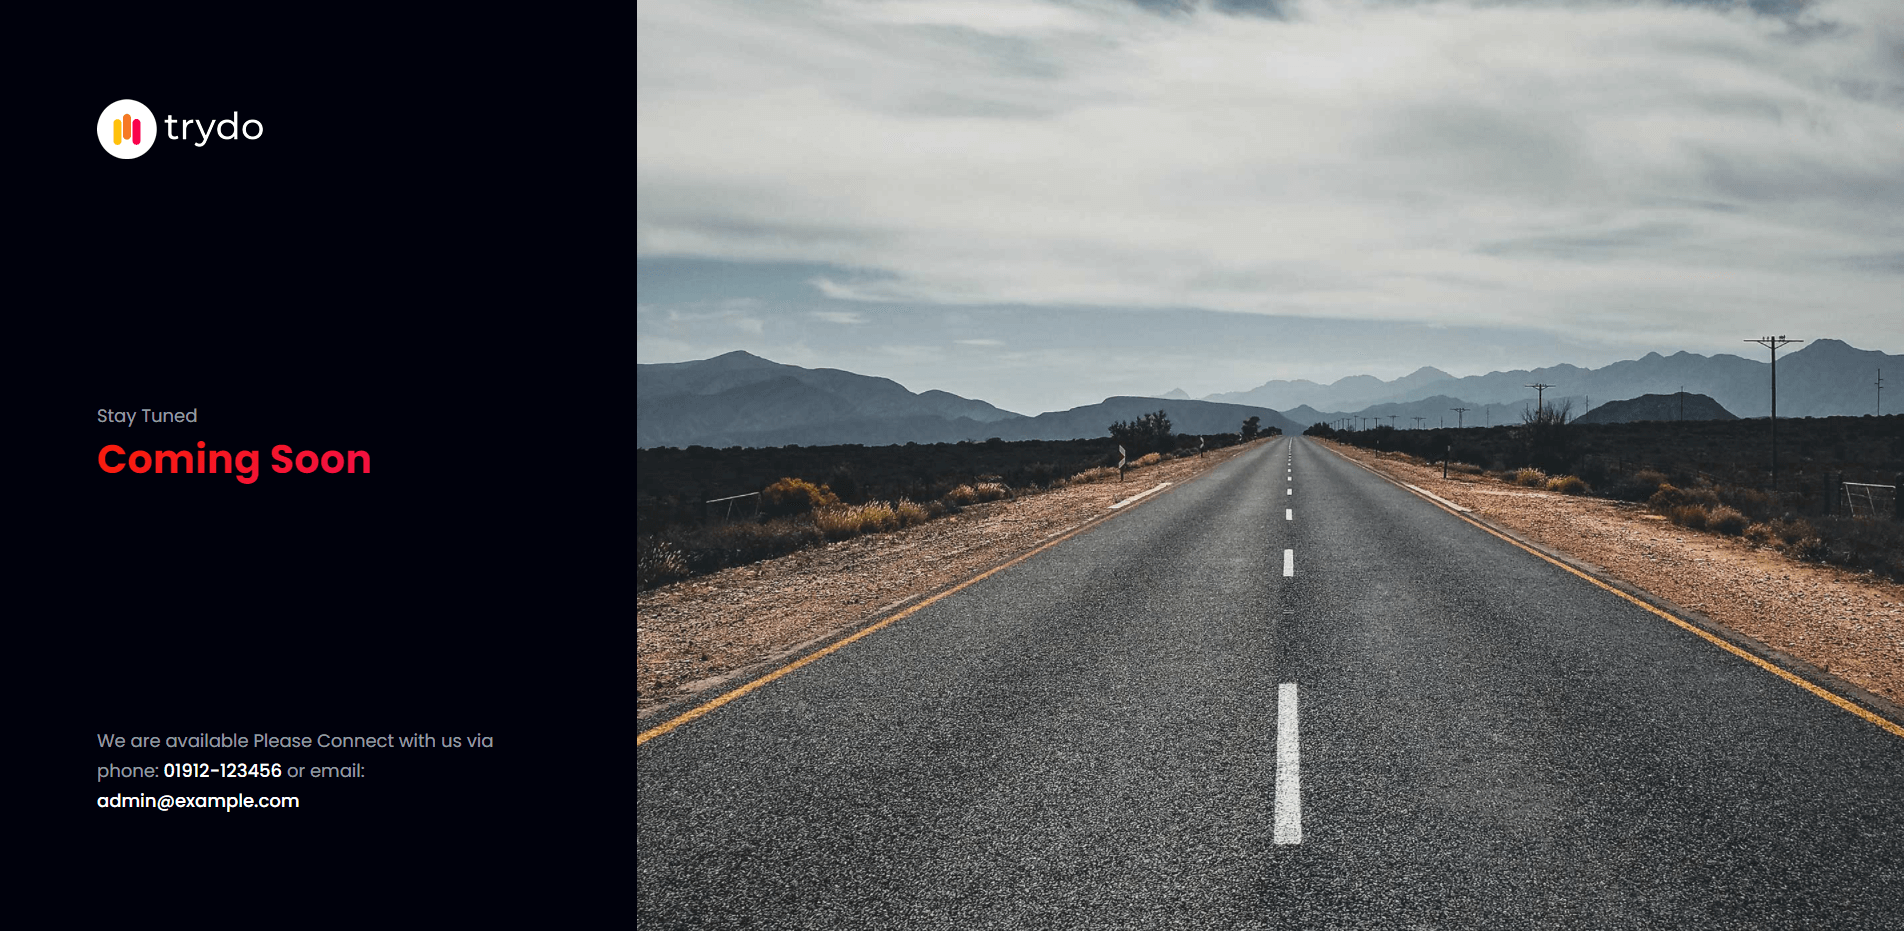
Pick the template for the Coming Soon Mode. Template name "Coming Soon"
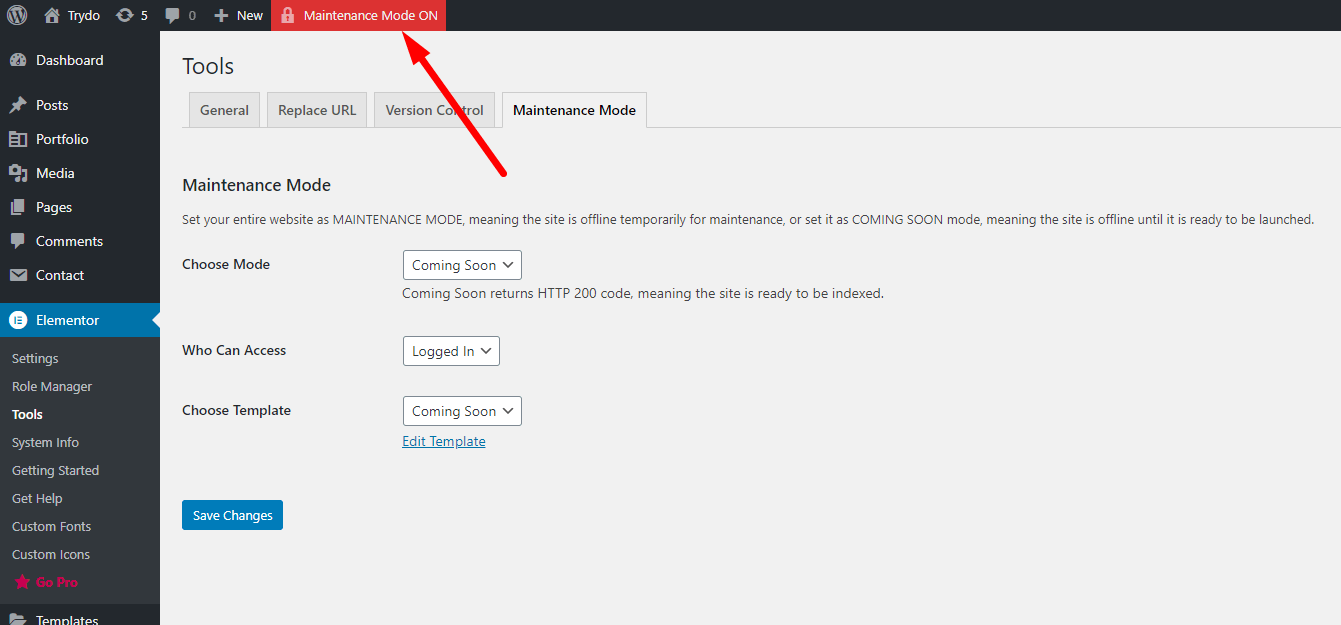
Note: You will see a red button on your top WordPress bar with the text: " Maintenance Mode ON".
Tip: You can use the same process described here for "Maintenance Mode"
Elementor > Tools > Maintenance ModeChoose between Coming Soon and Maintenance Mode Pick the template for the Coming Soon Mode. Template name "Coming Soon" and click the save change buttonMaintenance Mode ONActive Coming Soon Mode
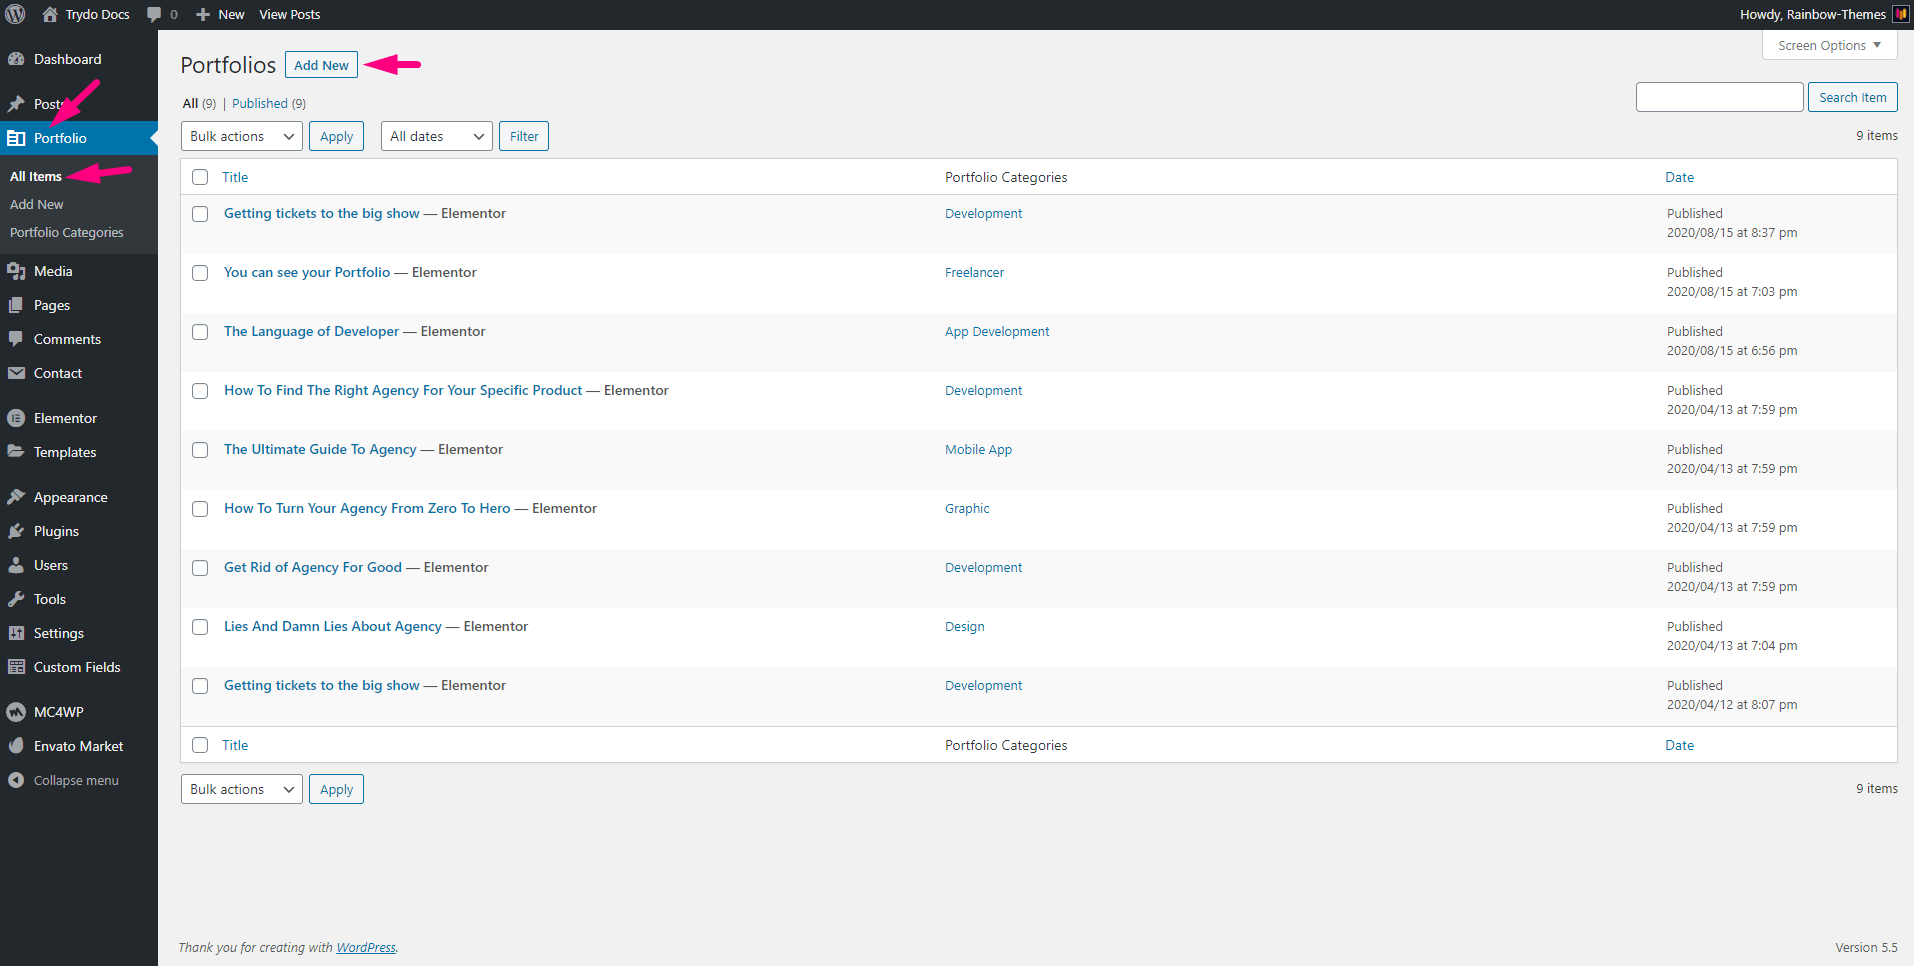
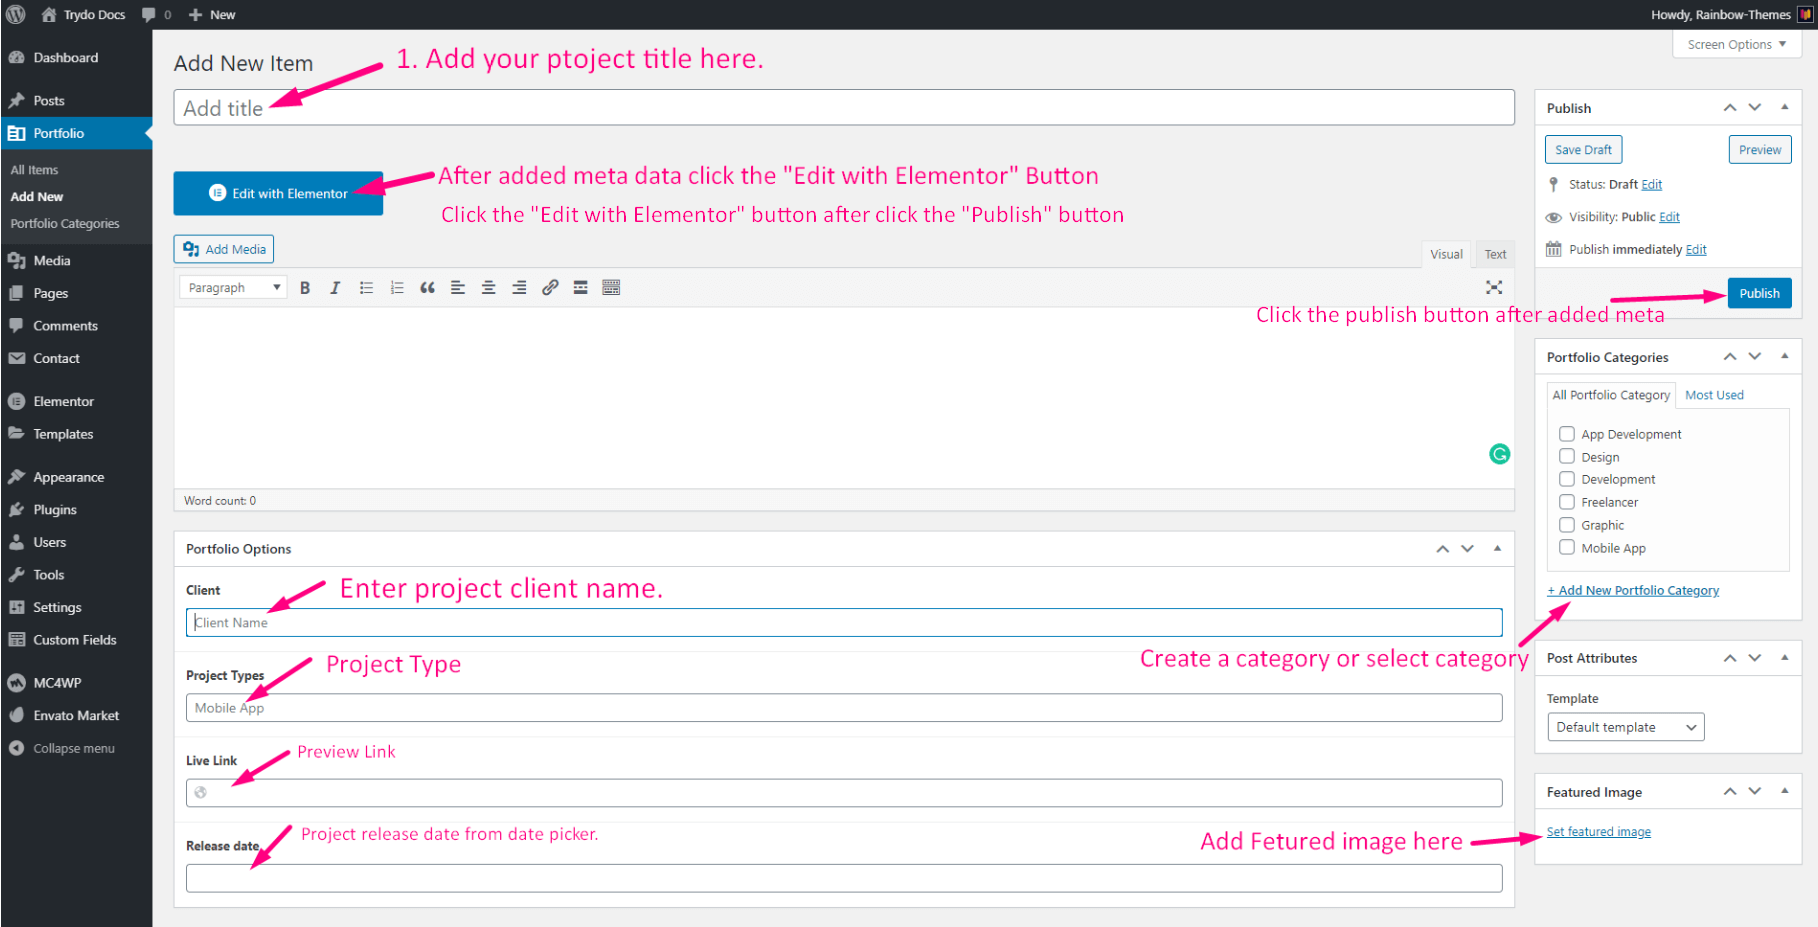
Creating a project
To create a new project do the following:
From the dashboard go to Portfolio All ItemsAdd New
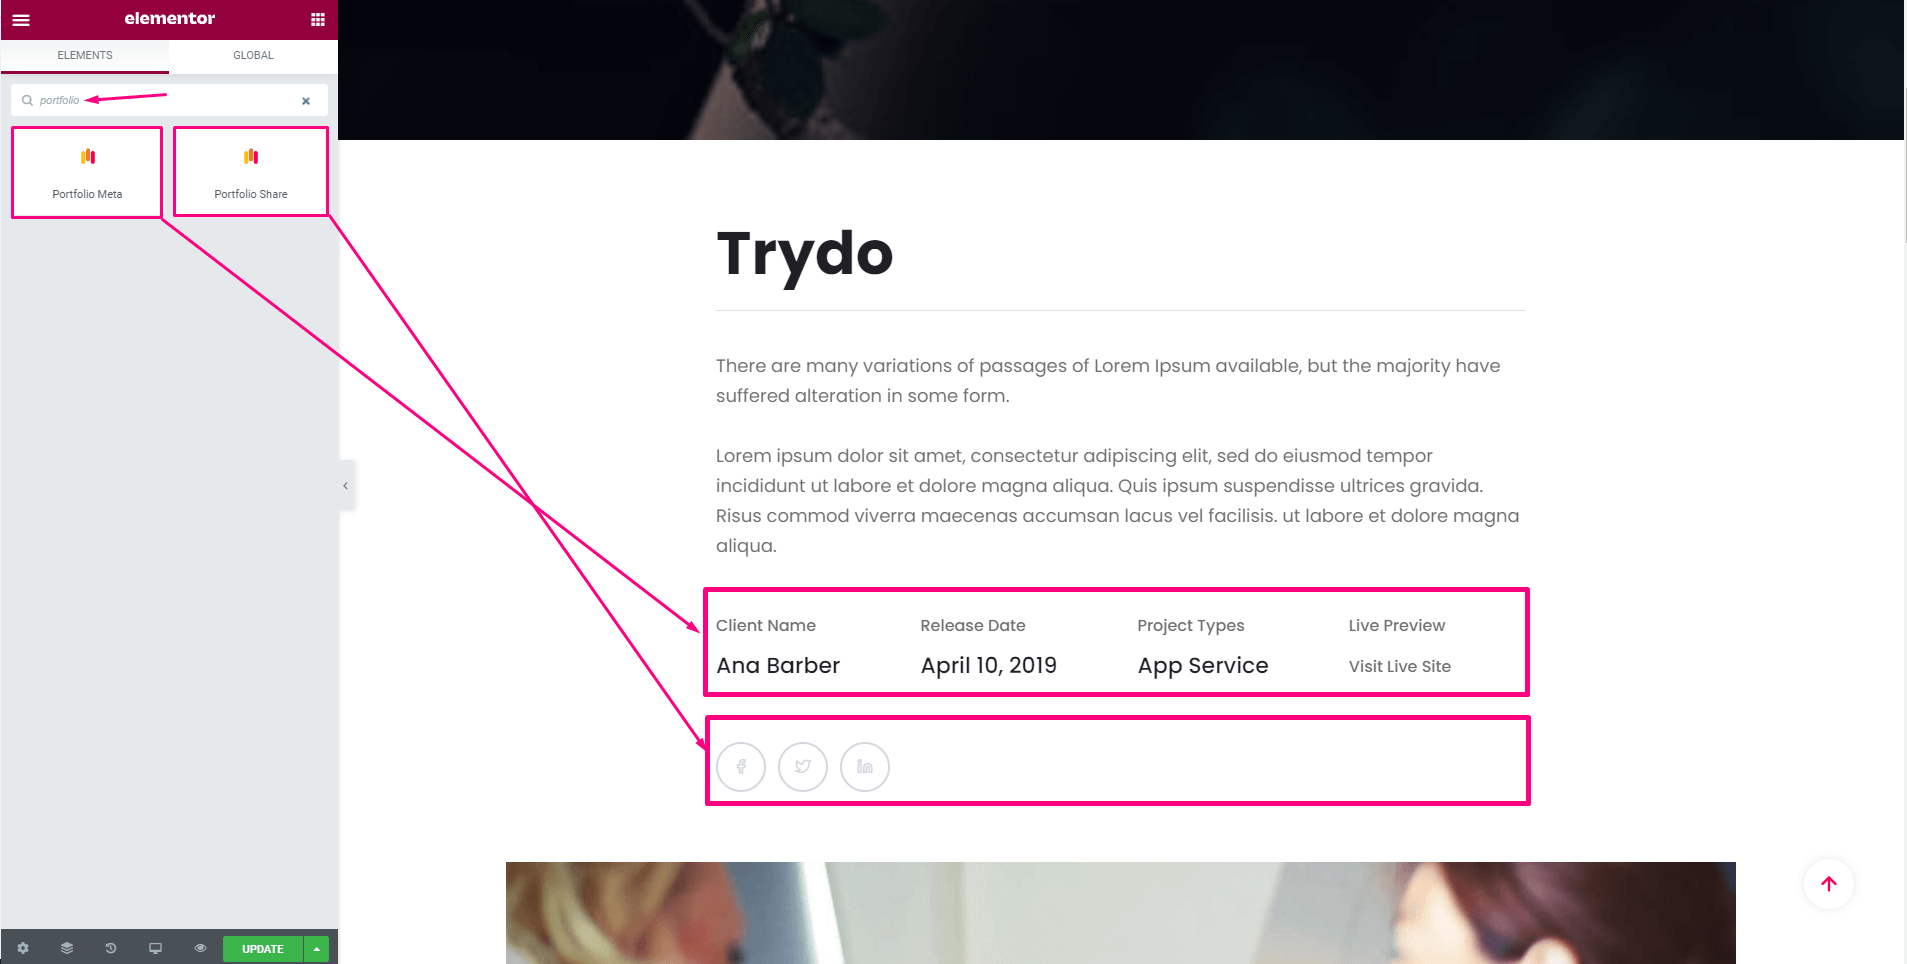
Add project meta and click the publish button
Then click the "Edit with Elementor" Button
Add project content
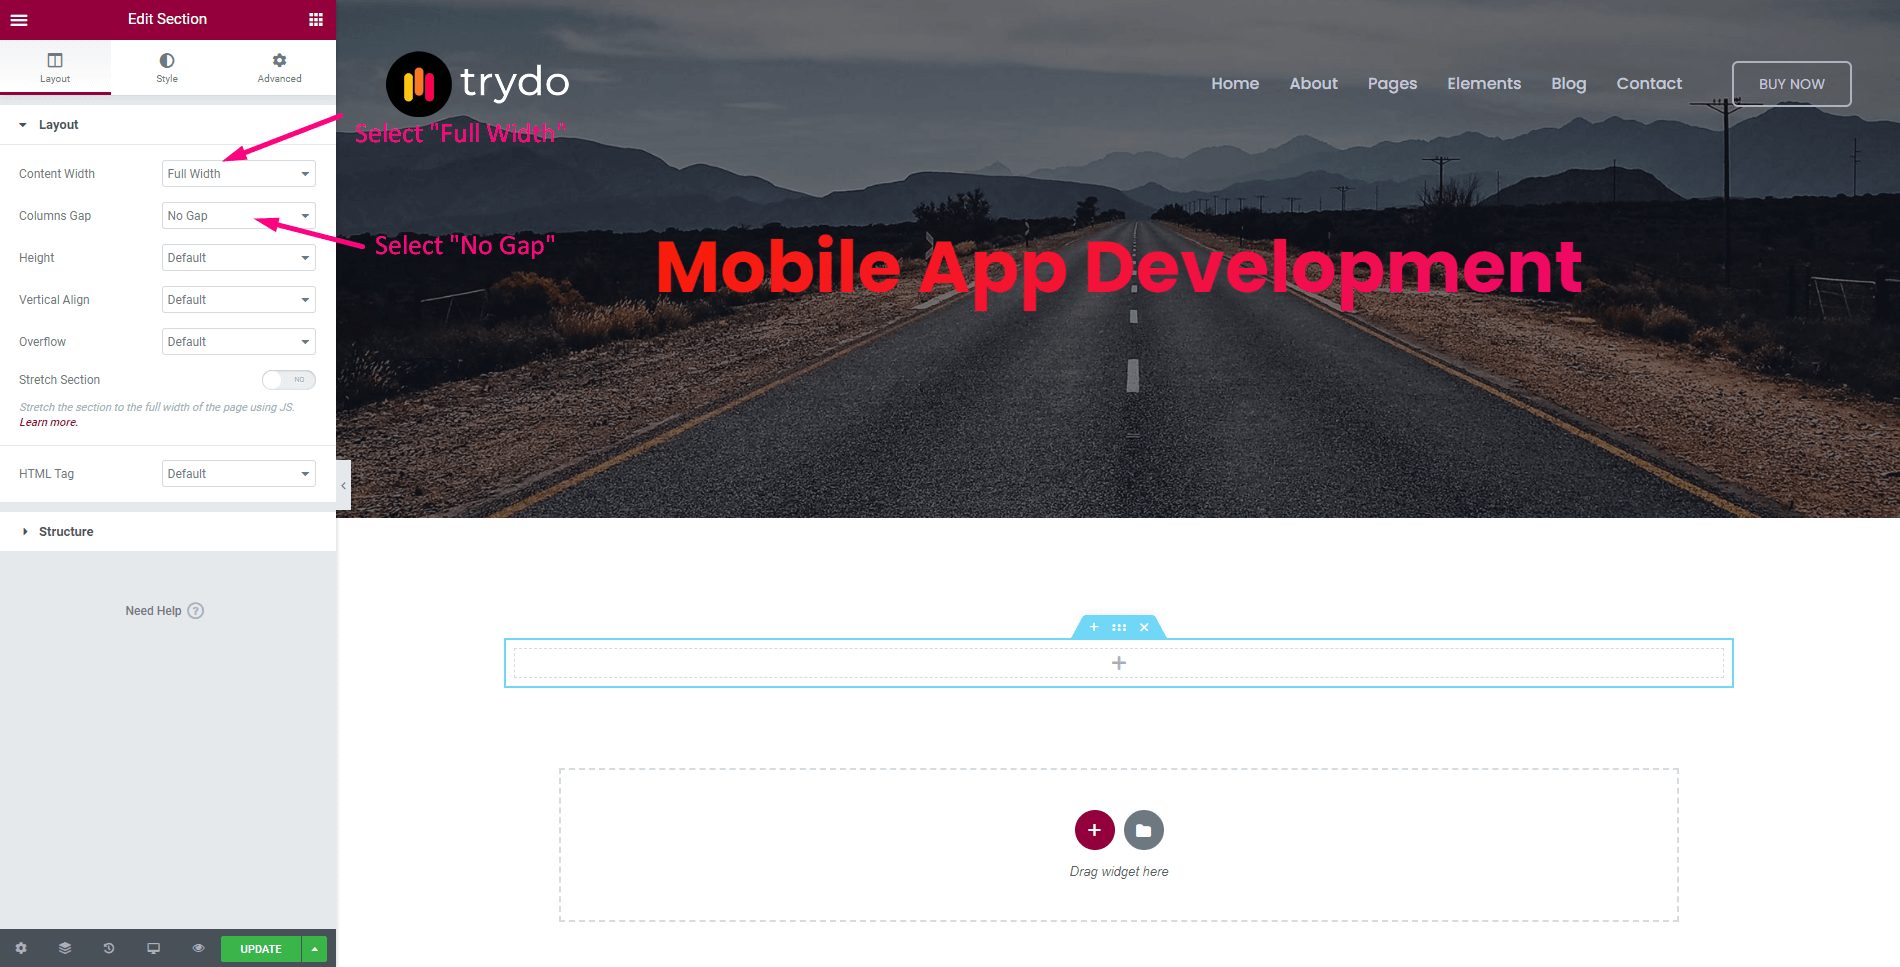
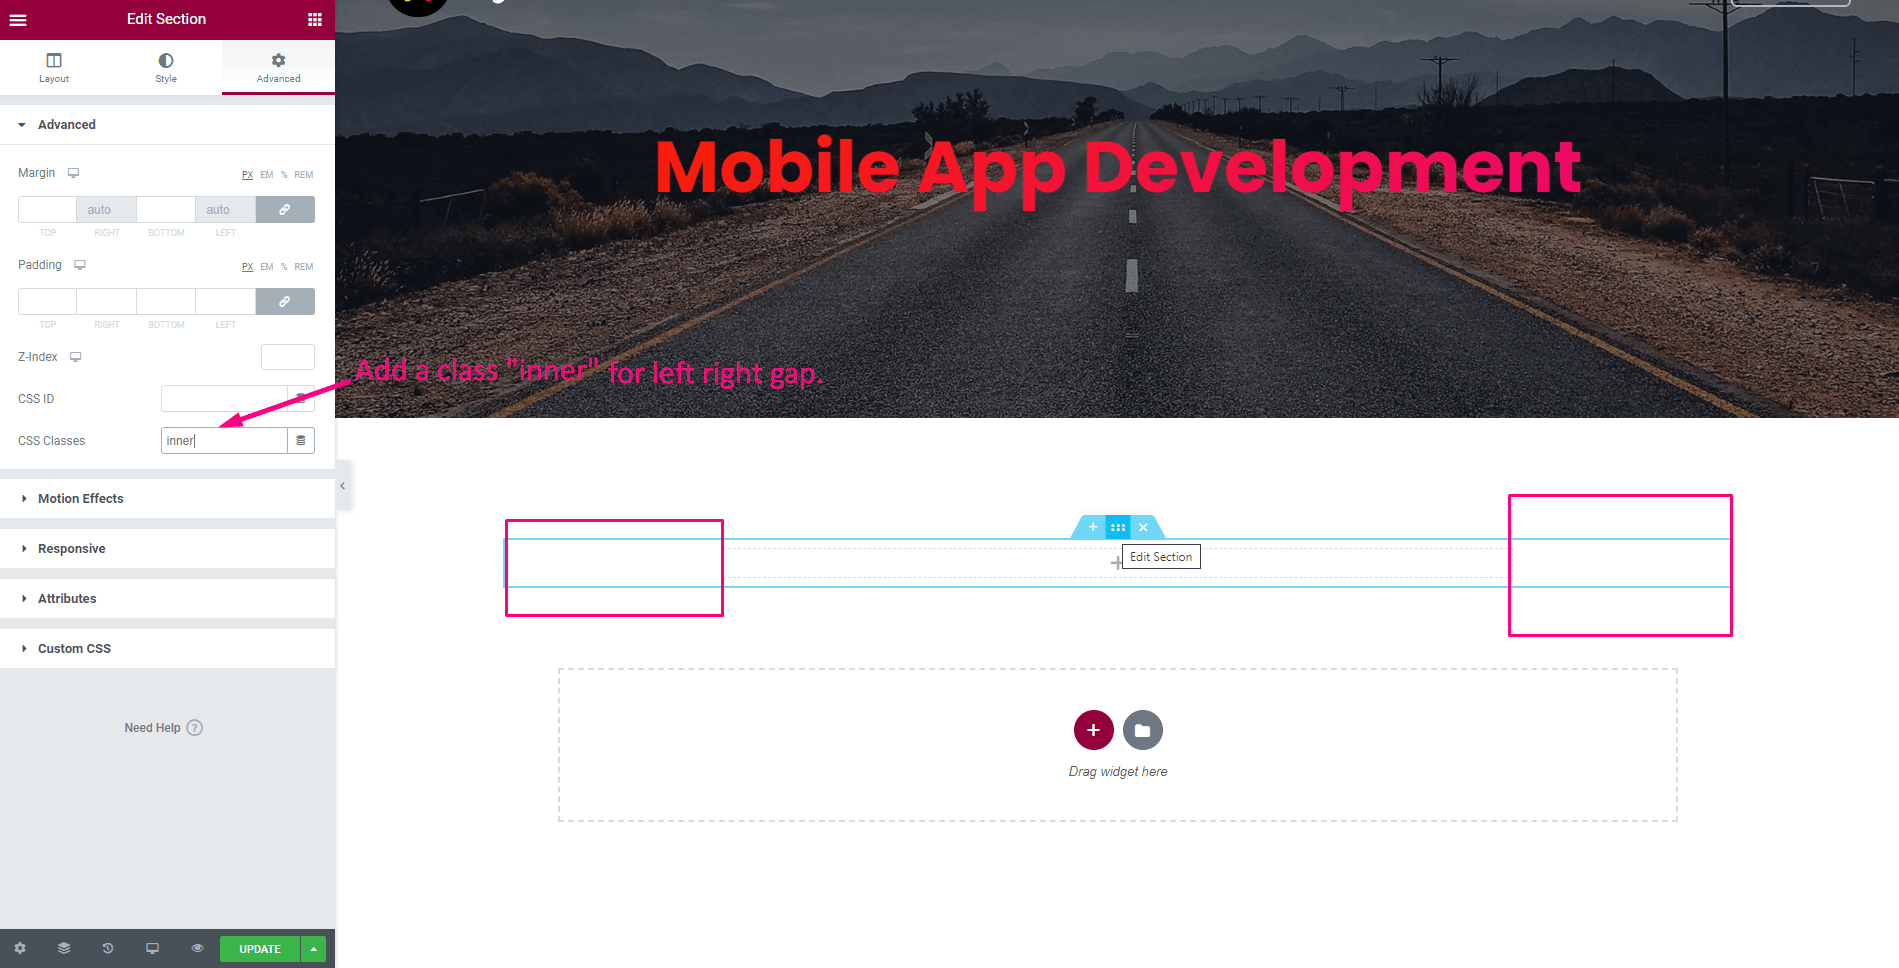
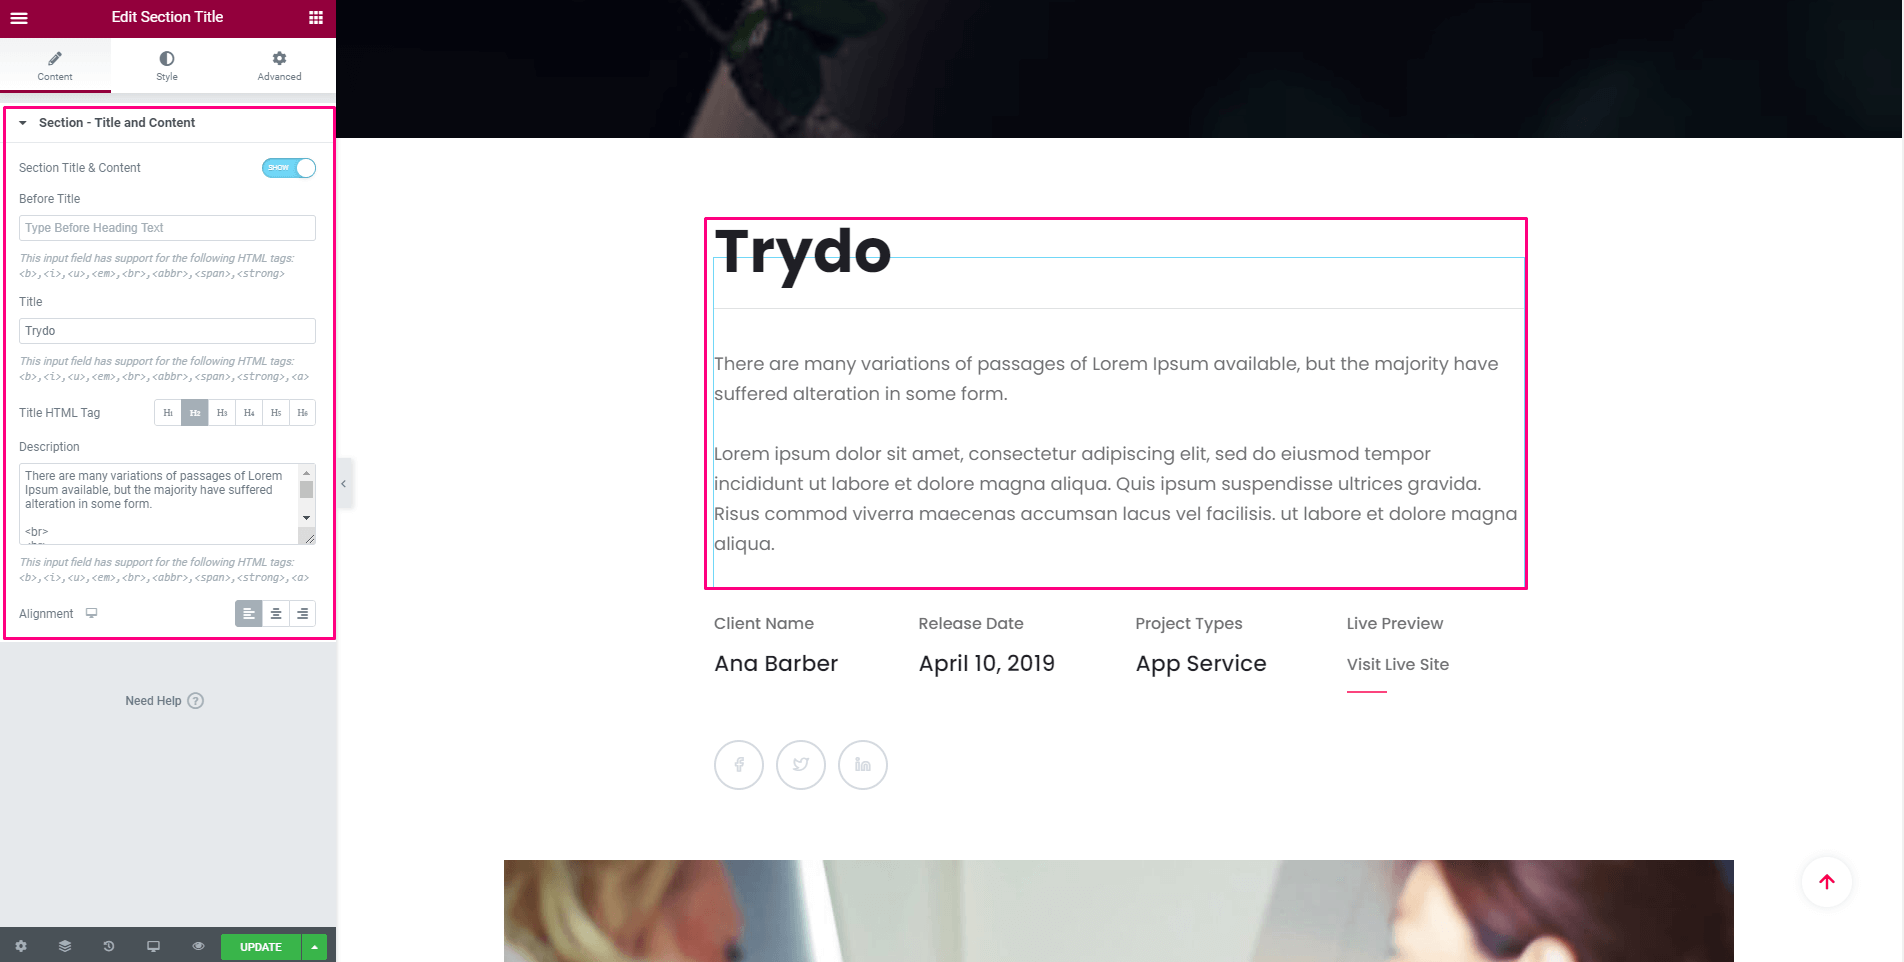
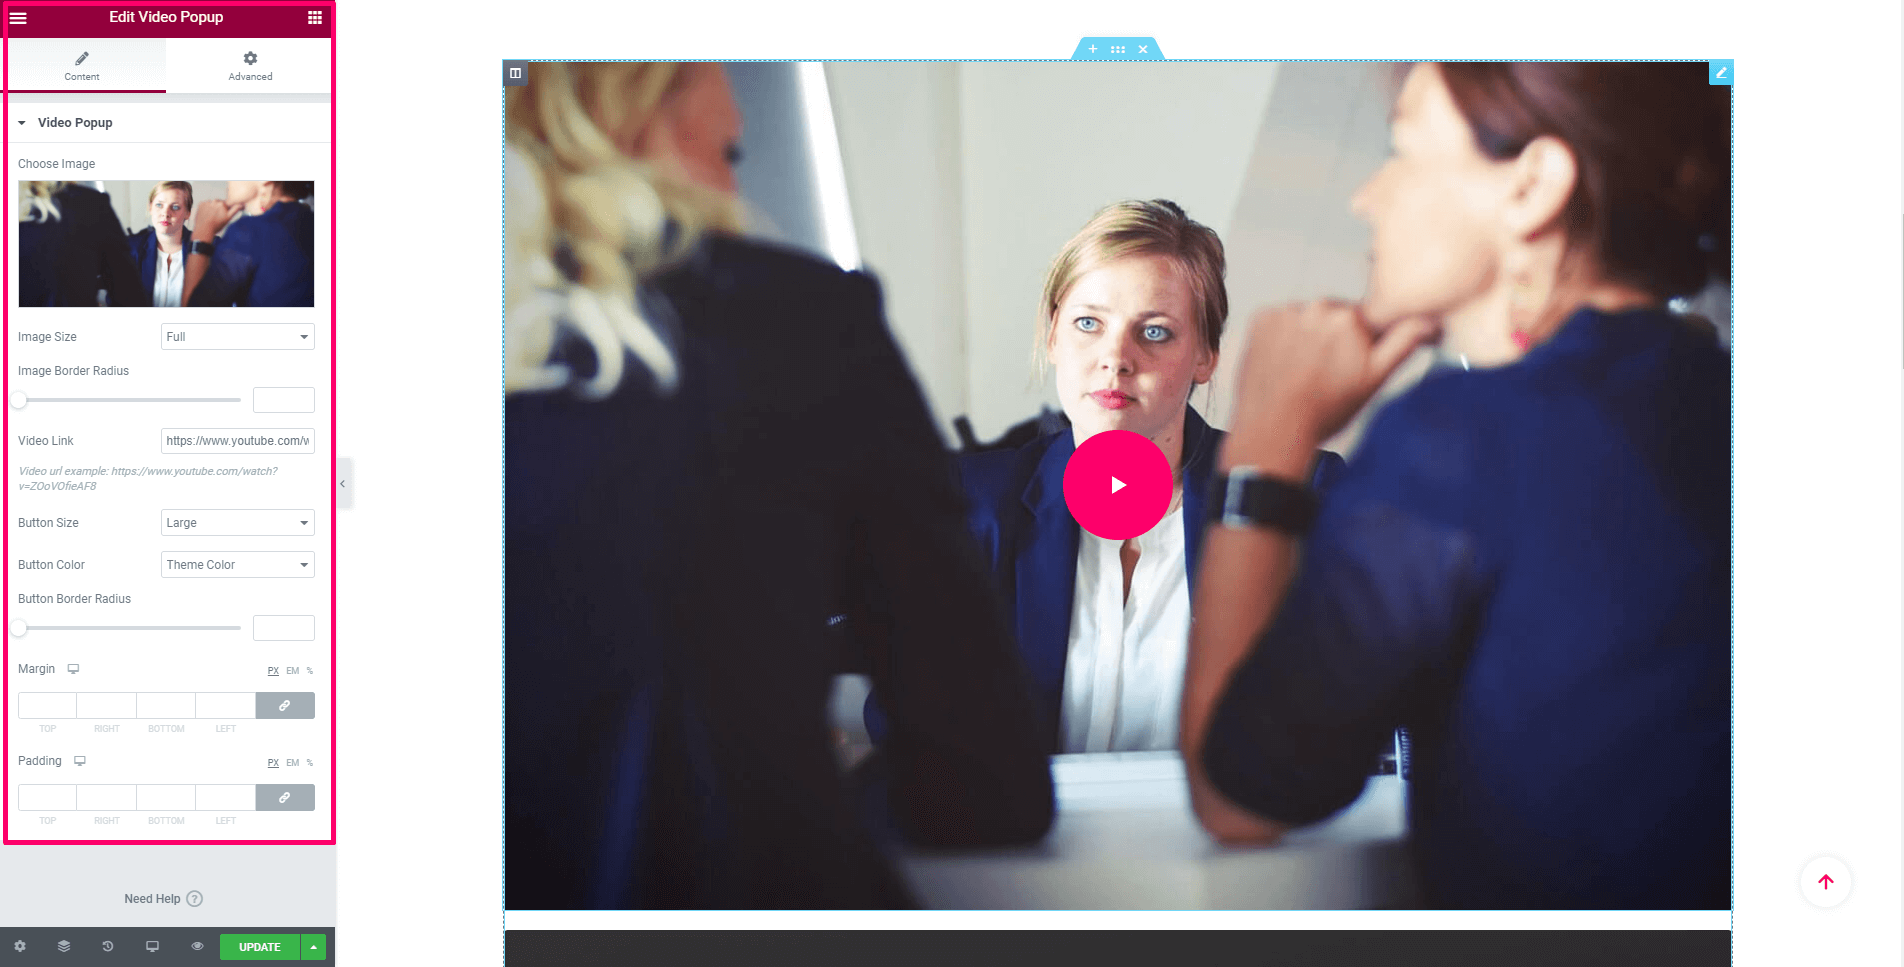
Create a portfolioAdd meta data and publish post then click the "Edit with Elementor" buttonAdd a section with "full width" and "No Gap"Add a section with "inner" classAdd project title and text contentAdd project meta data and social shareAdd Project Video
Creating a portfolio page
To create a page with a portfolio template and add it to your website:
From the dashboard go to Pages Add New
Enter your portfolio page title
If you want to overwrite global options. Like Header, Footer etc style. Please customize here.
Click the Publish Button
Select "Elementor Full Wdth" Page Template
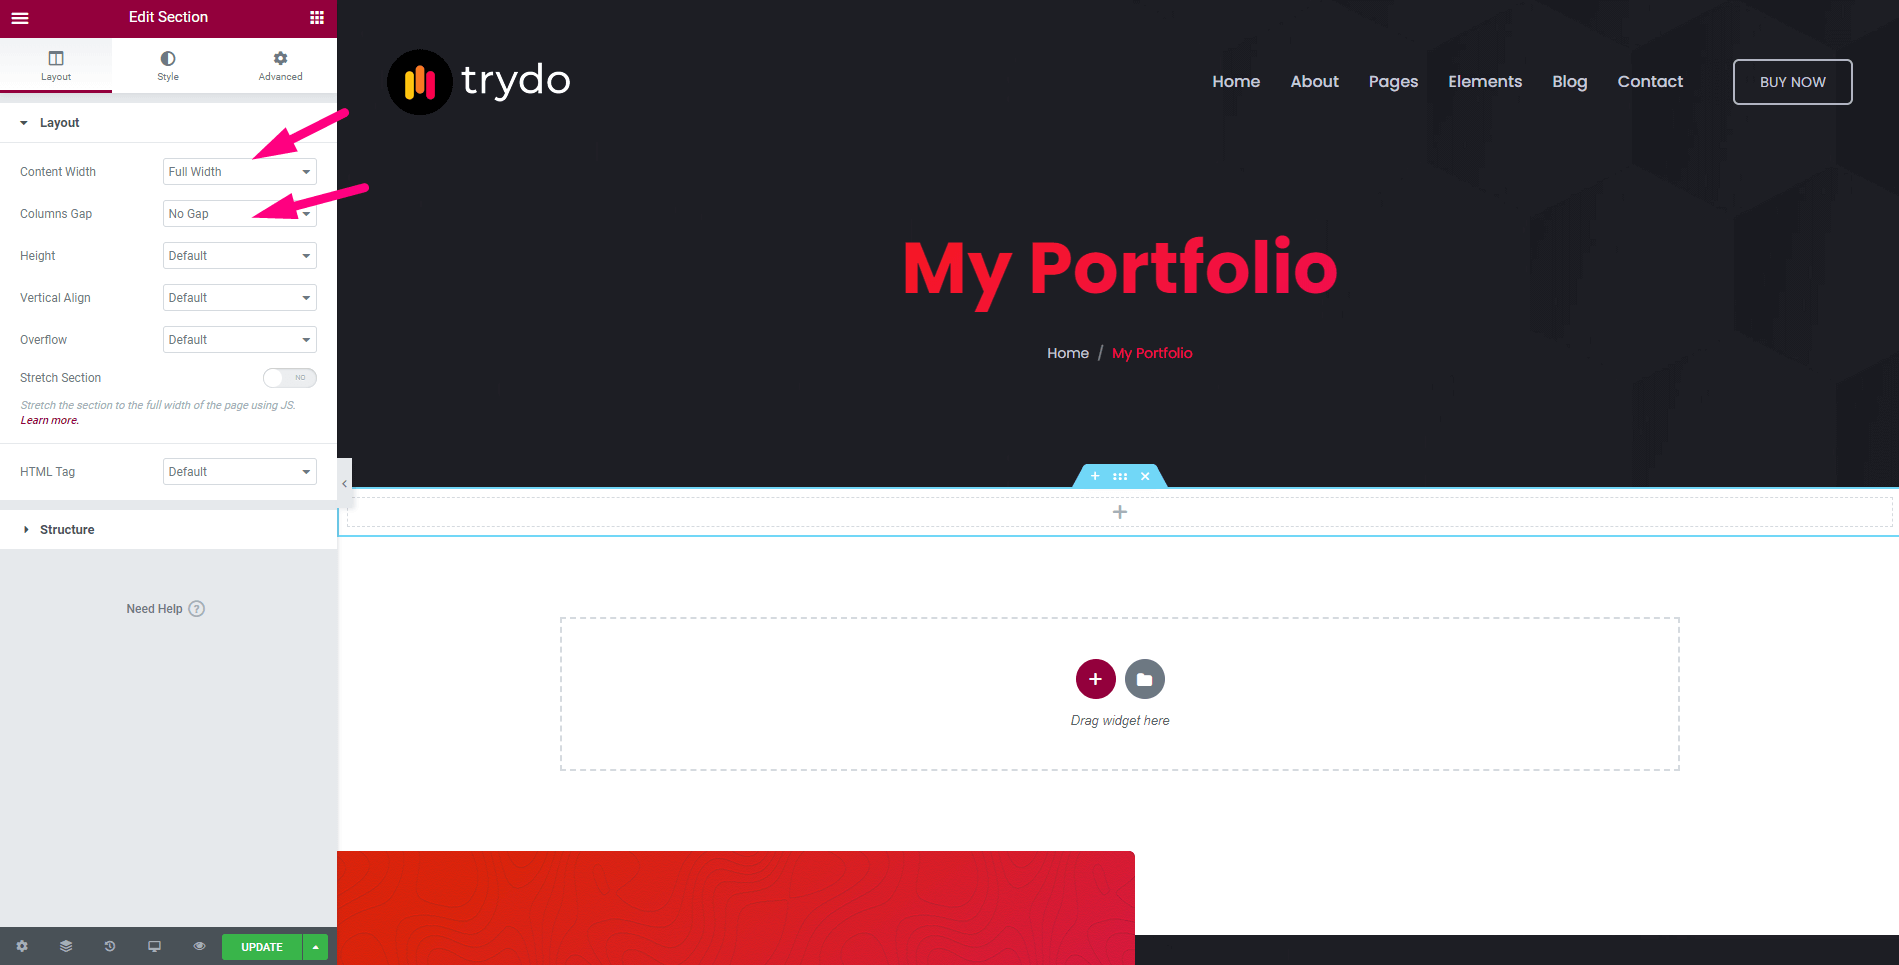
Add a section with "full width" and "No Gap"
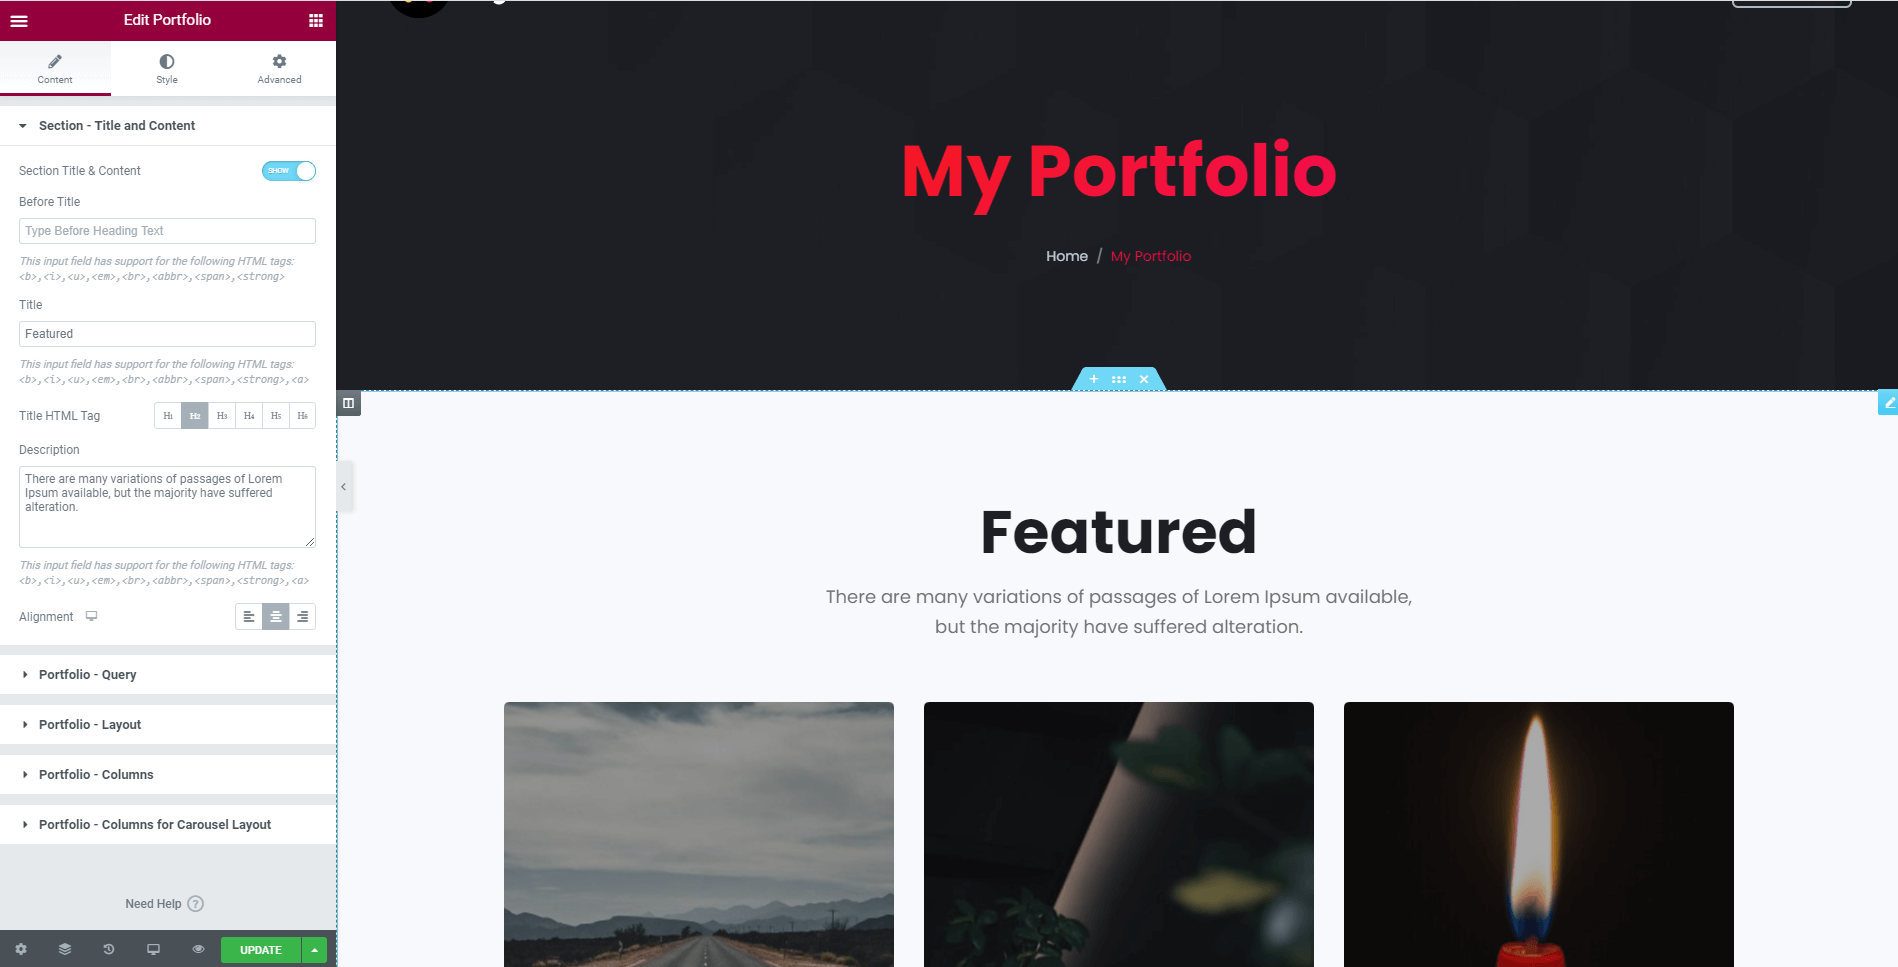
Choose and drop a Portfolio Projects element from the left side
Create a portfolio with elementor custom addonsAdd a section with "full width" and "No Gap"Choose and drop a Portfolio Projects element from the left sideCustomize addons
Set portfolio as a home page
To create a page with a portfolio template and add it to your website:
From the dashboard go to Pages Add New
Enter your portfolio page title
If you want to overwrite global options. Like Header, Footer etc style. Please customize here.
Click the Publish Button
Select "Elementor Full Wdth" Page Template
Add a section with "full width" and "No Gap"
Choose and drop a Portfolio Projects element from the left side
Create a portfolio with elementor custom addonsAdd a section with "full width" and "No Gap"Choose and drop a Portfolio Projects element from the left sideCustomize addons
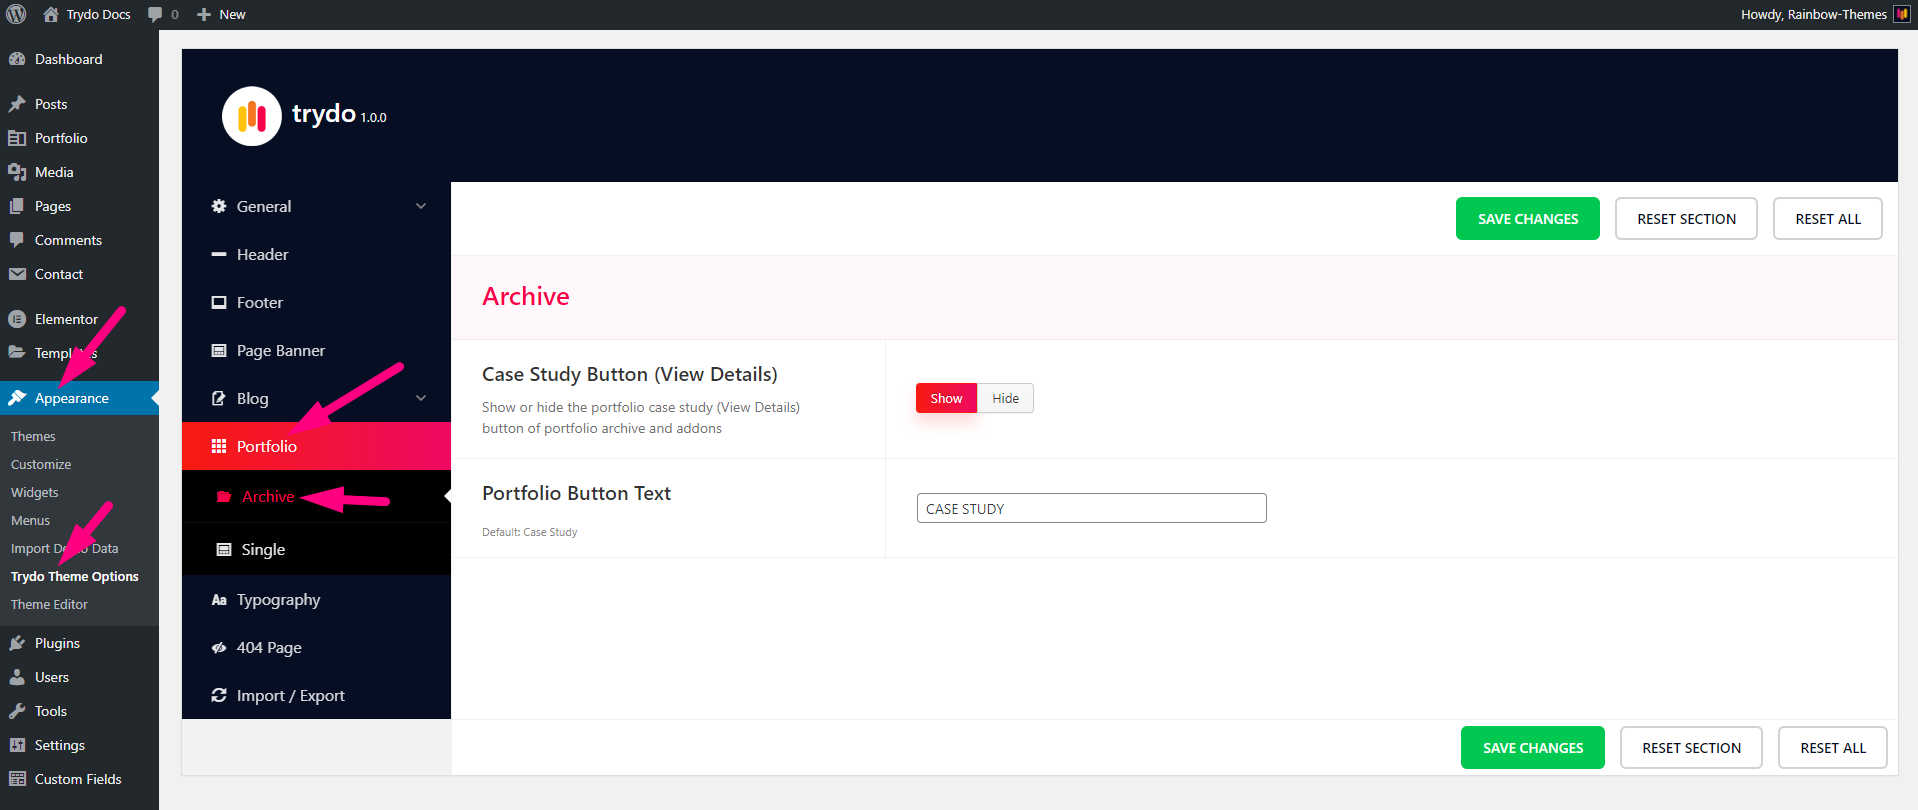
Portfolio Archive Setting
To customize portfolio archive page setting. Please follow the steps:
From the theme options go to Appearance Trydo Theme OptionsPortfolioArchive
Portfolio Archive Setting
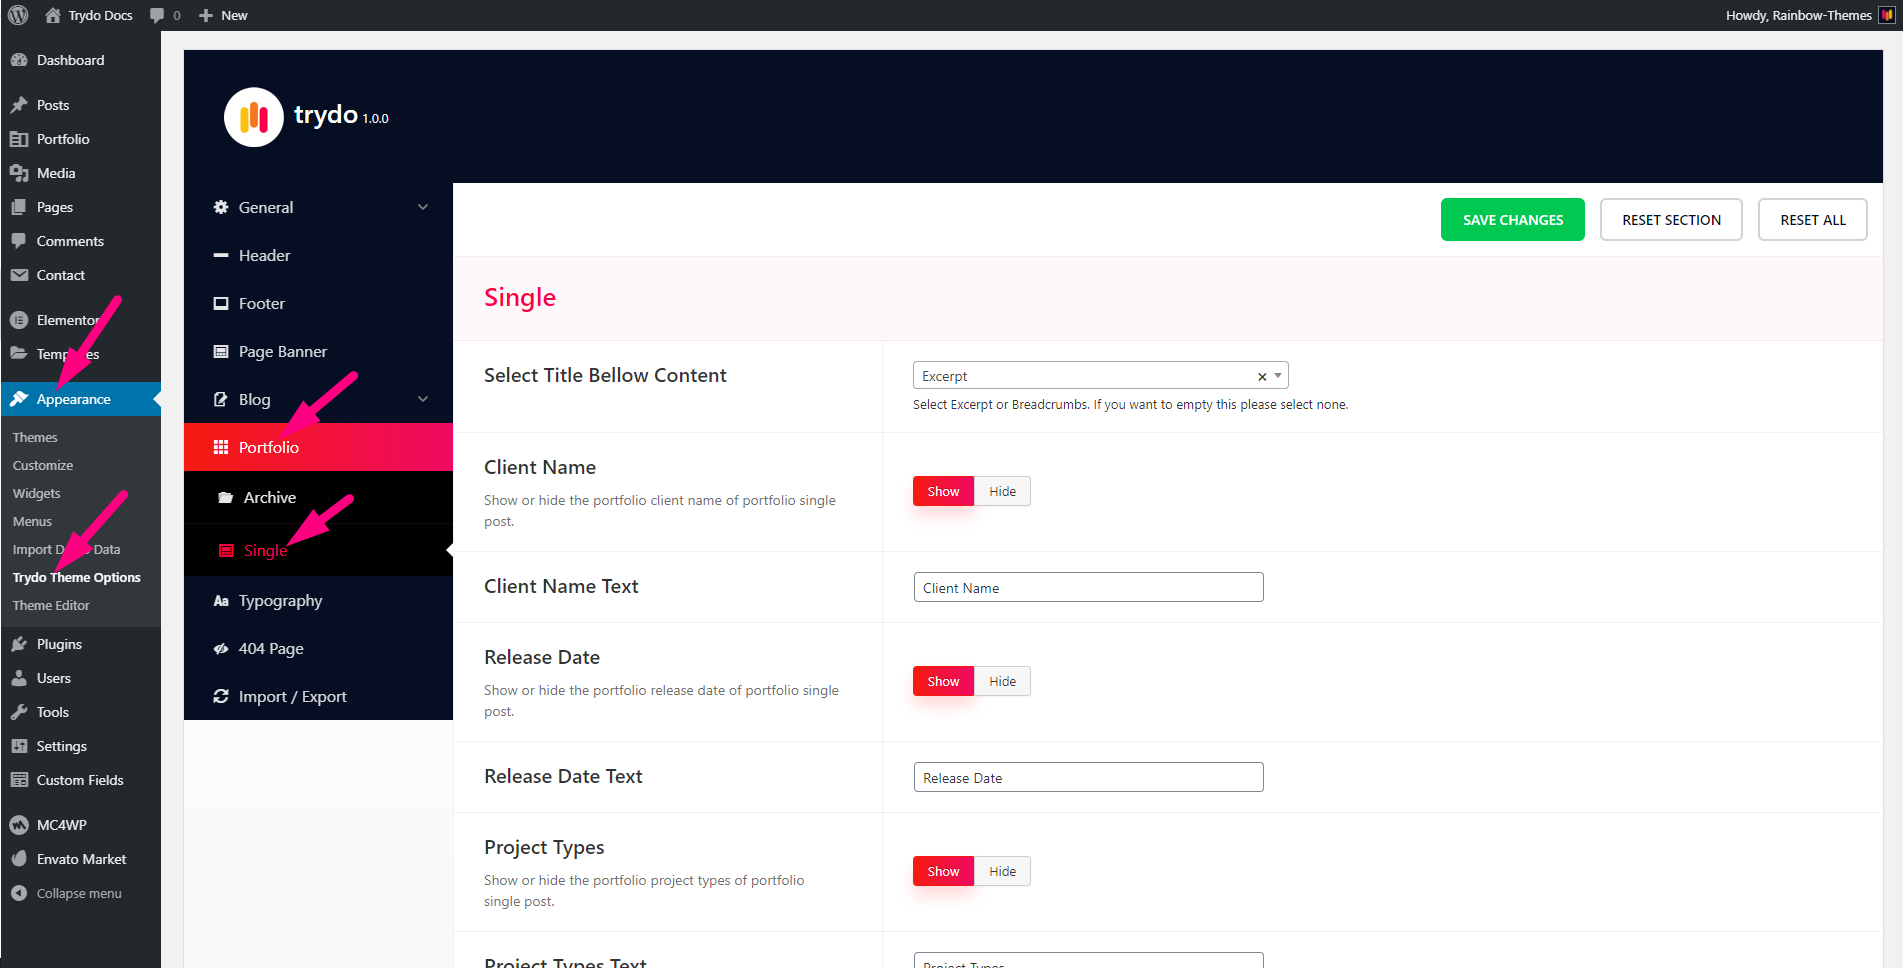
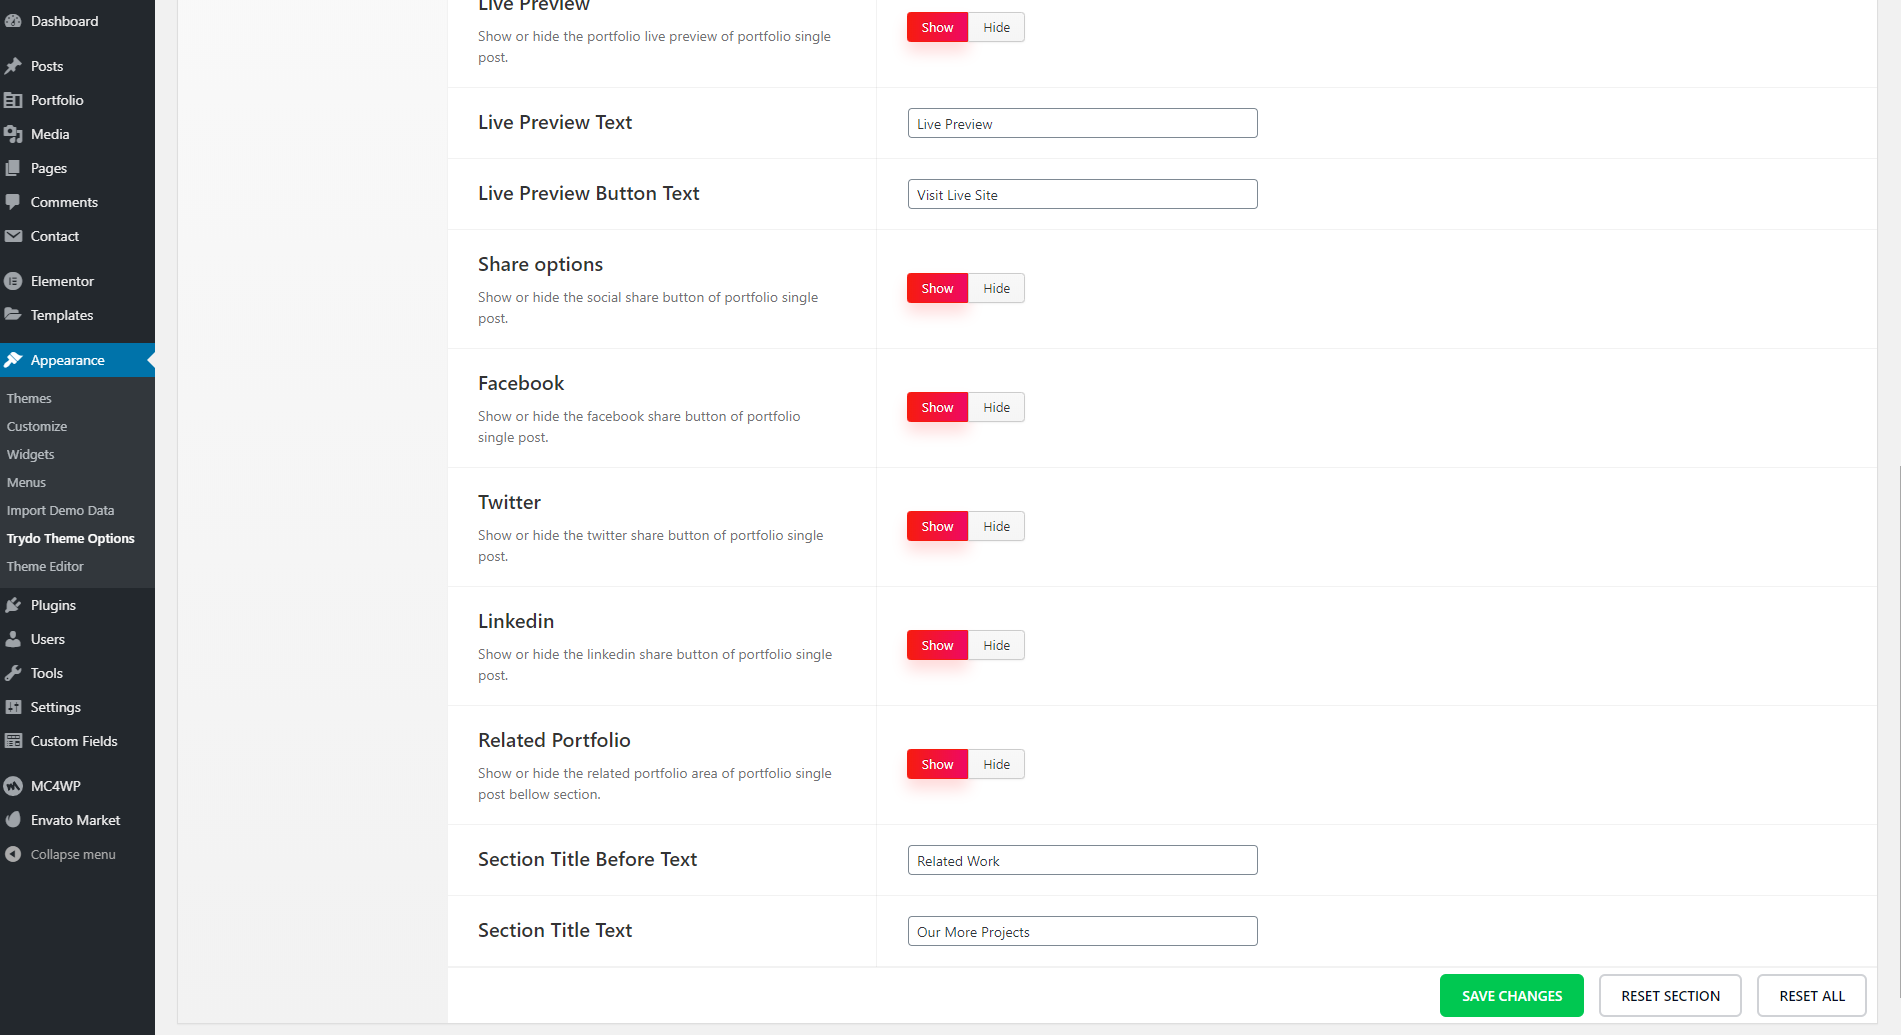
Portfolio Single Page Setting
To customize portfolio single page setting. Please follow the steps:
From the theme options go to Appearance Trydo Theme OptionsPortfolioSingle
Portfolio Single Page Setting 1Portfolio Single Page Setting 2
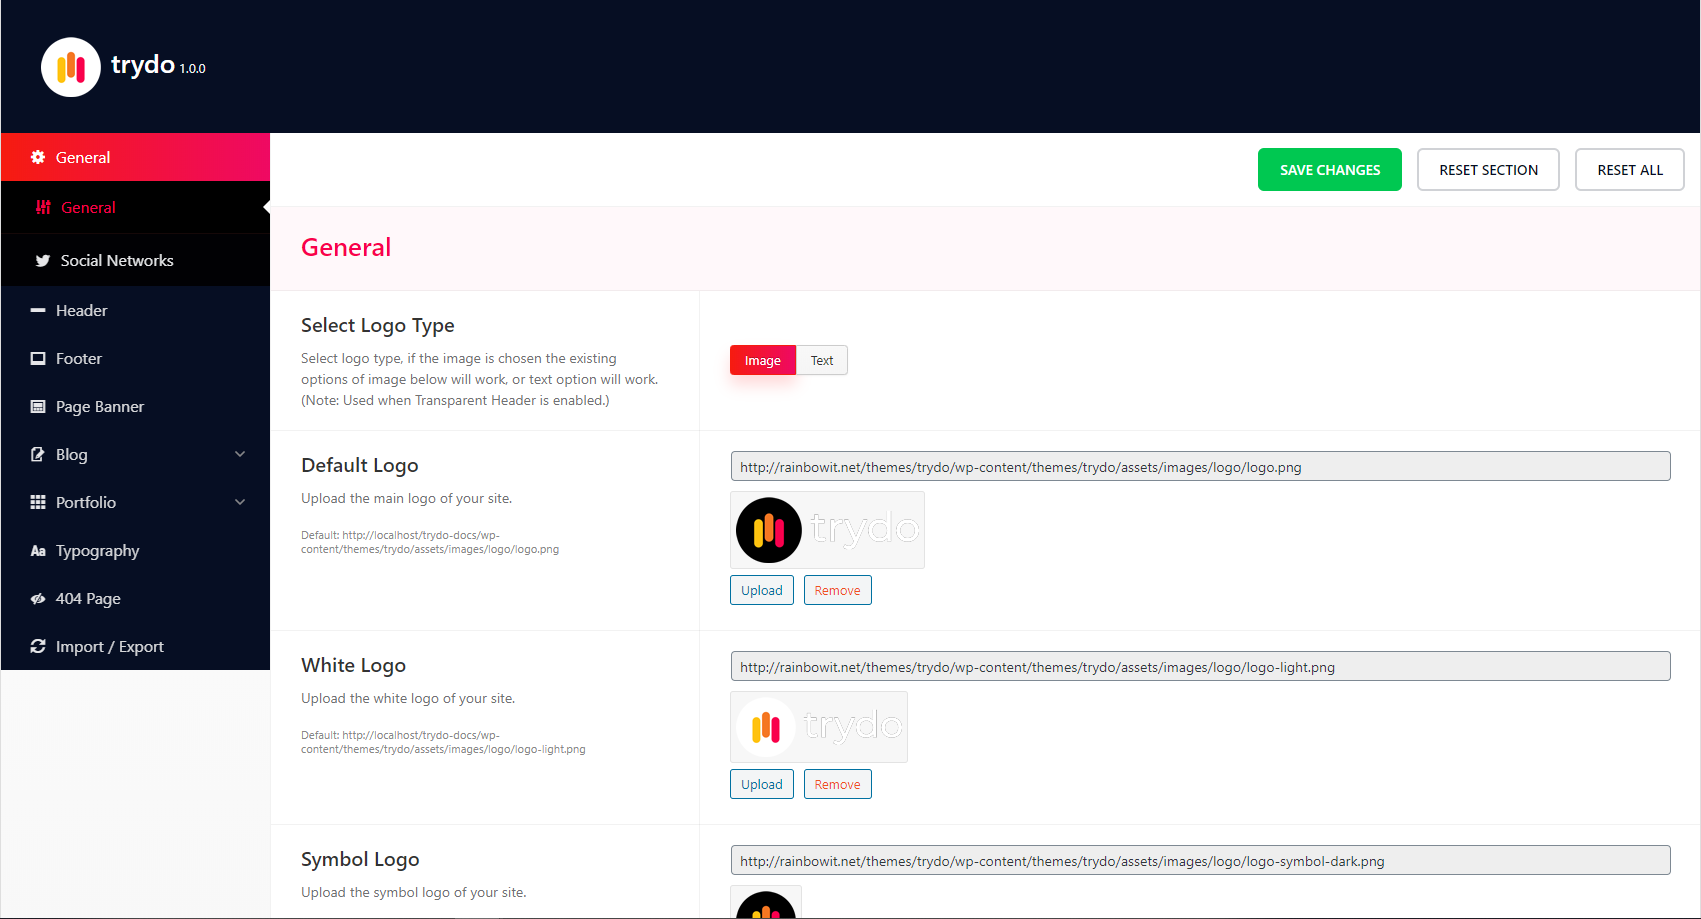
General
To change Trydo General Options navigate to Appearance Trydo Theme Options General
General menu contains such tabs as website logo settings.
The logo can be uploaded in 4 variants. This is very helpful in case you have pages with different backgrounds and are using a transparent header. It makes you available to choose the logo which looks the best for each of your pages individually.
General
Social Networks
To change Social Networks Options navigate to Appearance Trydo Theme Options Social Networks
Pul your social profile link here.
Add your link here
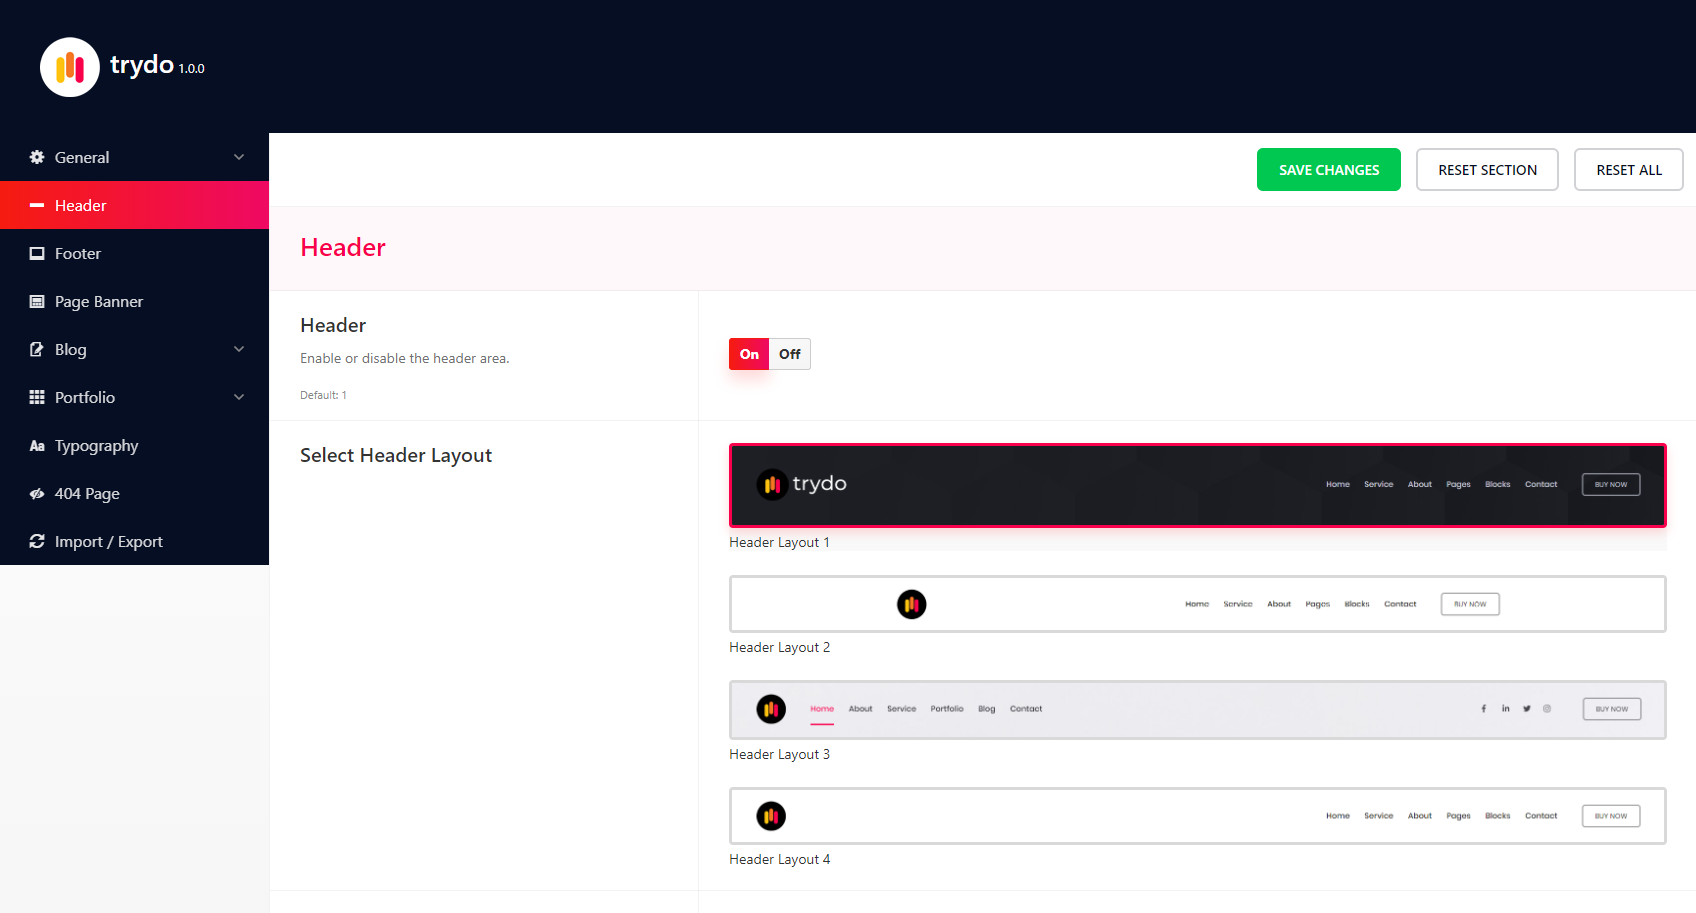
Header
To change Header Layout and setting, navigate to Appearance Trydo Theme Options Header
Change Header Setting
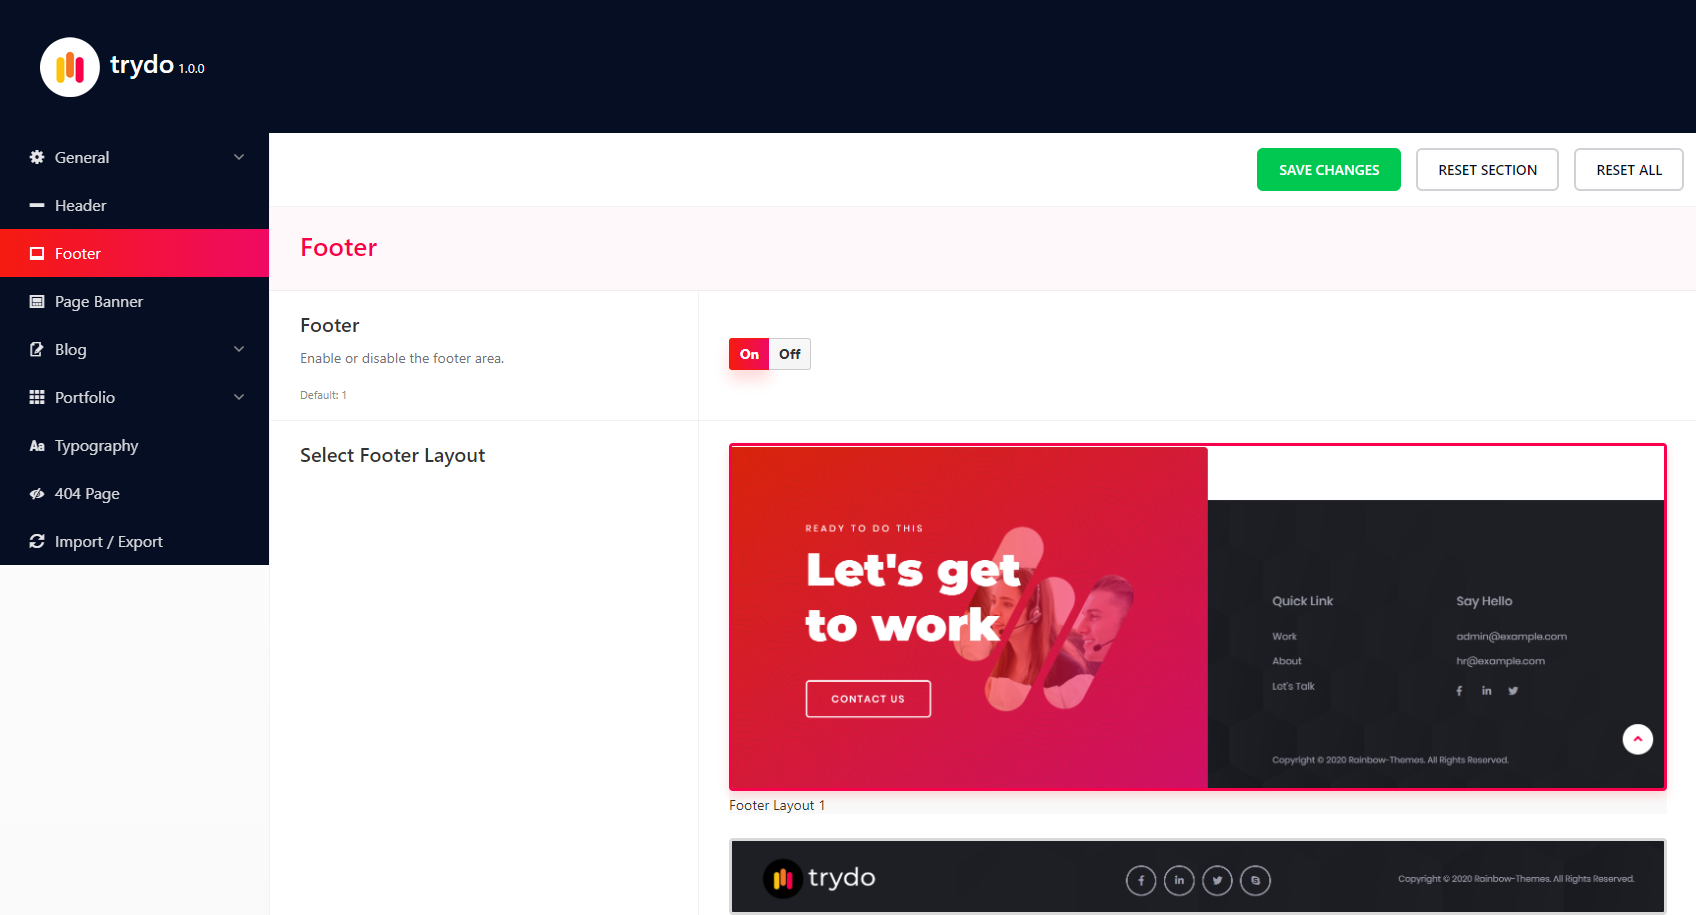
Footer
To change Footer Layout and setting, navigate to Appearance Trydo Theme Options Footer
Change Footer Setting
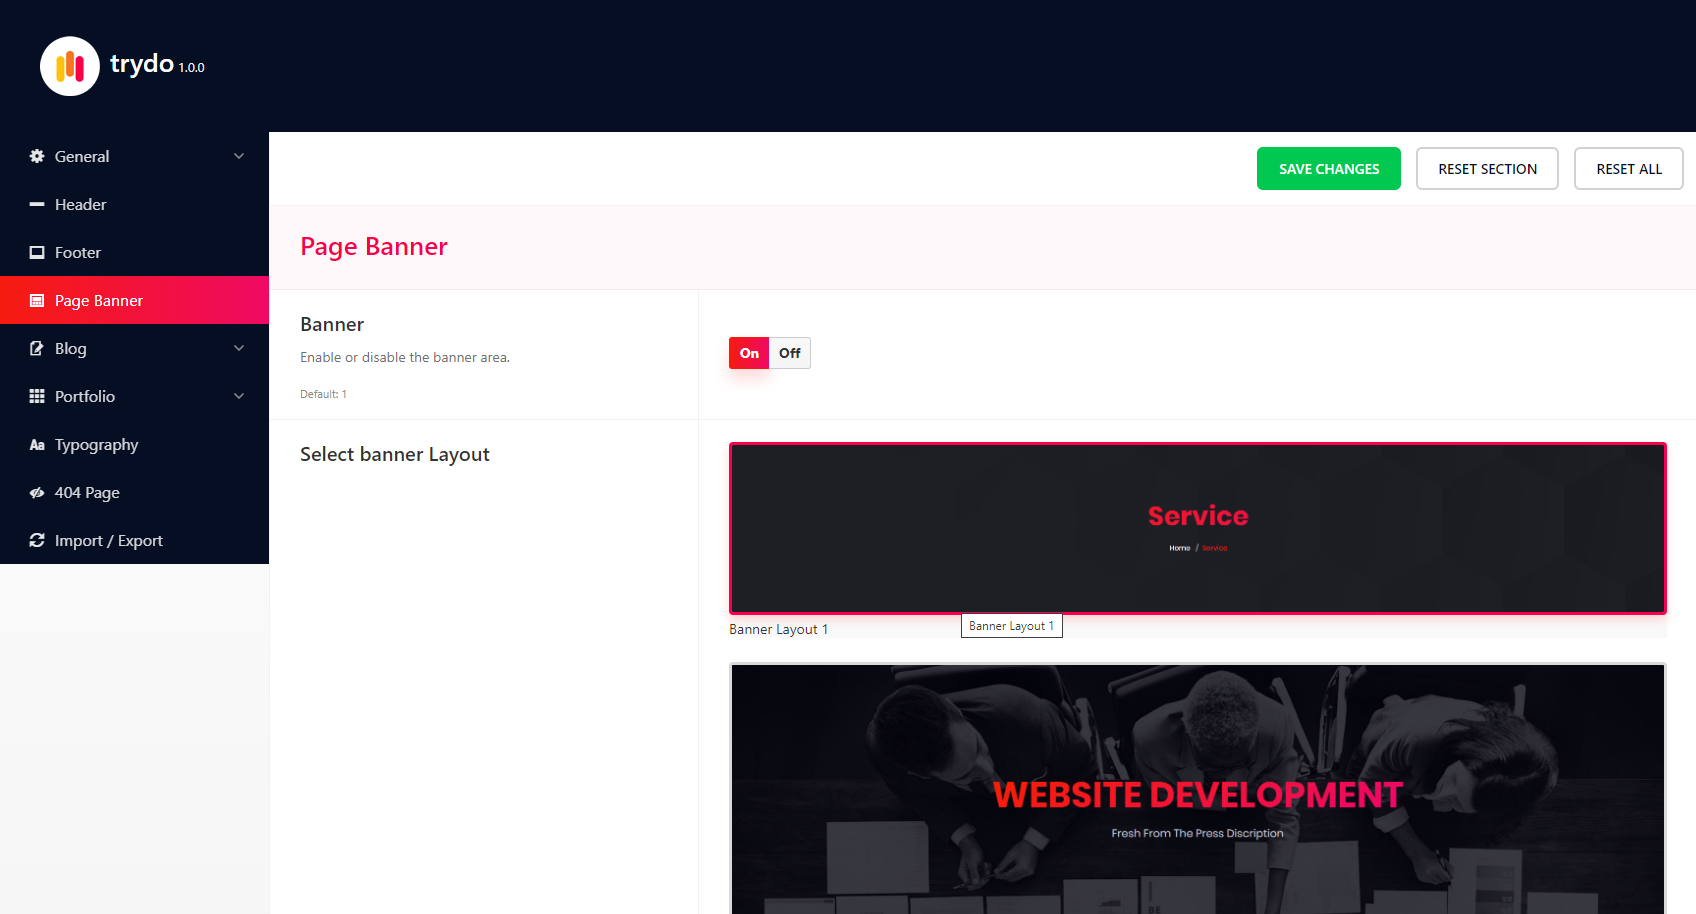
Page Banner
To change Page Banner Layout and setting, navigate to Appearance Trydo Theme Options Page Banner
Change Page Banner Setting
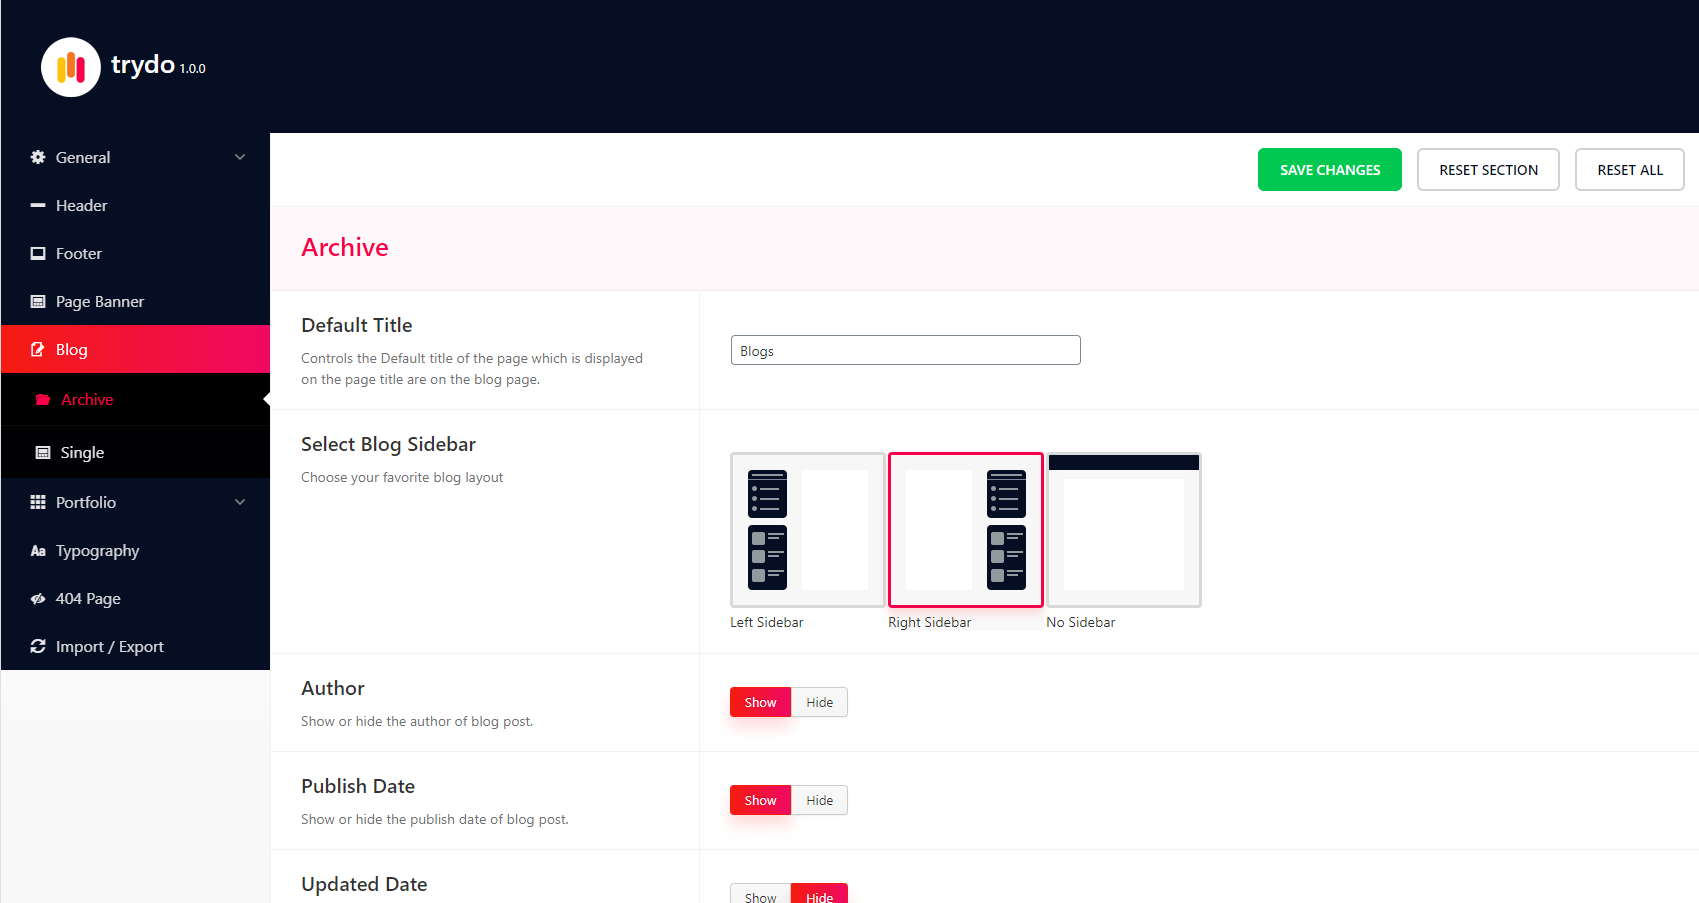
Blog Archive
To change Blog Archive setting, navigate to Appearance Trydo Theme Options Blog Archive
Change Blog Archive Setting
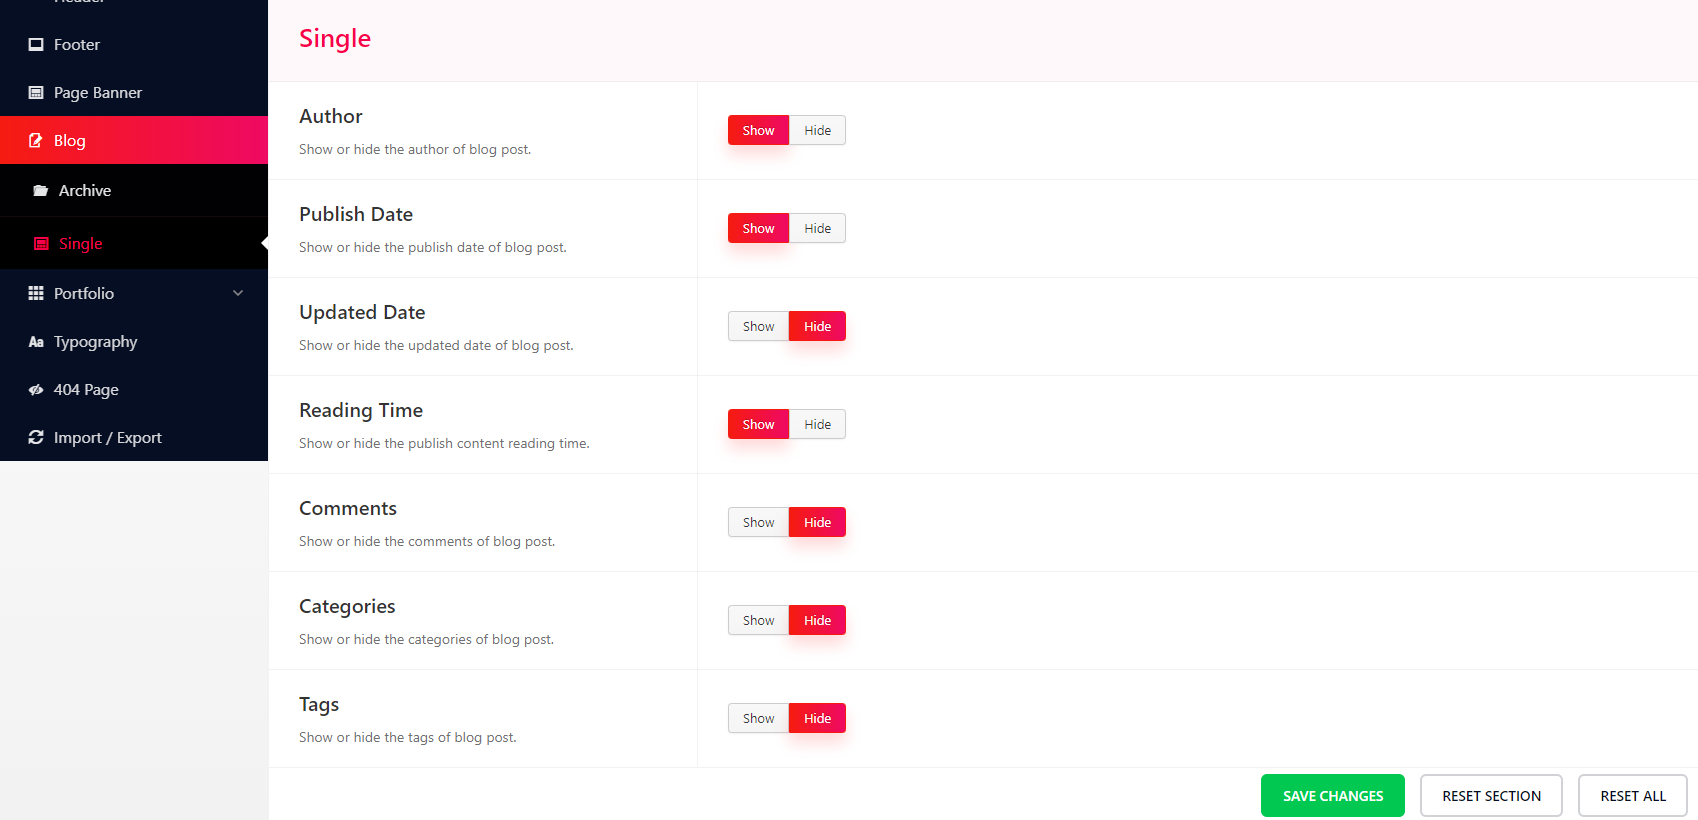
Blog Single
To change Blog Single setting, navigate to Appearance Trydo Theme Options Blog Single
Change Blog Single Setting
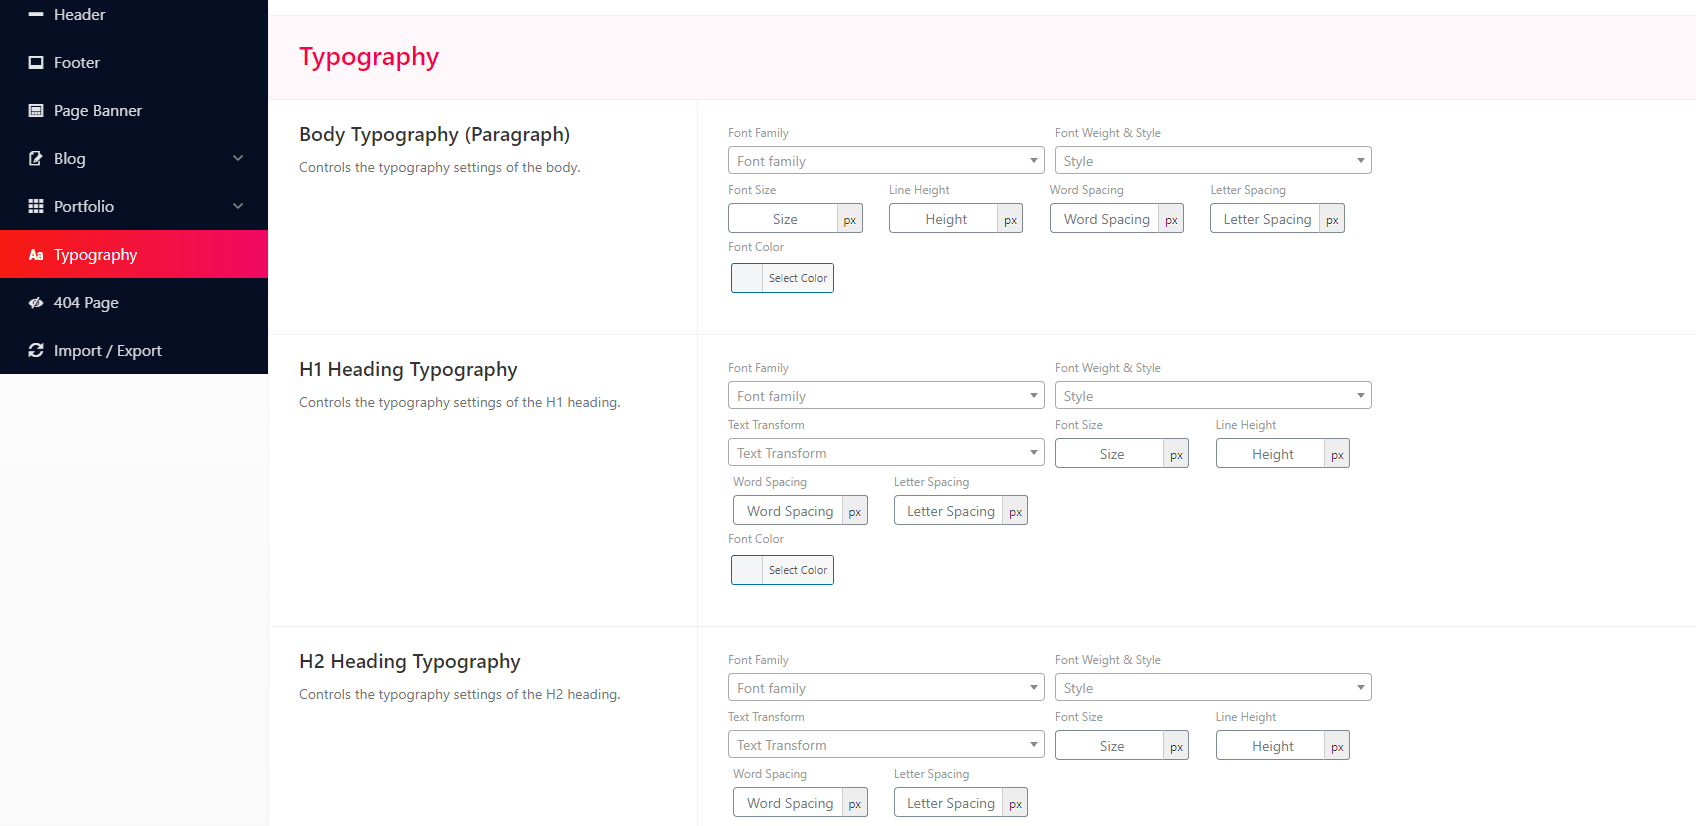
Typography
To change Typography setting, navigate to Appearance Trydo Theme Options Typography
Change Typography Setting
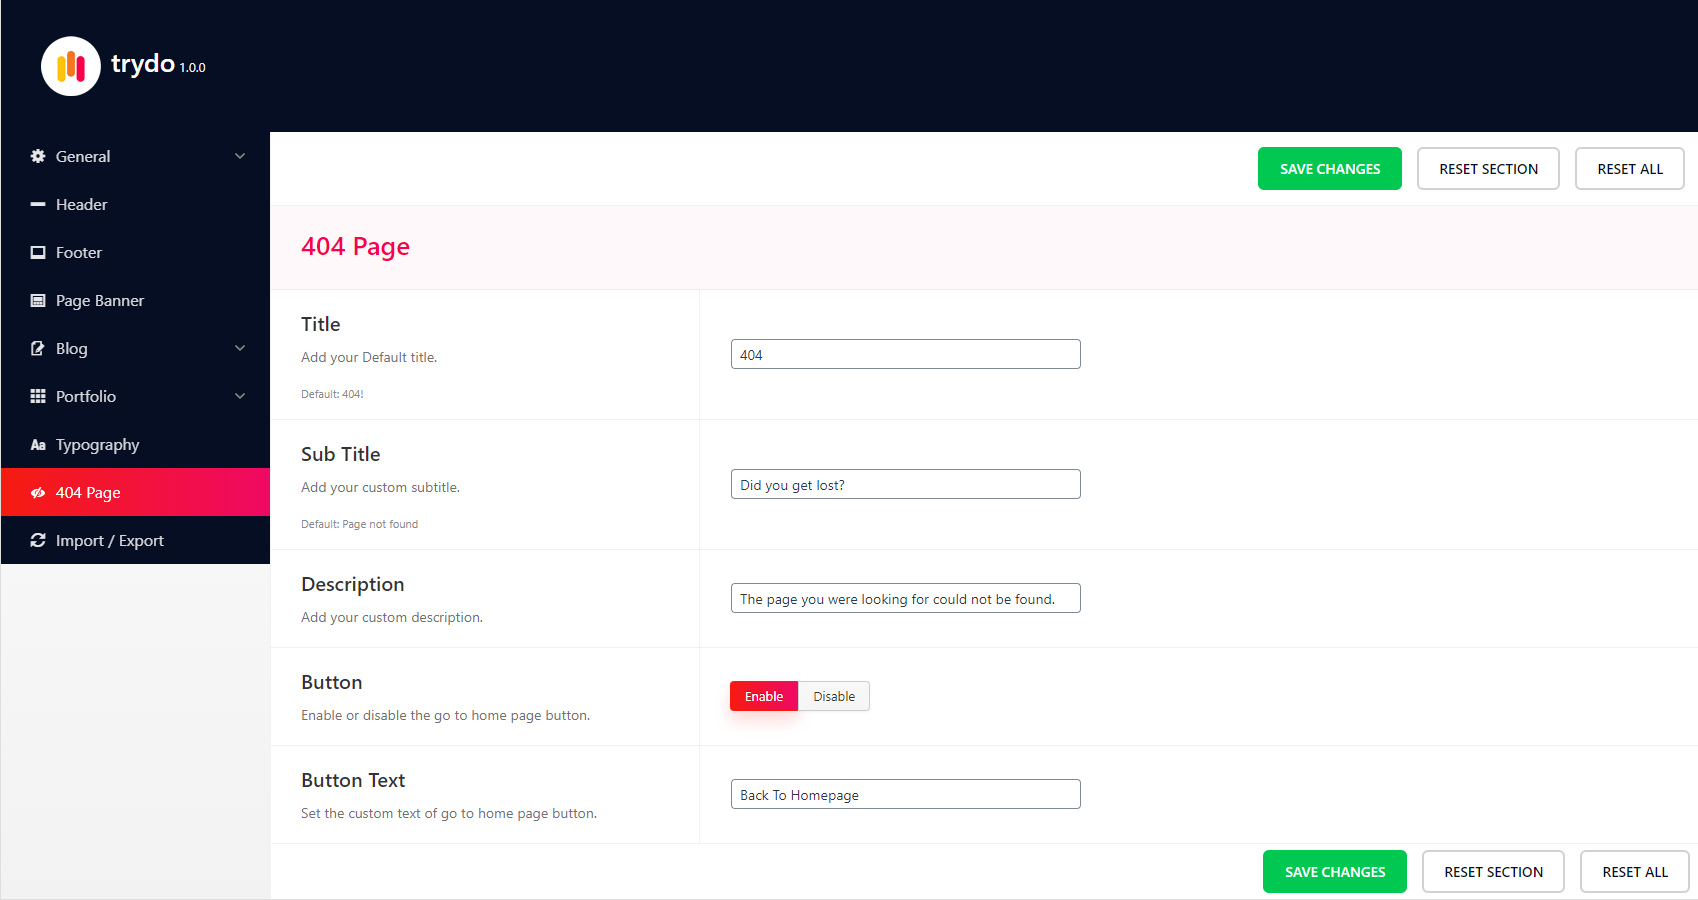
404 Page
To change 404 Page setting, navigate to Appearance Trydo Theme Options 404 Page
Change 404 Page Setting
Back to Top Arrow
To change Back to Top Arrow setting, navigate to Appearance Trydo Theme Options General Enable Back To Top
Change Back to Top Arrow Setting
Enable Preloader
To change Enable Preloader setting, navigate to Appearance Trydo Theme Options General Enable Preloader
Change Enable Preloader Setting
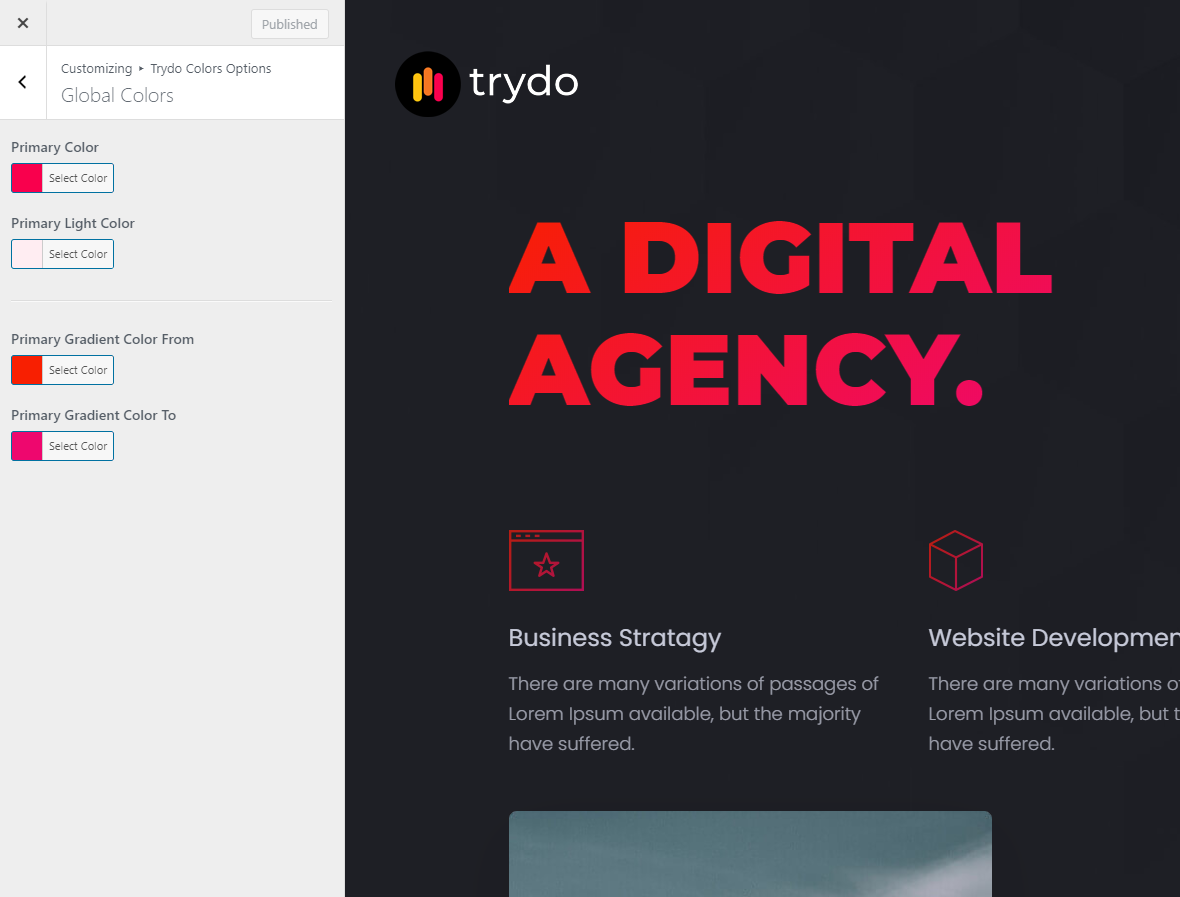
Global Color Options
To change Global Color Options setting, navigate to Appearance Customize Trydo Color Options Global Colors
Change Global Color Options Setting
Change Log
Rainbow-Themes team never stops Improving, bug fixes, and improvements. See What's New. We recommend you to read the changelog for every update.
22 October 2023
Issues Fixing
1.5.0
FixedPortfolio Single Page translate the date
UpdateAdvanced Custom Fields PRO Plugin
FixedTrydo Core
improveAdded Visit Site Button Target Options
24 March 2022
Issues Fixing
1.2.0
FixedDeprecations Issues
FixedTeam Addons Issues
FixedAgency Banner Issues
FixedTypography Issues
FixedColor Issues
UpdateAdvanced Custom Fields PRO Plugin
FixedTrydo Core
improvePage Speed
12 January 2022
Issues Fixing
1.1.2
FixedTeam email issues
UpdatedACF Pro Plugin
19 june 2021
Issues Fixing
1.1.1
FixedLightbox popup style issues fixing
FixedPortfolio clickable issues fixing
16 February 2021
Added
Issues Fixing
1.1.0
AddedWooCommerce
AddedLight/Dark Mode Switcher for All Demos
FixedDemo Import Issues
FixedPricing Table Color Issues
FixedInfobox Color Issues
FixedFooter Menu Spacing Issus
FixedHeader Social Network and Button Color Issues


Social Networks
To change Social Networks Options navigate to Appearance Trydo Theme Options Social Networks
Pul your social profile link here.